How to configure IPTV function on TP-Link Wi-Fi router
Introduction
This article will introduce the configuration of the IPTV function and guide you in configuring it on TP-Link Wi-Fi router correctly.
Requirements
- TP-Link Wi-Fi Router
- Set‑top box
- An active IPTV subscription from your Internet Service Provider (ISP)
- IPTV configuration details provided by your ISP
Configuration
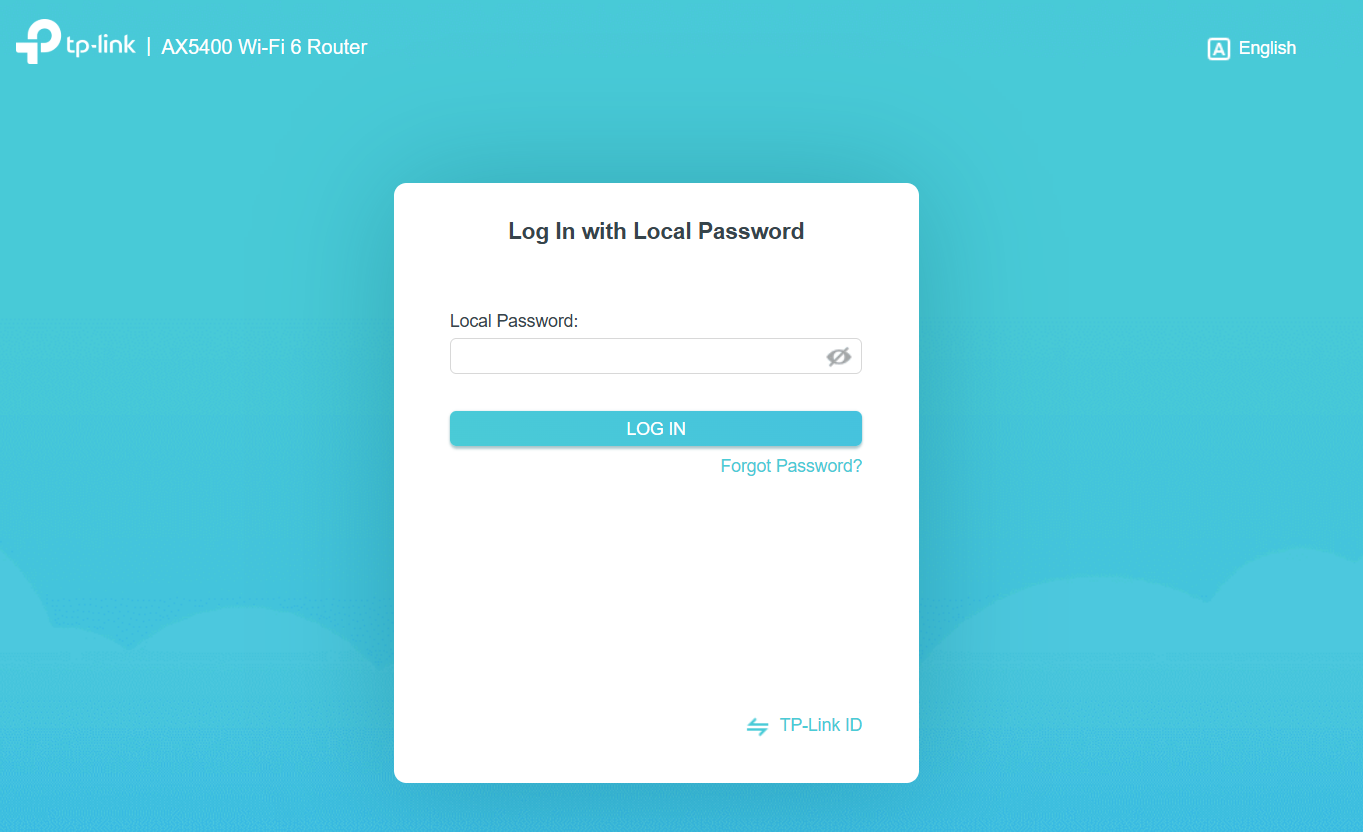
Step 1. Log in to the TP-Link device by typing http://tplinkwifi.net in the address bar of any web browser (such as Chrome or Firefox).
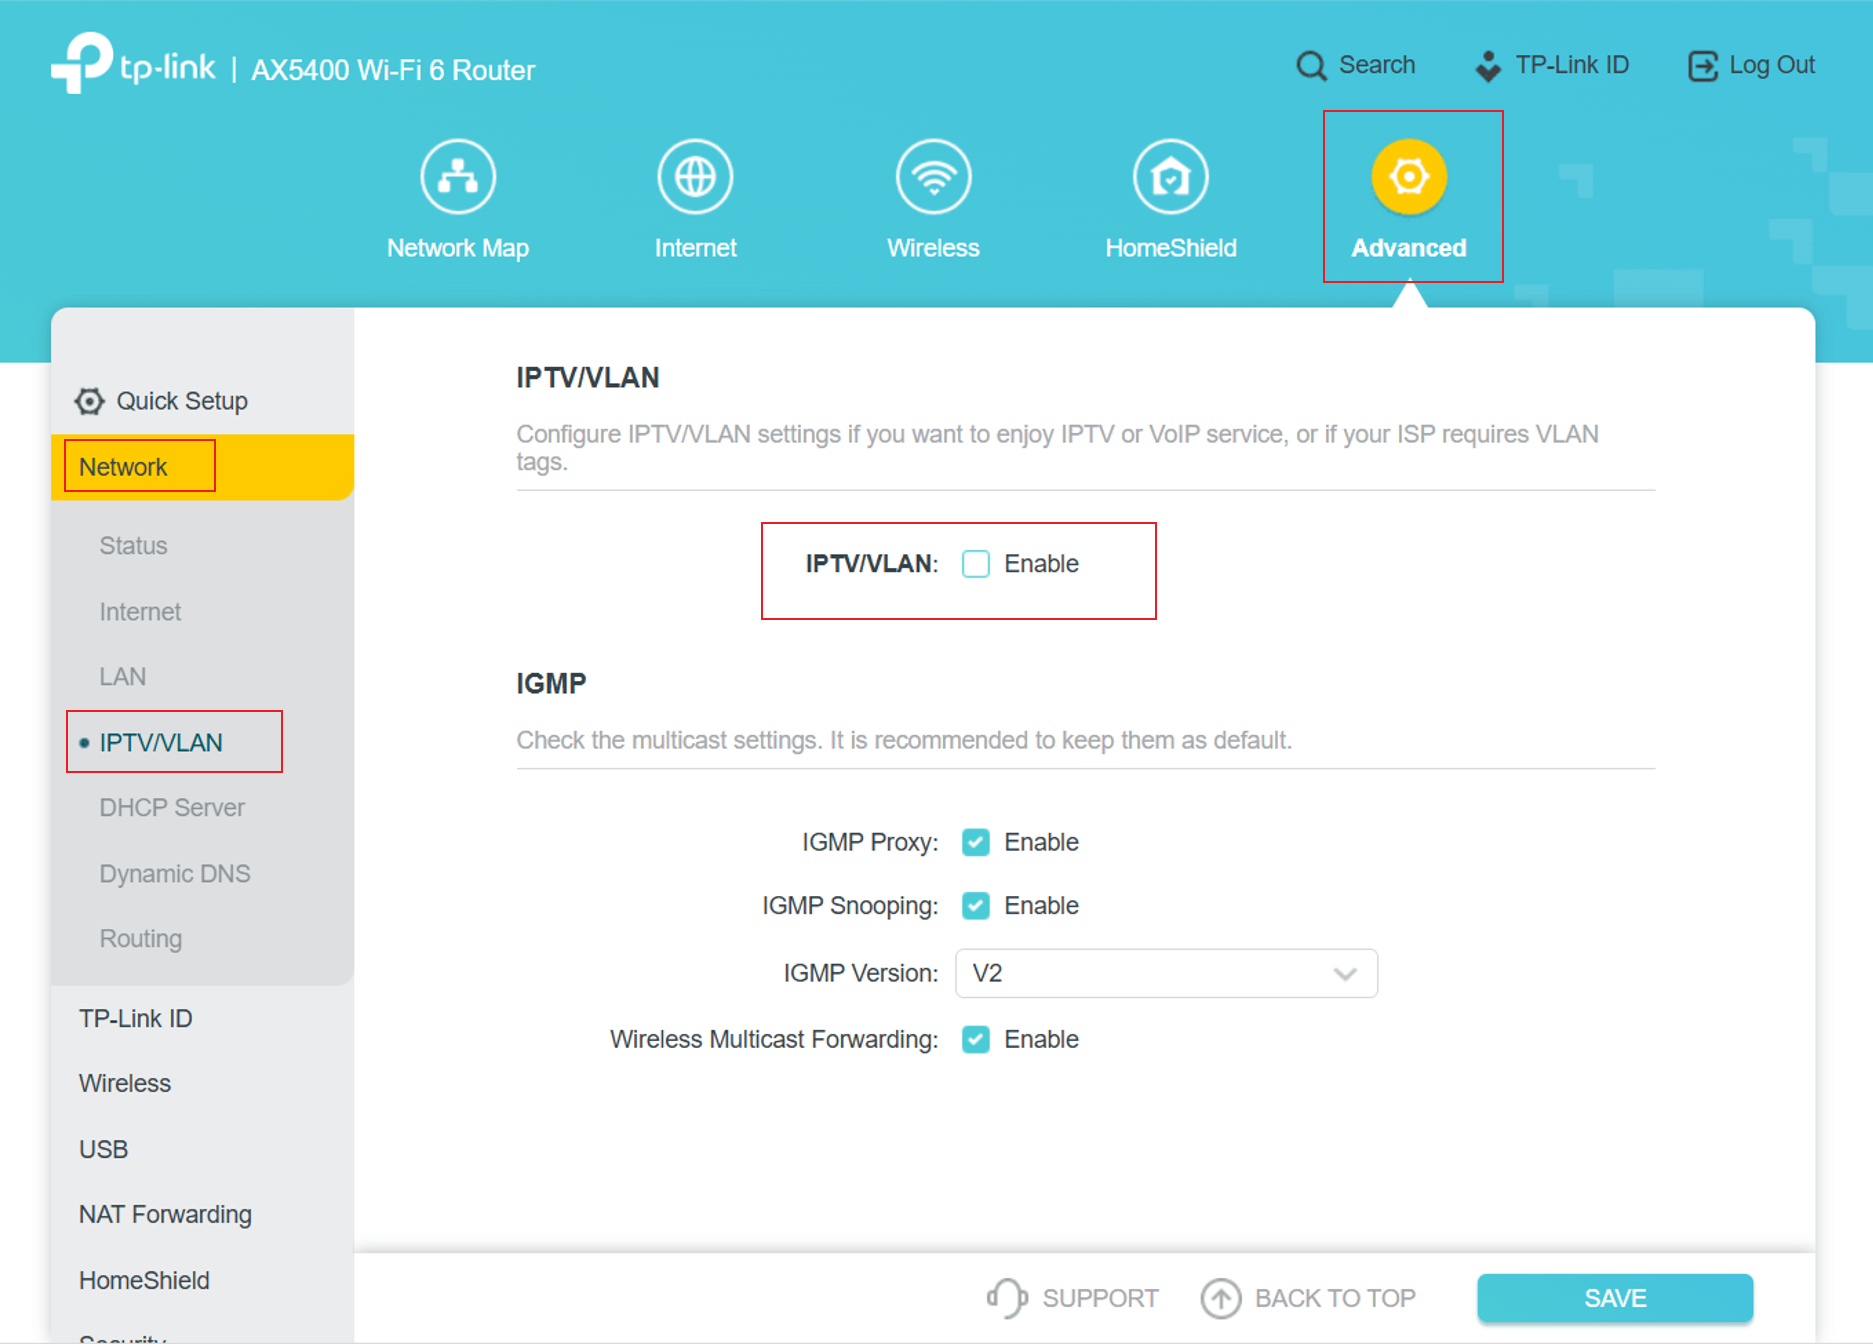
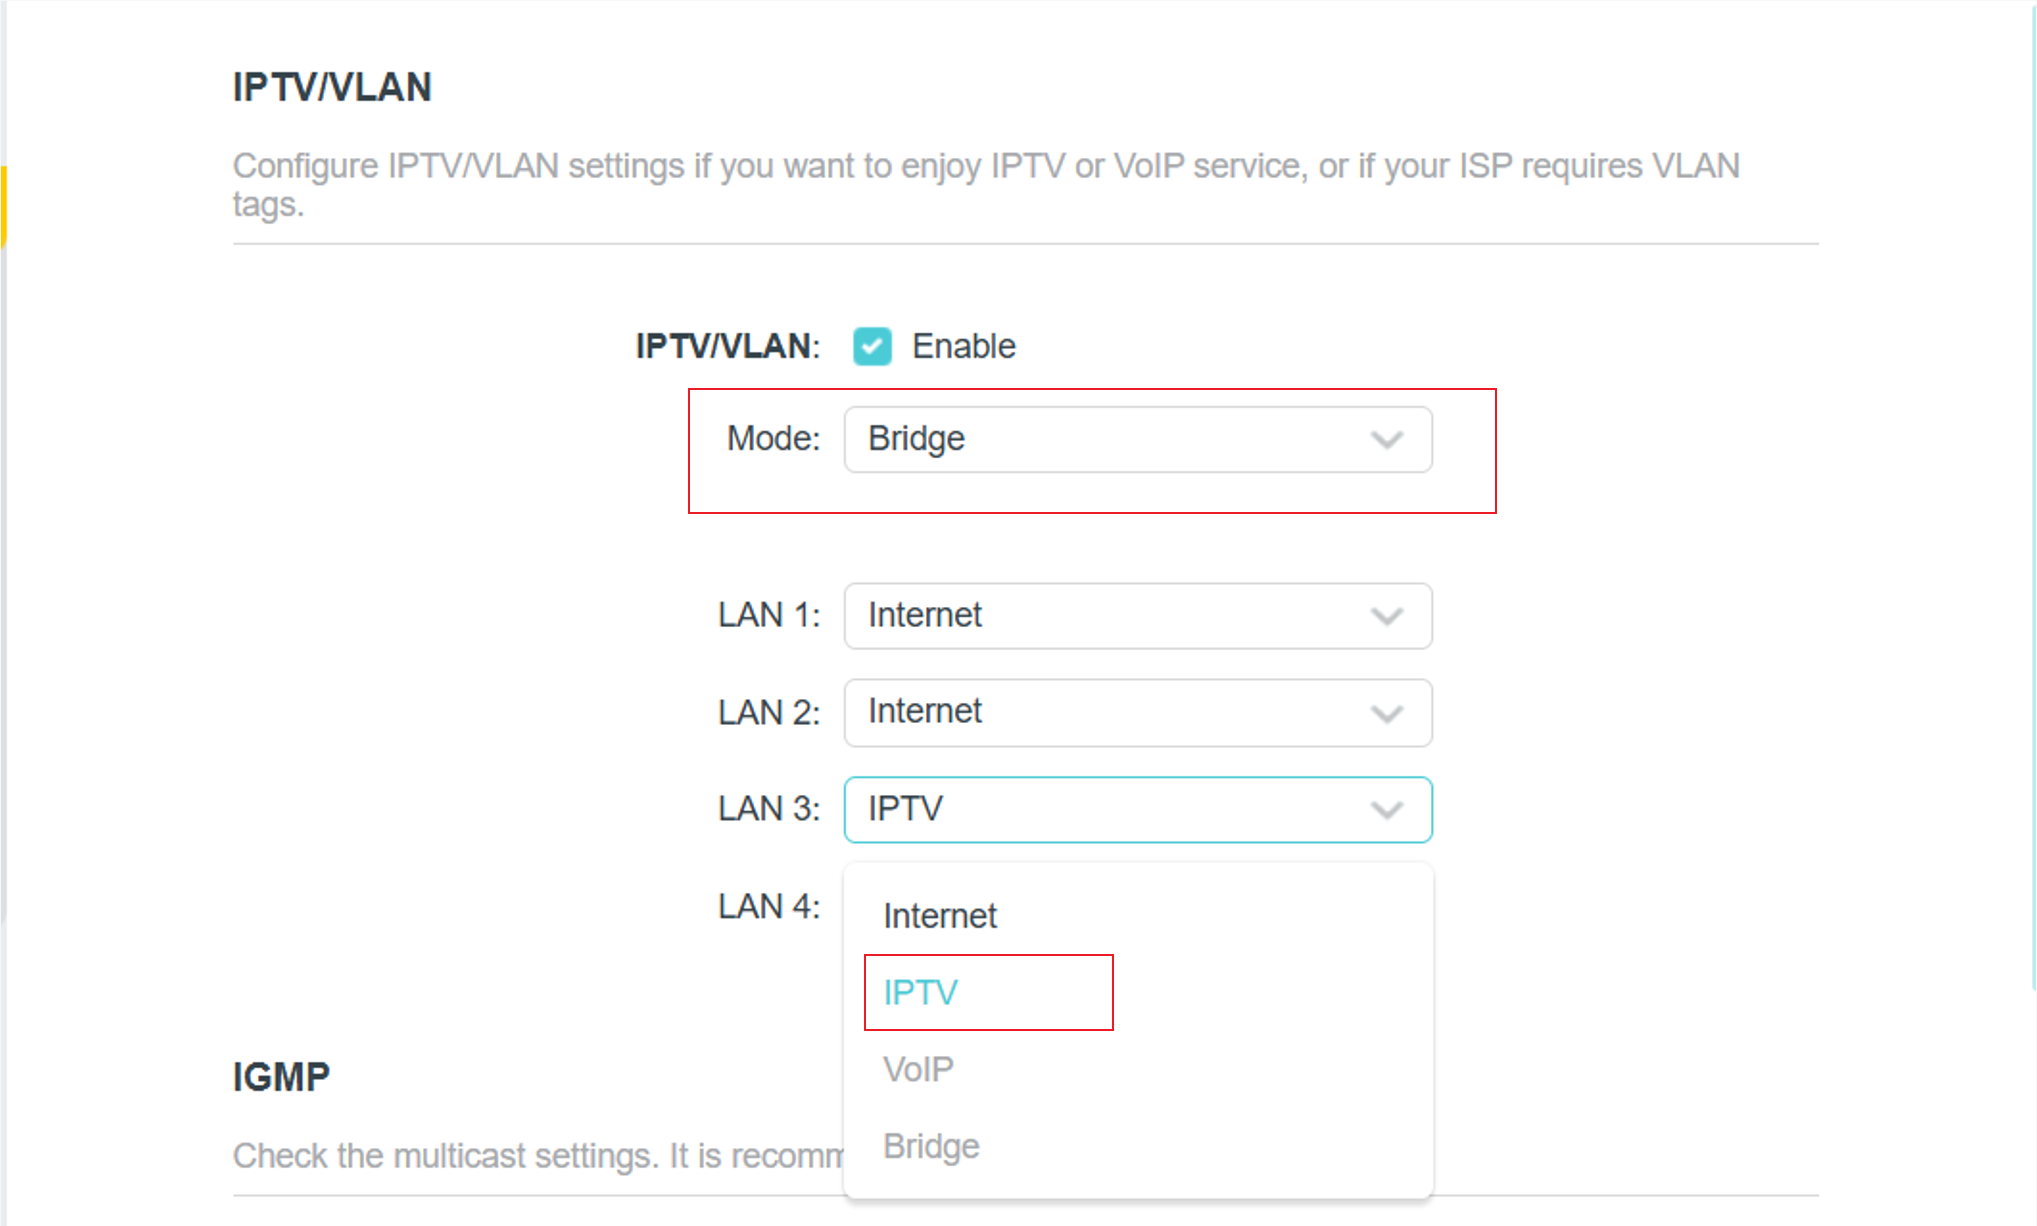
Step 2. Navigate to Advanced > Network > IPTV/VLAN and enable IPTV/VLAN.
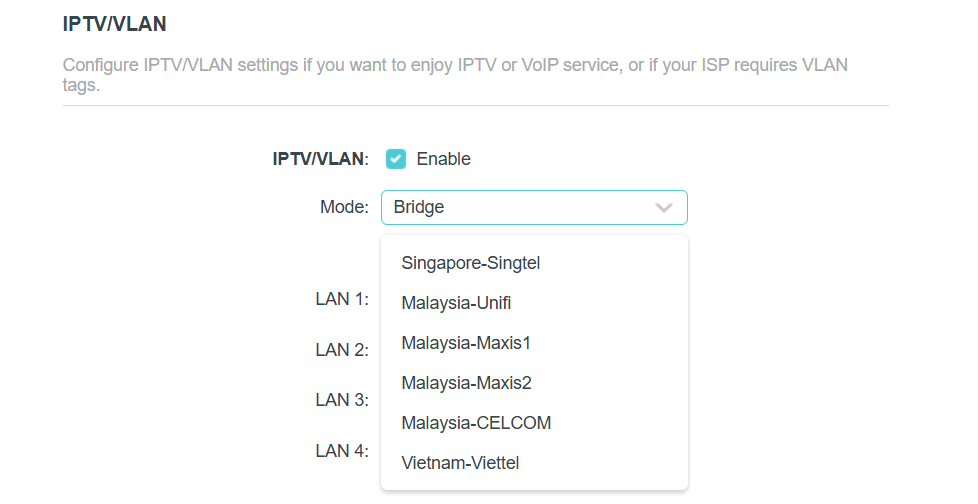
Step 3. Select the built-in profile when your ISP is in the list. Otherwise, continue with the next step.
Note:
- Obviously, the ISP options in the list are designed for specific ISPs in different regions.
- Bridge mode doesn’t need you to type in VLAN information; we just use this mode when the ISP doesn’t require VLAN settings.
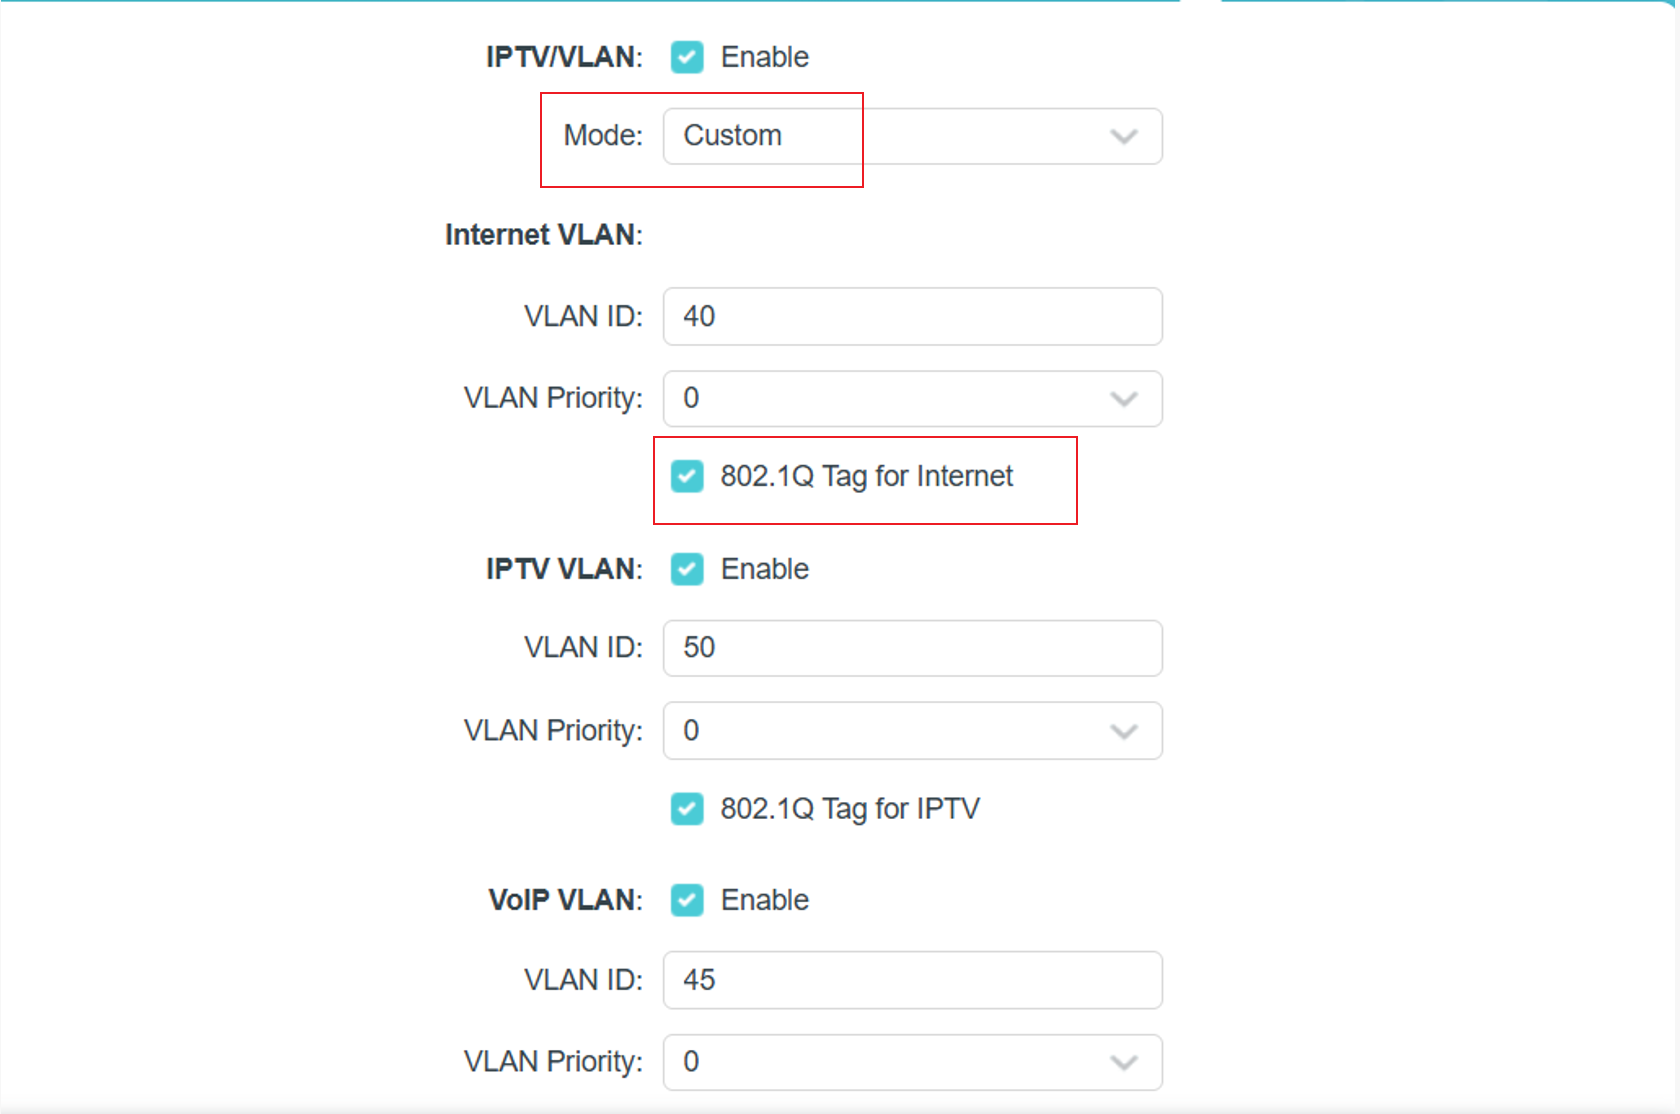
- Custom mode is used for some of the ISPs that require 802.1Q VLAN settings for IPTV service.
Step 4.
For ISPs that do not require the VLAN ID:
1) Select Bridge mode.
2) Assign a LAN port for IPTV. Example: LAN3 for IPTV.
For ISPs requiring VLAN settings:
1) Select Custom mode.
2) Enter the VLAN IDs according to your ISP.
Example:
- Internet: VLAN 40
- VOIP: VLAN 45
- IPTV: VLAN 50
3) 802.1Q Tag and IPTV Multicast VLAN ID should follow your ISP’s requirements.
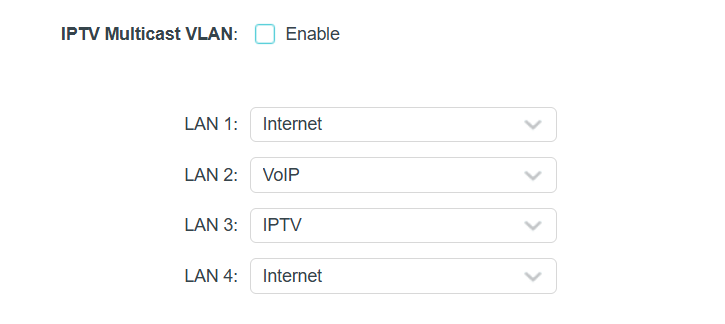
4) Assign LAN ports to each service.
Example:
- Internet: LAN1, LAN4
- VOIP: LAN2
- IPTV: LAN3
Step 5. After saving the settings, connect your set‑top box (STB) to the selected LAN port and test whether the IPTV service works properly.
Esta FAQ é útil?
Seu feedback ajuda a melhorar este site.

20normal_1589417815138v.png)