How to install Tapo Doorbell (Tapo D235/Tapo D225/TD25)
Introduction
Tapo D235, Tapo D225, and TD25 support both battery powering and hardwire powering. Determine the power supply method first and then install the doorbell following the instructions below.
Installation
If you don’t have existing doorbell wiring at the door, or you don’t want to connect to existing doorbell wiring, use the built-in battery. You are free to determine the doorbell position and the mounting is easy and quick. When the doorbell battery level is low, you need to detach and charge it.
Follow instructions below to install your doorbell.
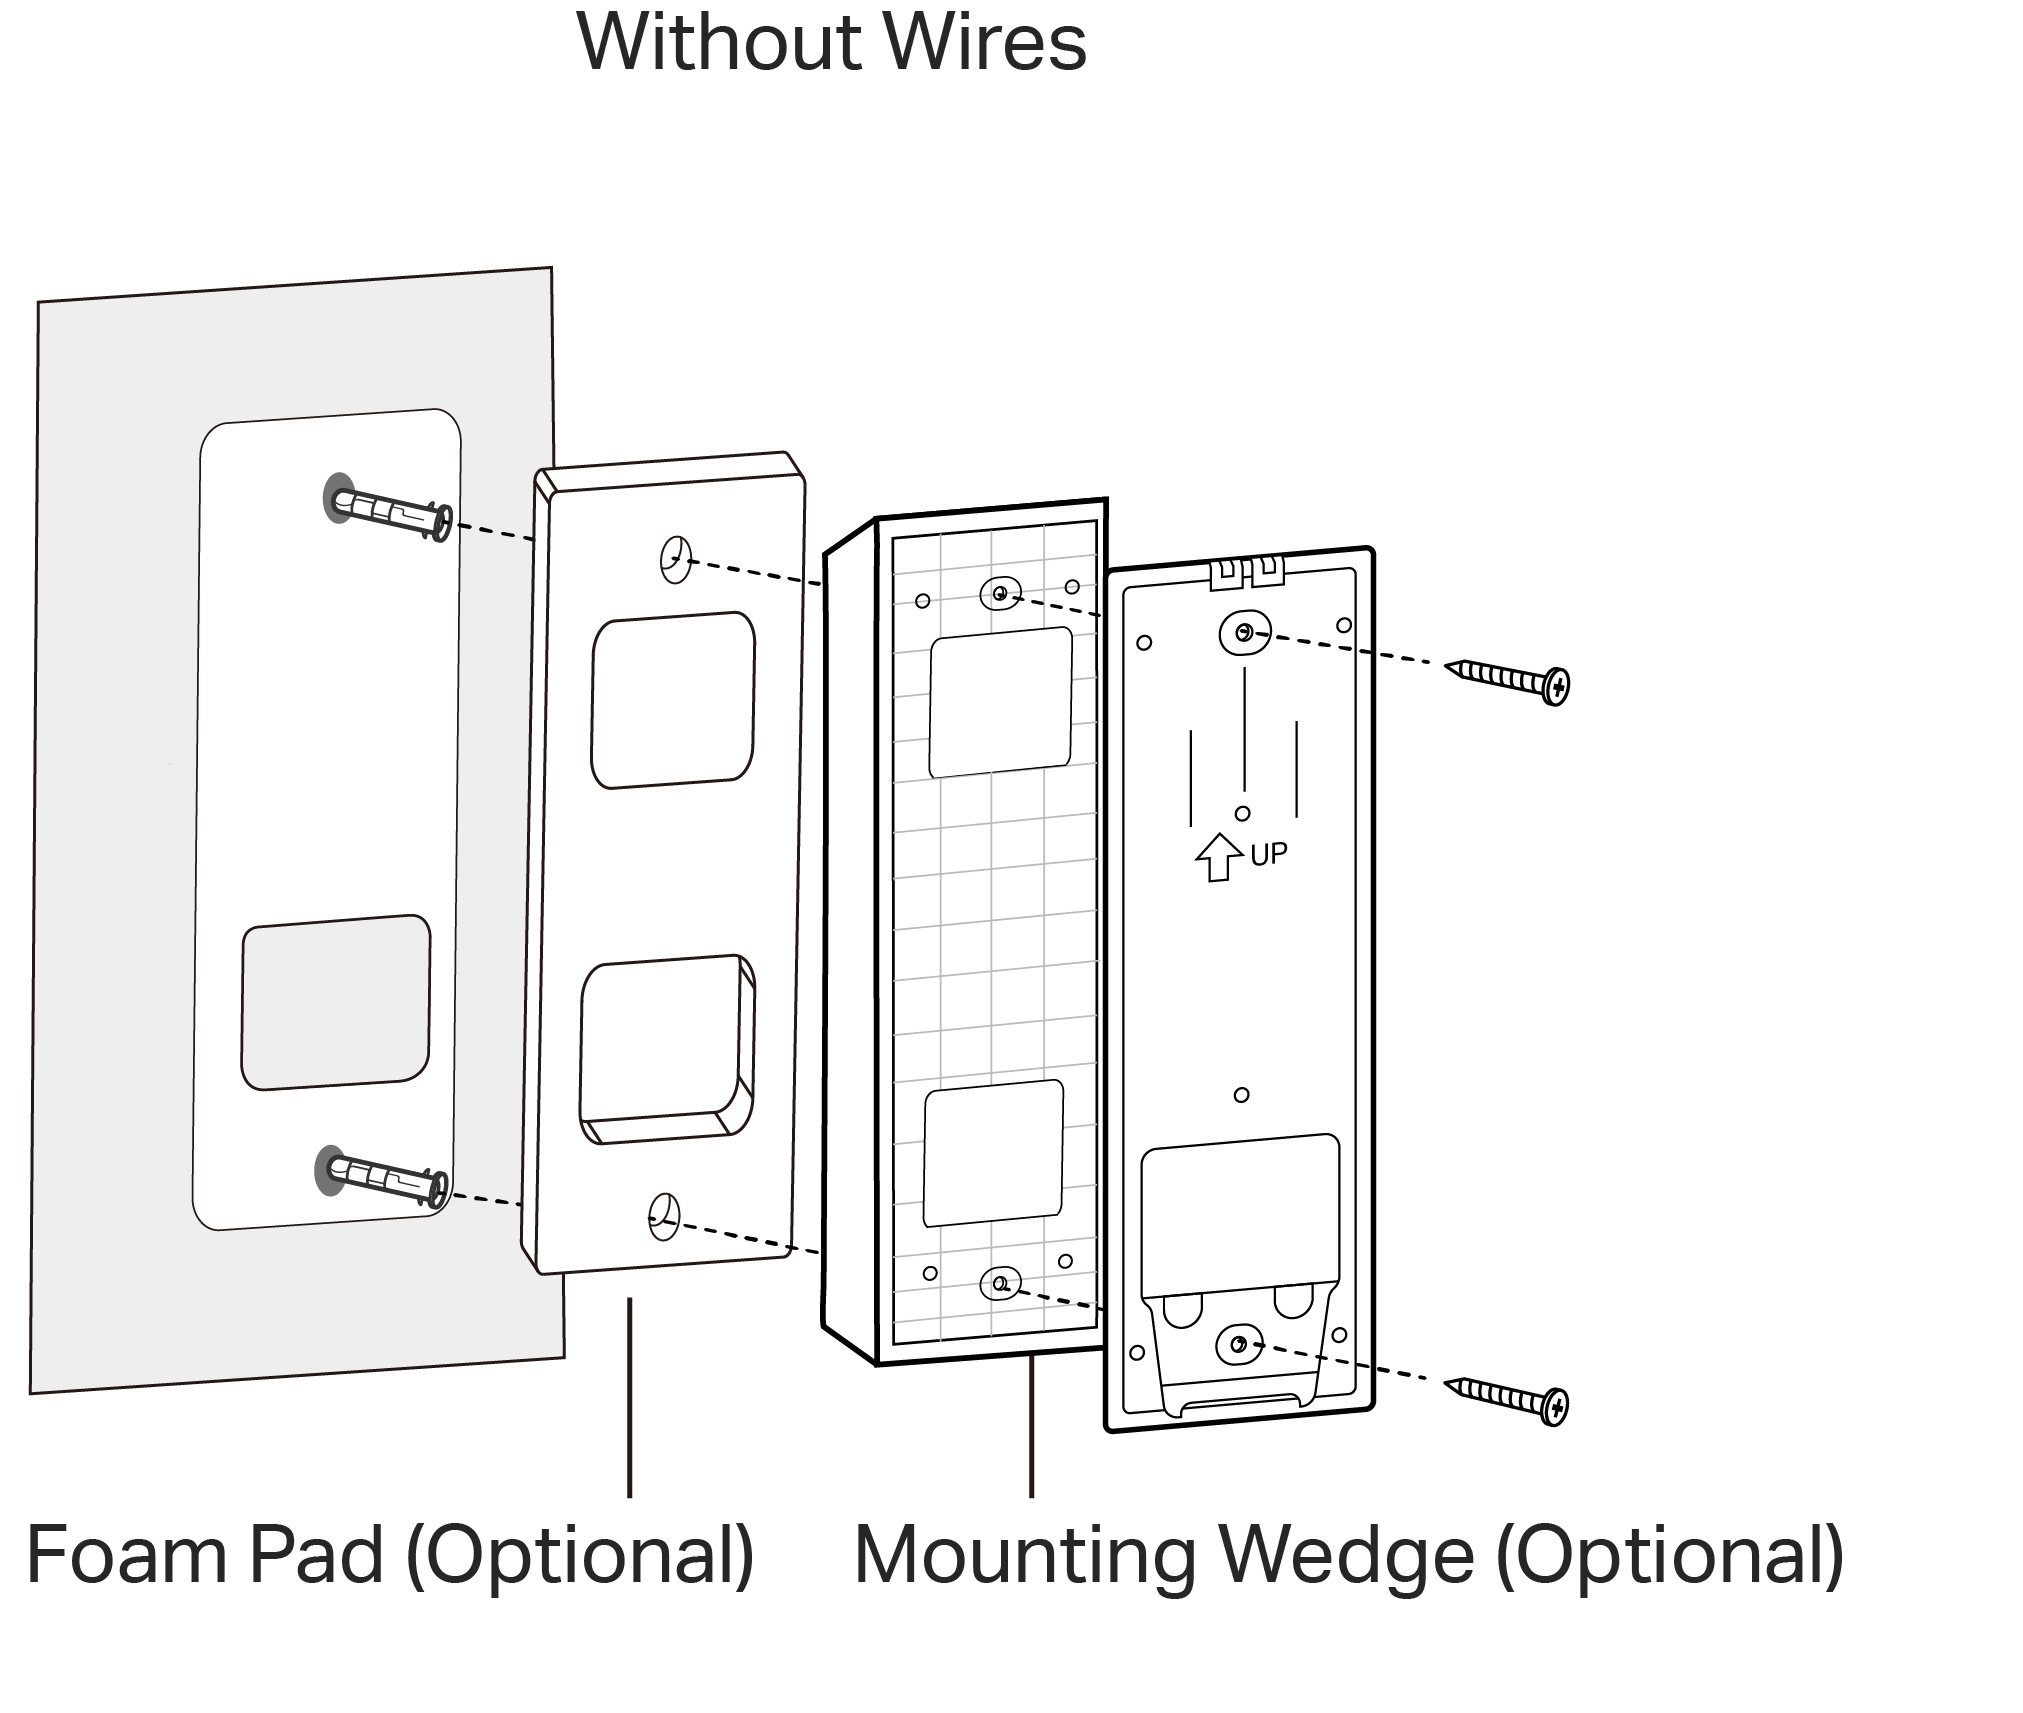
Step 1. Attach the included adhesive to the back of the bracket or the wedge you have selected. If you use the wedge, affix the bracket and the wedge with screws.
Note: The adhesive is for one-time use. Avoid re-using the adhesive to ensure its adhesion.

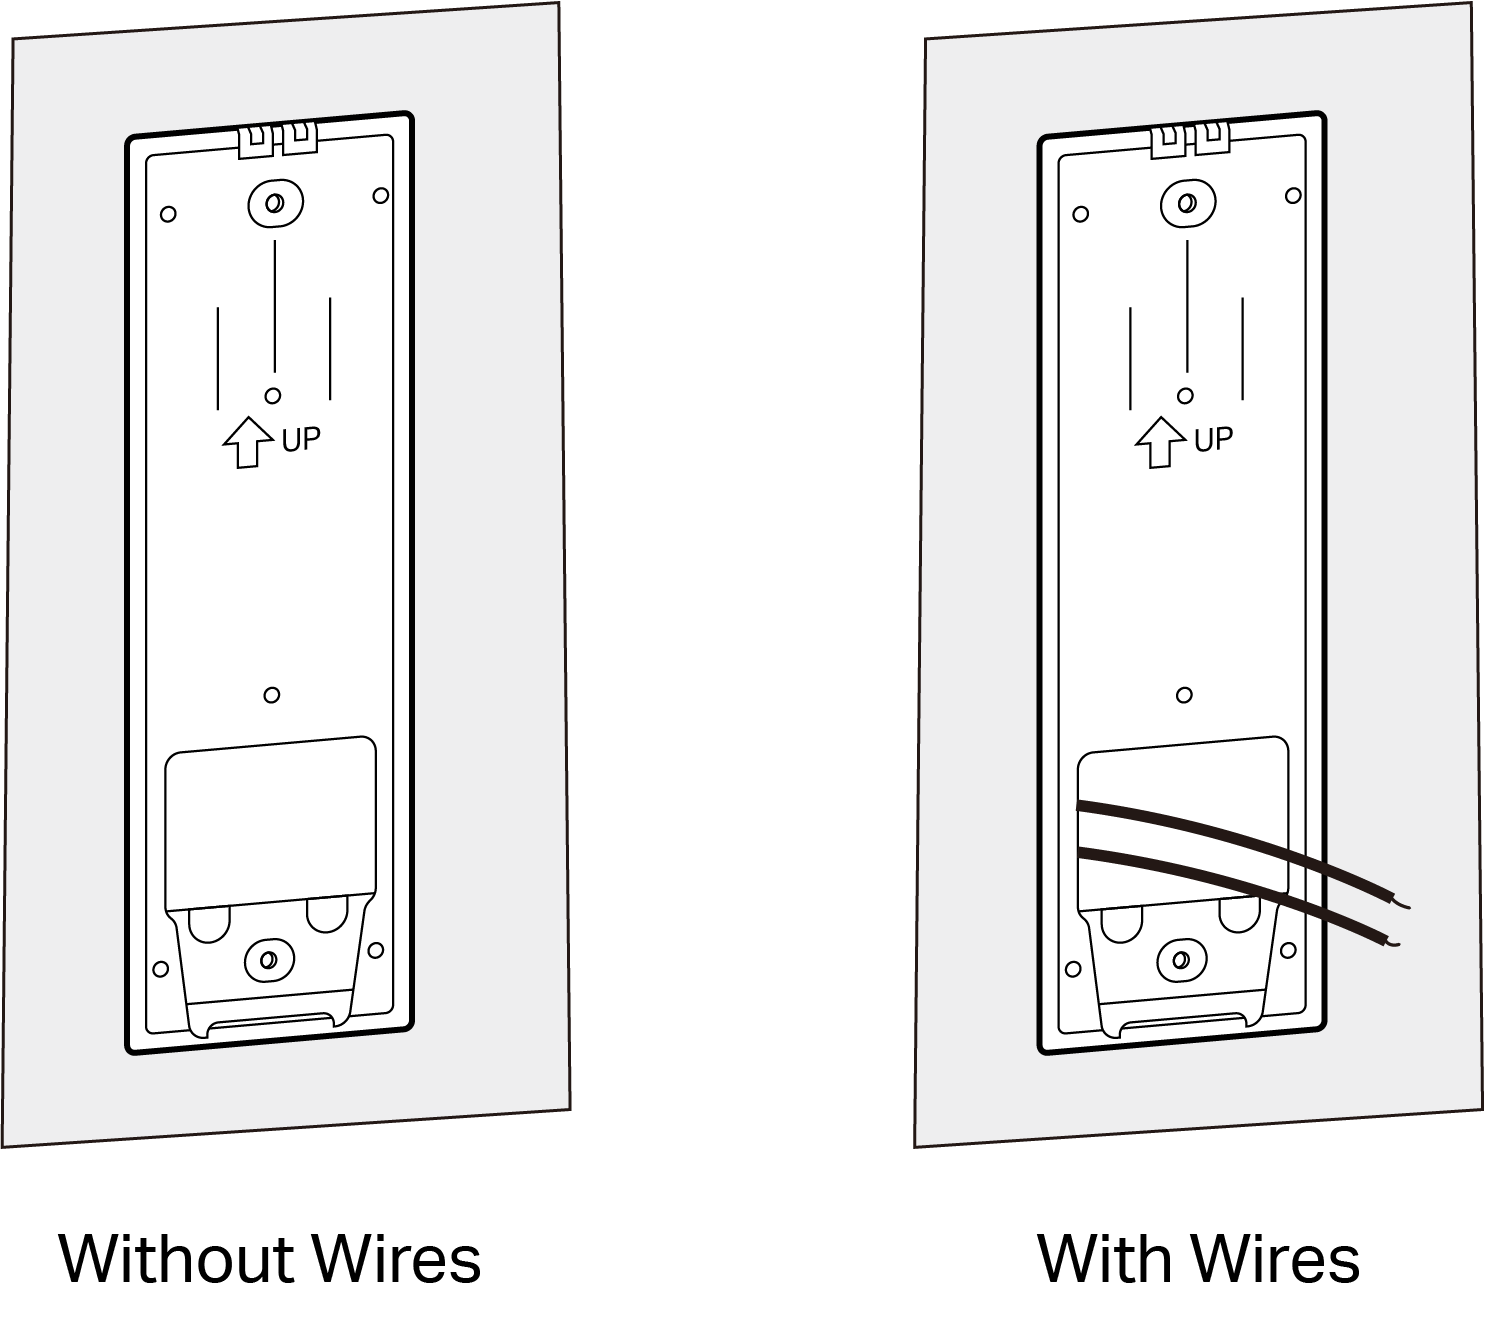
Step 2. Route the wires through the bracket (if there are existing wires). Wipe off the dust from the surface using a dry cloth, stick the bracket with adhesive to the smooth wall, and press it down for 15 seconds to ensure the bracket is firmly attached.
Note: This is applicable with tile, glass, marble, metal, stainless steel, and smooth wall surfaces.
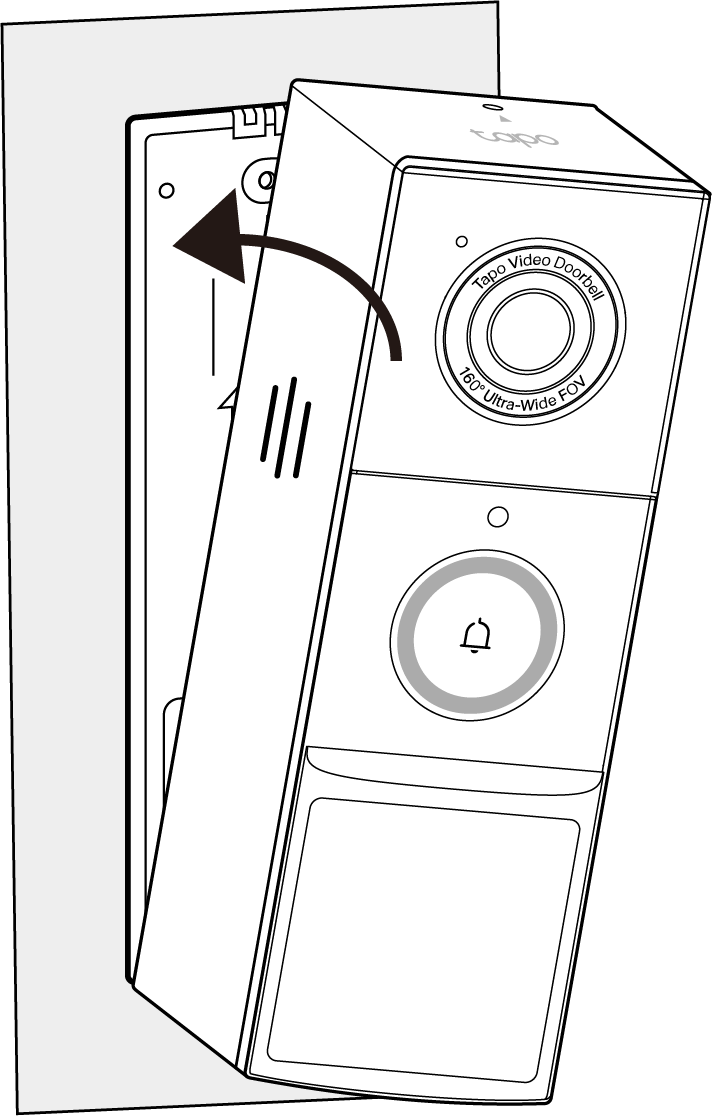
Step 3. Mount the doorbell to the bracket.

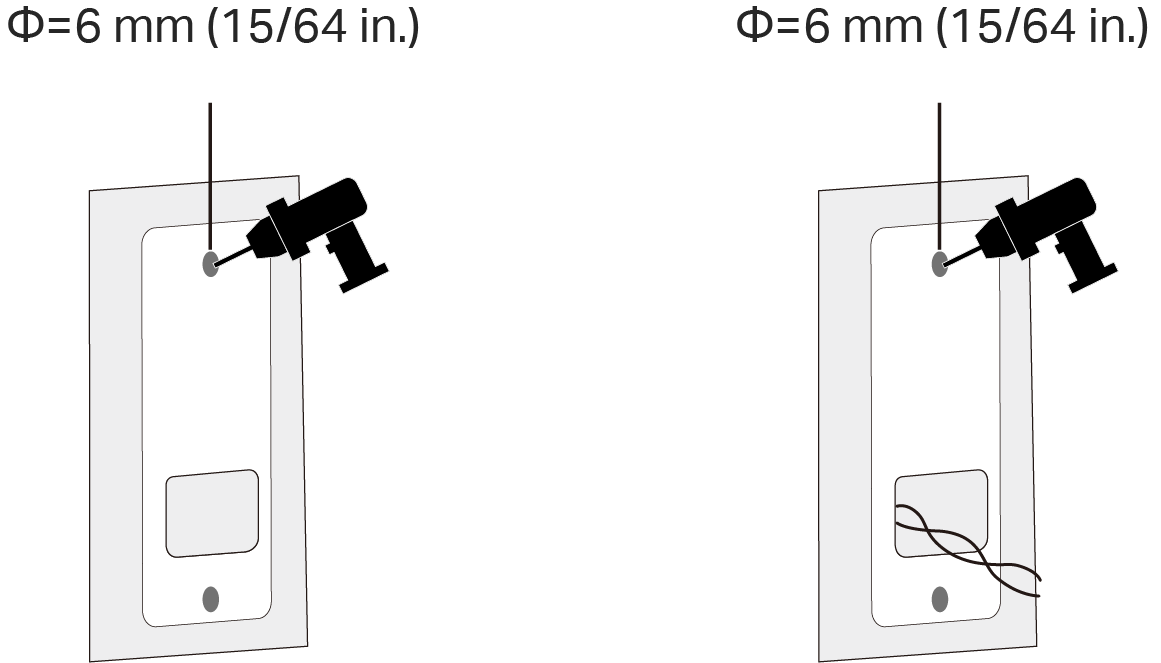
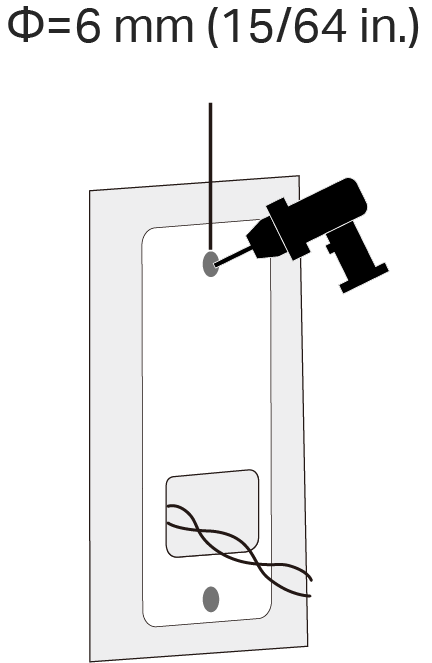
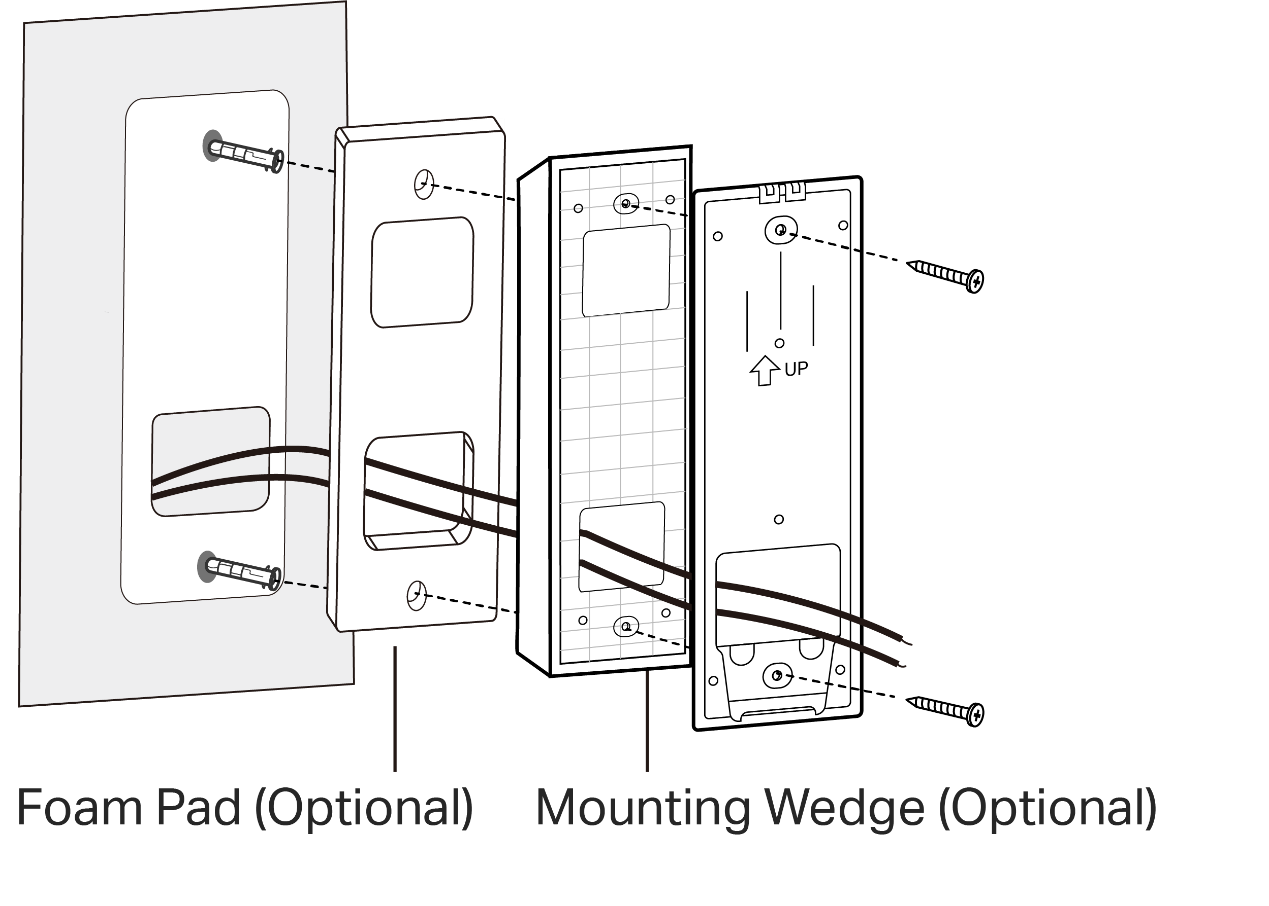
Step 1. Route the wires (if there are existing wires) through the mounting template and stick the template. Drill two holes where indicated.
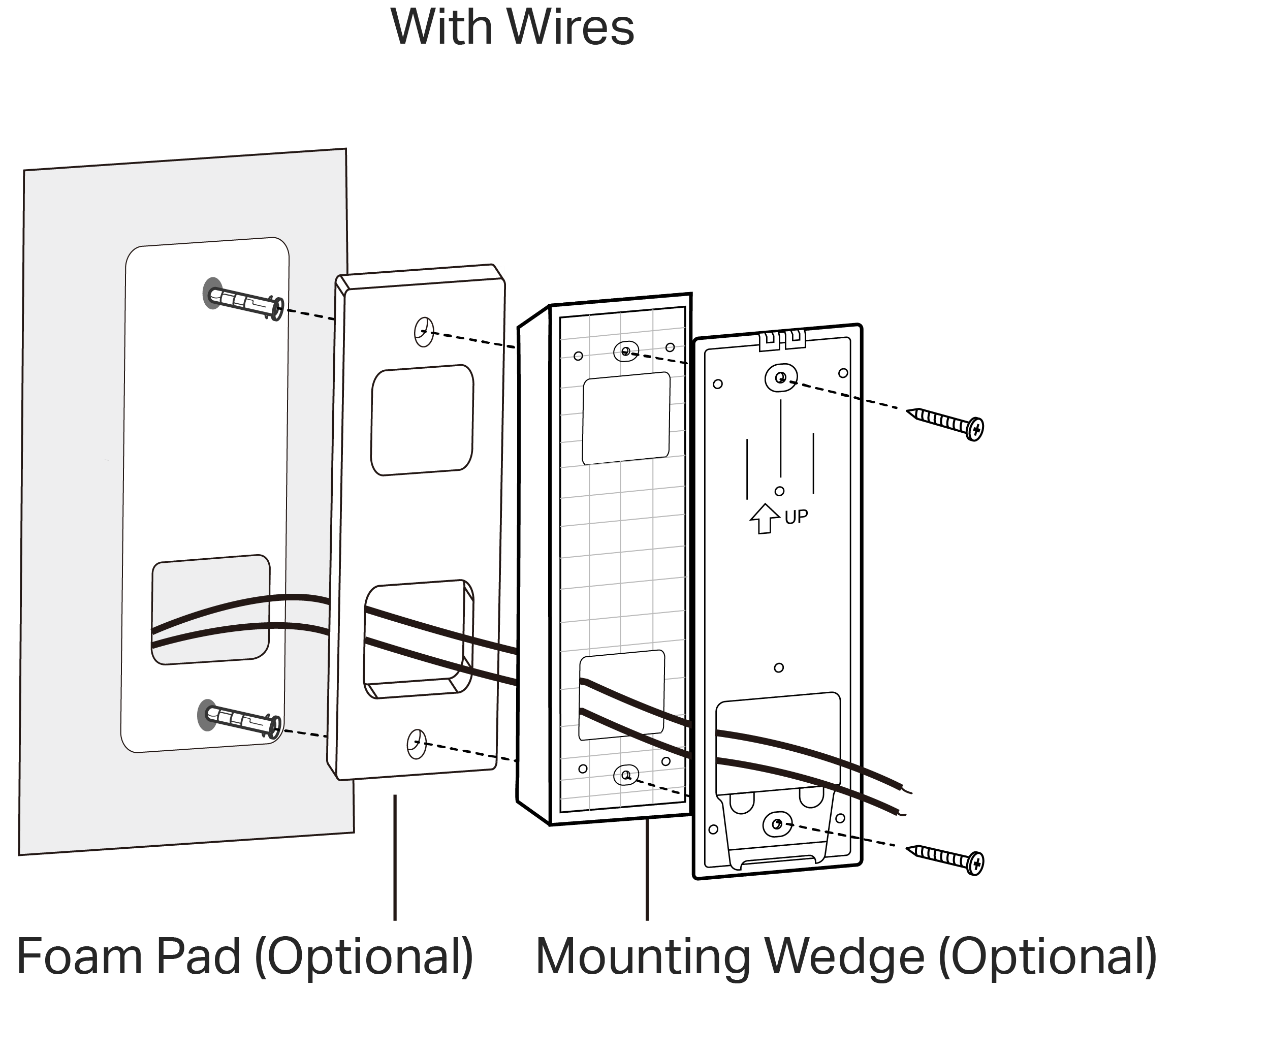
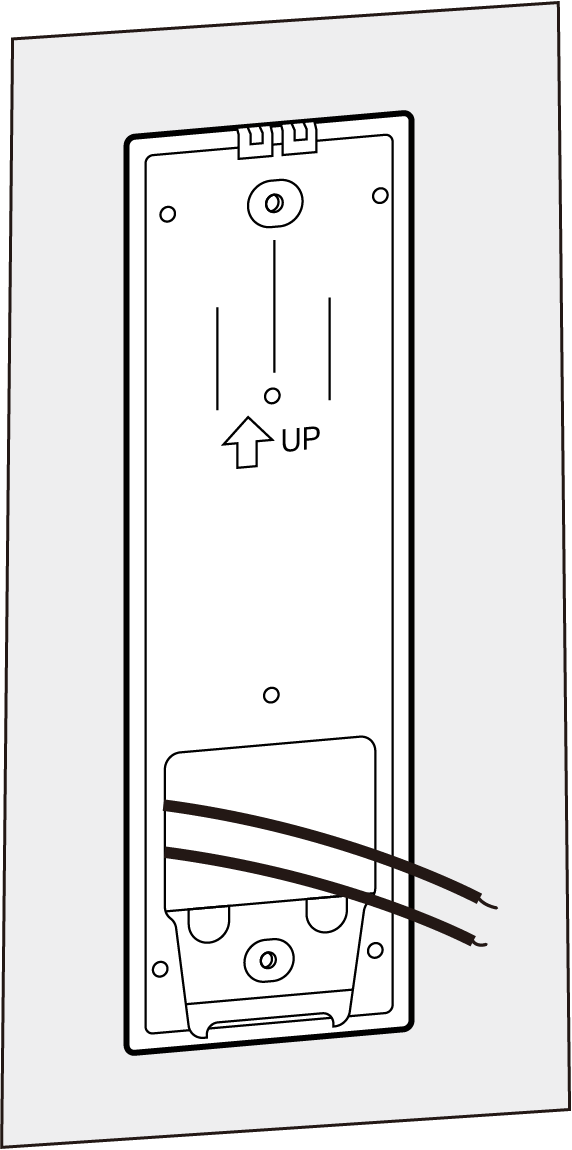
Step 2. Route the wires (if there are existing wires) through the bracket. Insert two anchors into the holes and use the screws to affix the bracket over the anchors.
Note: When mounting to uneven walls, stick the foam pad on the back of the bracket or wedge.
Step 3. Mount the doorbell to the bracket.
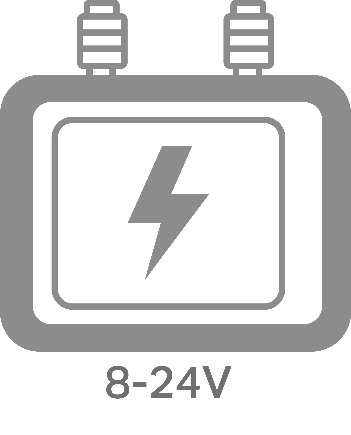
Your existing doorbell must be wired (not battery powered) and supplied by an 8-24V AC, 10VA minimum transformer.
You can choose whether to enable Always-On Mode, which supports 24/7 recording.
- Enabling Always-On Mode requires bypassing your existing chime.
- Disabling Always-On Mode allows using your existing chime. Hardwiring provides a constant power source.
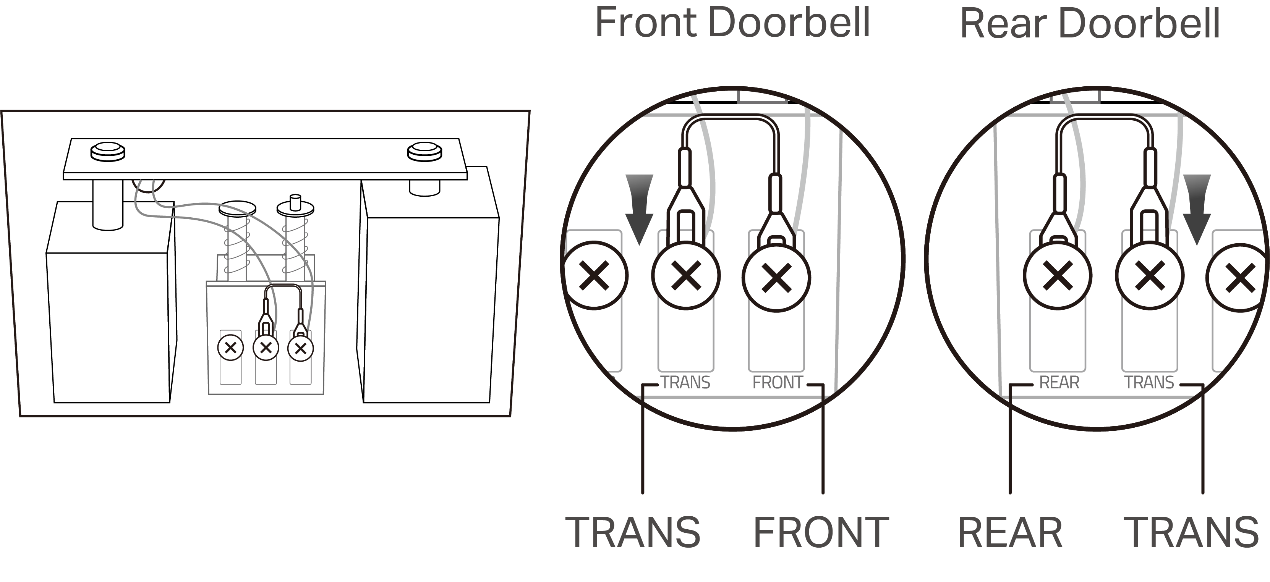
Note: when hardwiring the doorbell and enabling Always-On Mode, it's necessary to install Jumper Wire for Your Existing Chime:
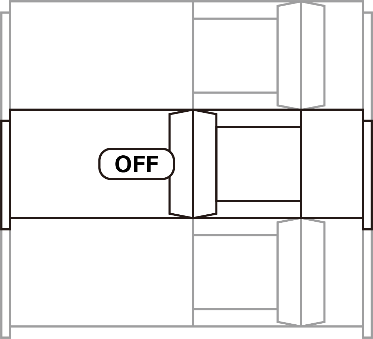
Step 1. Turn off the circuit breaker. Make sure the power is off by ringing your doorbell a few times.
Step 2. Remove the chime cover and take a photo of the wiring in case you want to reconnect it.
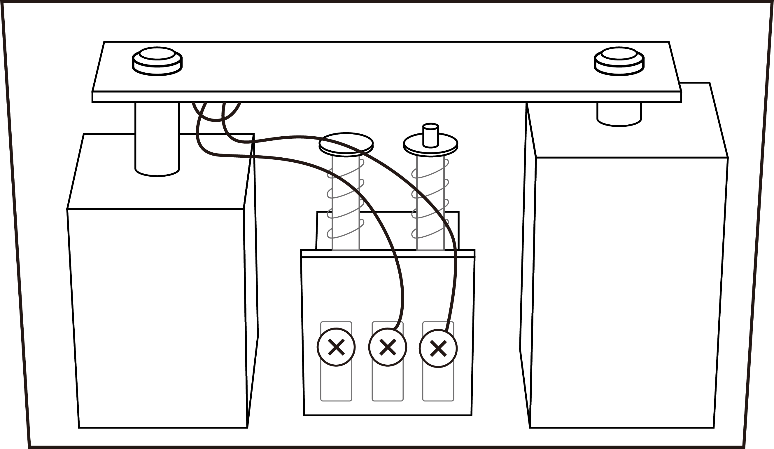
Step 3. Slightly loosen the screws for the Front and Trans of your front doorbell or the Rear and Trans of your rear doorbell, then insert the included jumper wire.
If your doorbell chime has different markings, consult a licensed electrician.
Step 4. Tighten the screws and replace the chime cover. If you want to disable Always-On Mode, just remove the jumper wire.
Remove your existing doorbell on the door. Then disconnect the wires. Then mount your doorbell.
Step 1. Attach the included adhesive to the back of the bracket or the wedge you have selected. If you use the wedge, affix the bracket and the wedge with screws.
Note: The adhesive is for one-time use. Avoid re-using the adhesive to ensure its adhesion.

Step 2. Route the wires through the bracket. Wipe off the dust from the surface using a dry cloth, stick the bracket with adhesive to the smooth wall, and press it down for 15 seconds to ensure the bracket is firmly attached.
Note: This is applicable with tile, glass, marble, metal, stainless steel, and smooth wall surfaces.
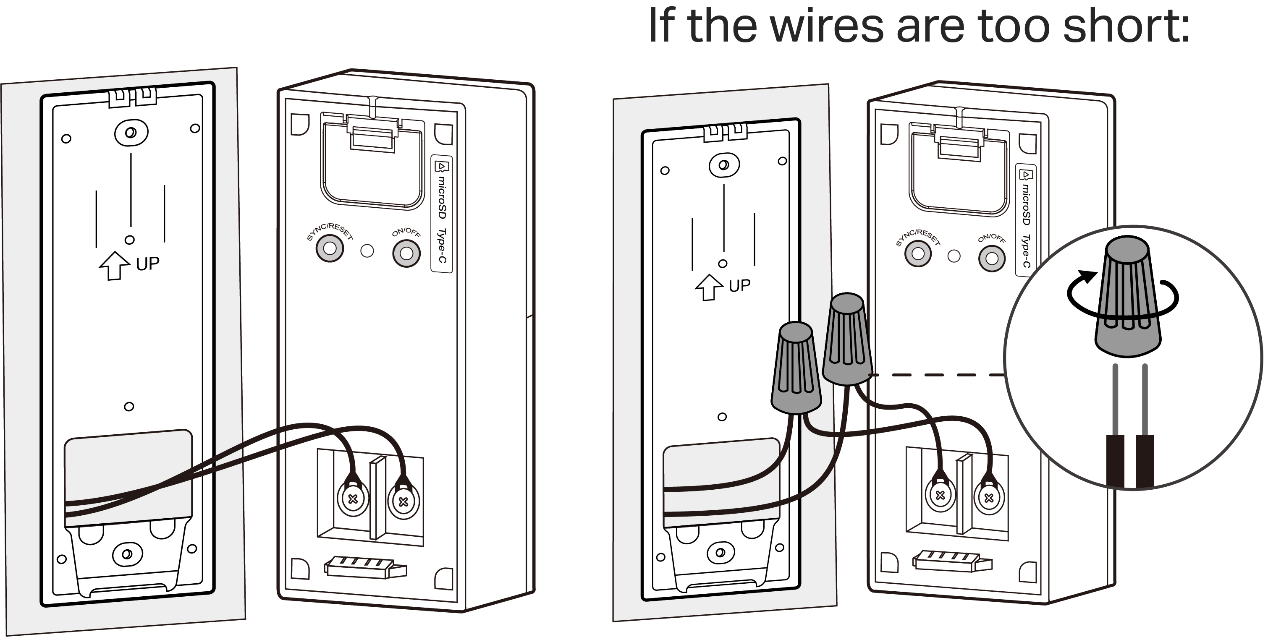
Step 3. Connect the wires to the doorbell and tighten the screws. Mount the doorbell to the bracket and turn on the circuit breaker.
Note: If the wires are too short, use the included extension wires and wire nuts to make them longer.
Step 1. Route the wires through the mounting template and stick the template. Drill two holes where indicated.
Step 2. Route the wires through the bracket. Insert two anchors into the holes and use the screws to affix the bracket over the anchors.
Note: When mounting to uneven walls, stick the foam pad on the back of the bracket or wedge.
Step 3. Connect the wires to the doorbell and tighten the screws. Mount the doorbell to the bracket and turn on the circuit breaker.
Note: If the wires are too short, use the included extension wires and wire nuts to make them longer.

Is this faq useful?
Your feedback helps improve this site.

TP-Link Community
Still need help? Search for answers, ask questions, and get help from TP-Link experts and other users around the world.