Table of Contents
Installation and User Guide
About This Guide
This guide provides a brief introduction to KE110 Room Thermostat and regulatory information.
Features available in Kasa may vary by model and software version. Kasa availability may also vary by region. All images, steps, and descriptions in this guide are only examples and may not reflect your actual Kasa experience.
Conventions
In this guide, the following conventions are used:
|
Convention |
Description |
|---|---|
|
Underline |
Underlined words or phrases are hyperlinks. You can click to redirect to a website or a specific section. |
|
Bold |
Contents to be emphasized are in bold, including the menus, items, buttons, and so on. |
|
> |
The menu structures to show the path to load the corresponding page. |
|
Note: |
Ignoring this type of note might result in a malfunction or damage to the device. |
|
Tip: |
Indicates important information that helps you make better use of your device. |
More Info
- Specific product information can be found on the product page at https://www.tp-link.com.
- A Technical Community is provided for you to discuss our products at https://community.tp-link.com.
- Our Technical Support contact information can be found at https://www.tp-link.com/support.
Introduction
Regulates Kasa smart thermostatic radiator valves in the room to achieve the desired temperature set by the room thermostat.
- Convenient Control - Control a single TRV in a room anytime, anywhere, or seamlessly control multiple TRVs simultaneously in a room with just a tap.
- Real-Time & Accurate Monitoring - Current room temperature, heating status, and relative humidity are displayed on the thermostat’s LED matrix with great accuracy (Measurement Accuracy: ±0.54 ºF, ±3% RH).
- 2.4" E-ink Display - With clear & sharp, always bright, low-power consumption, wide view angle advantages.
- Smart Schedule - Schedule heating to suit your routine and reduce energy costs.
- Voice Control - Hands-free voice control via Alexa and Google Assistant.
- Remote Control - Control all your radiators in your home from your phone. No more guessing if you left the heater on in an empty room.
- Instant App Notification - Receive app alert notification when conditions fall outside the preset range.
- Free Data Storage & Visual Graphs - Record temperature and humidity data and generate periodic data summaries.
- Flexible Placement - Place it on the desk or mount it on the wall.
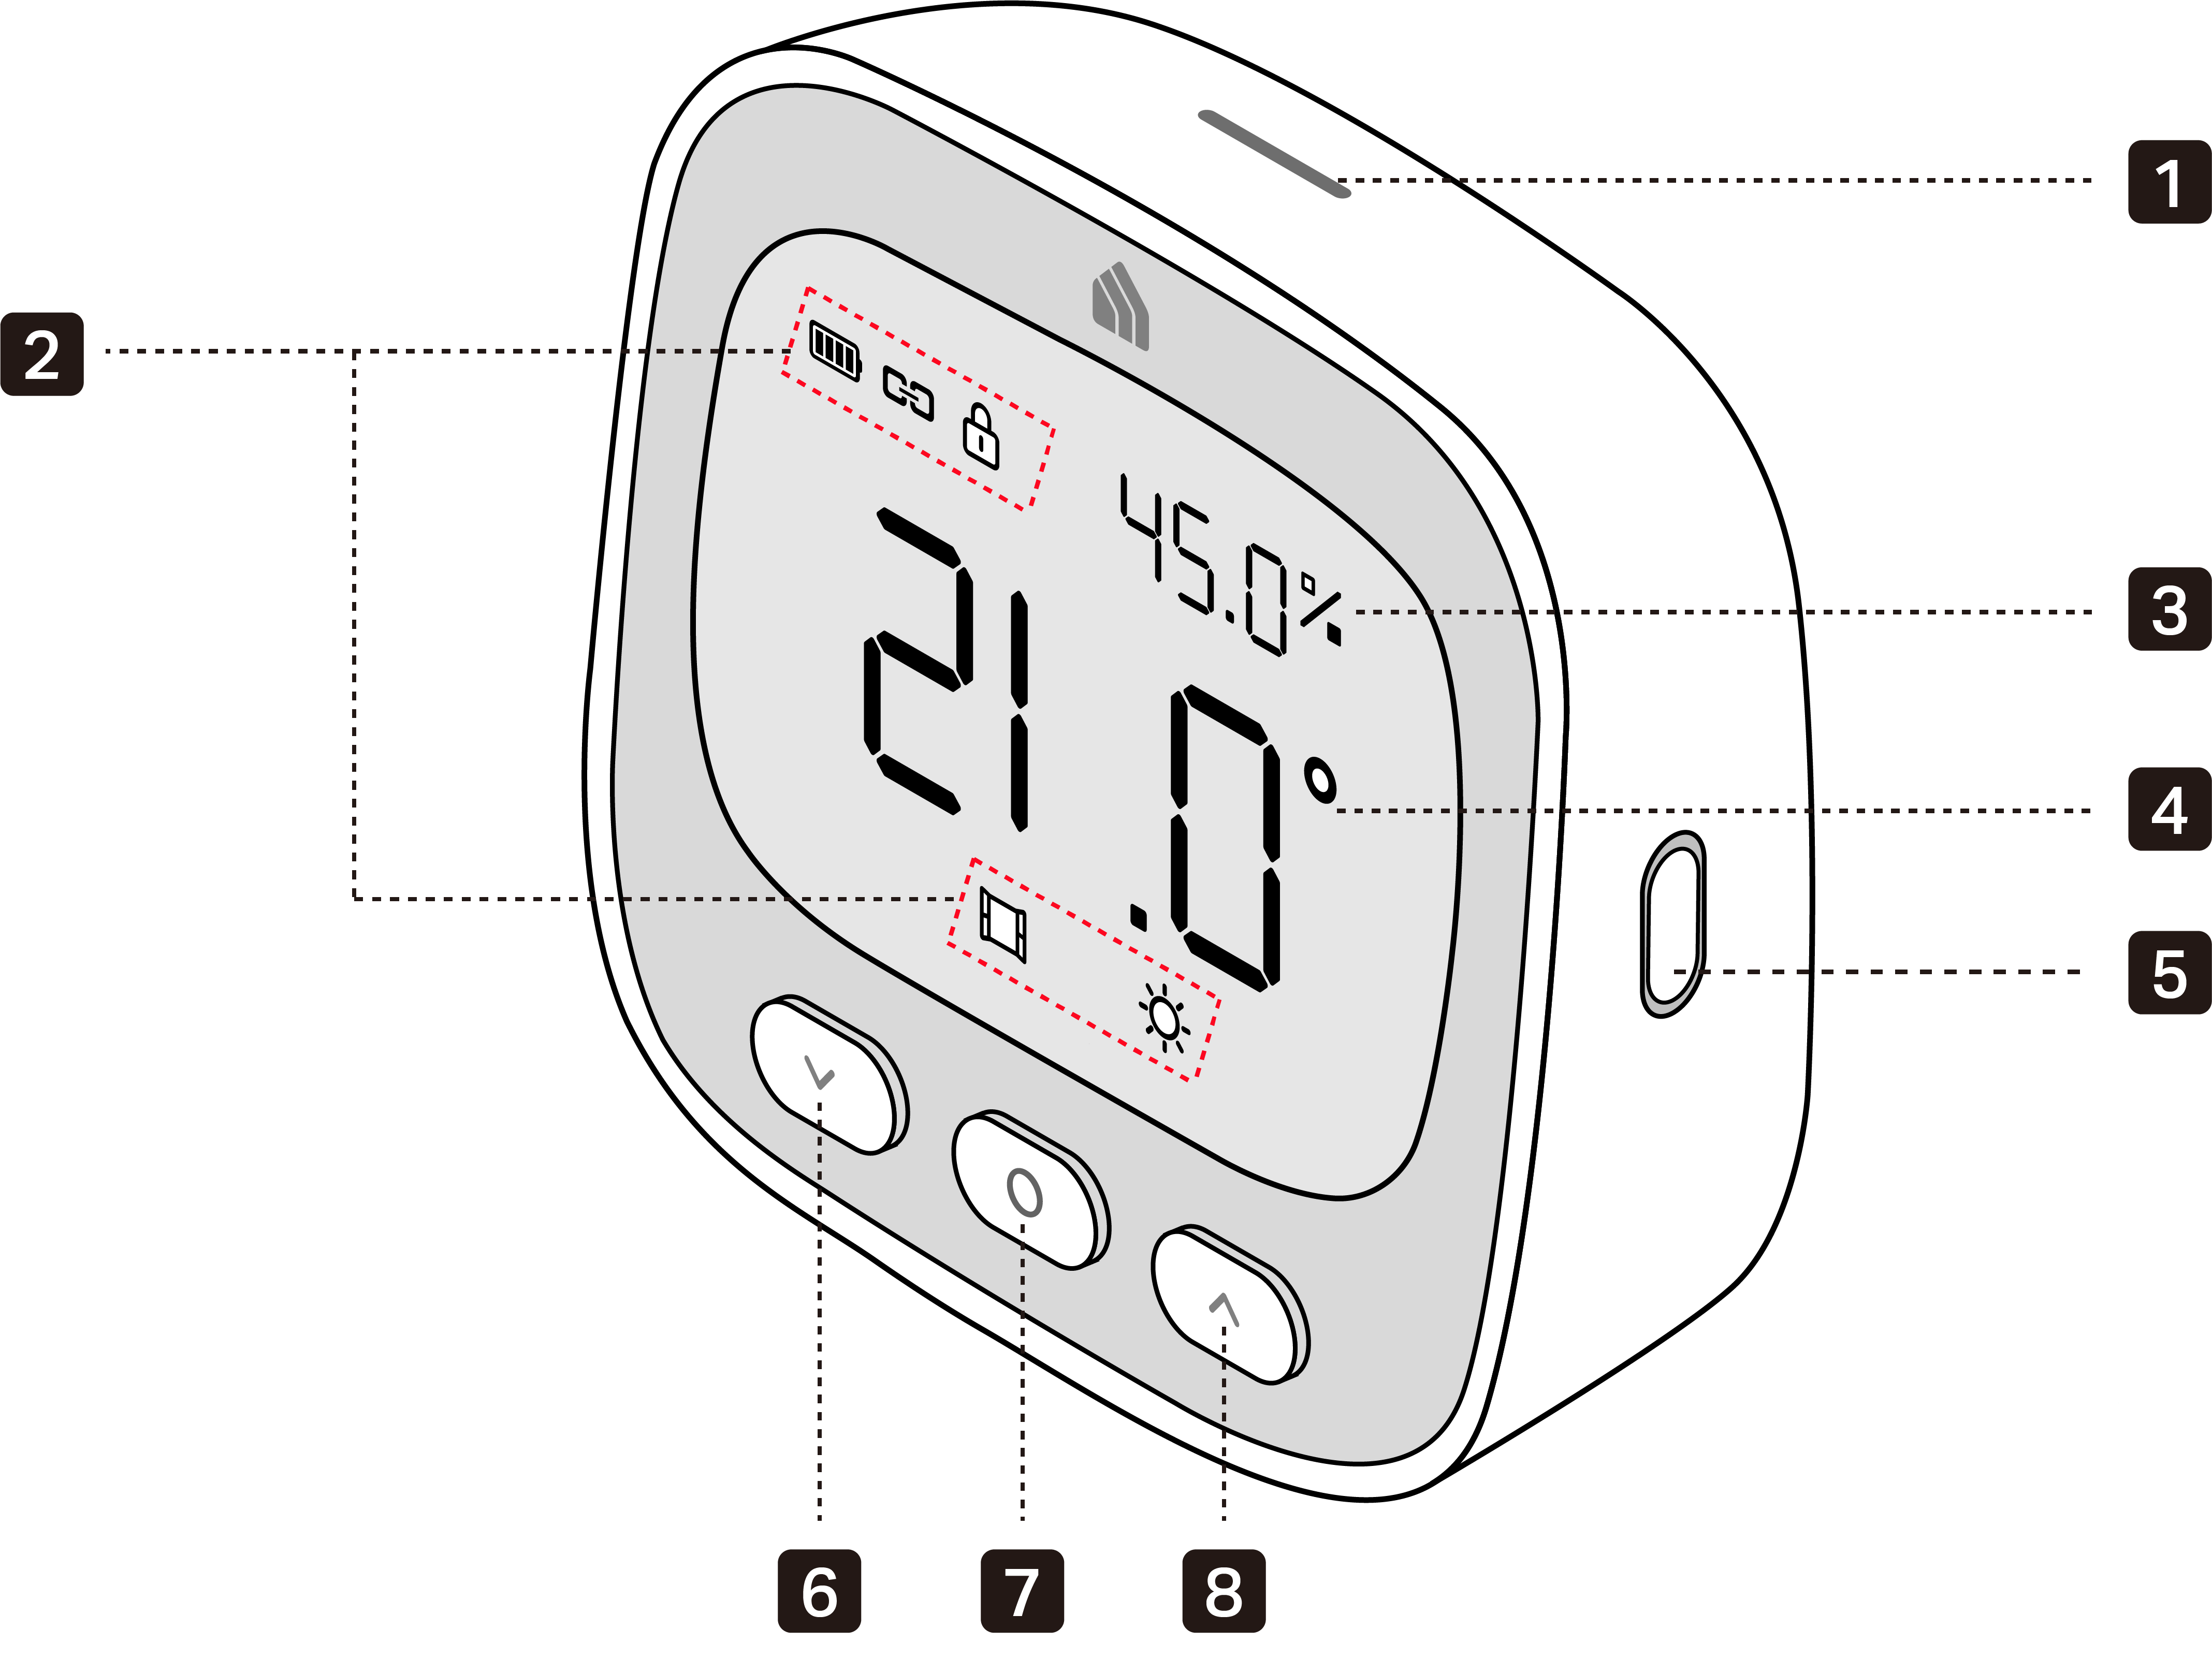
Appearance
| No. | Icon/Button | Indication |
|---|---|---|
| 1 | Vent Hole | For the escape of air. |
| 2 | Battery | Indcates the battery level. |
| Connection | Blinking: Connecting to hub Solid On: Connected to hub Off: Not connected |
|
| Child Lock | Solid On: Child Lock enabled Blinking: Child Lock is on. Cannot operate the device. Off: Child Lock disabled |
|
| Open Window Detected | Solid On: An open window is detected by a Tapo contact sensor. | |
| Heating | Solid On: TRV is heating. Off: Heating is off. |
|
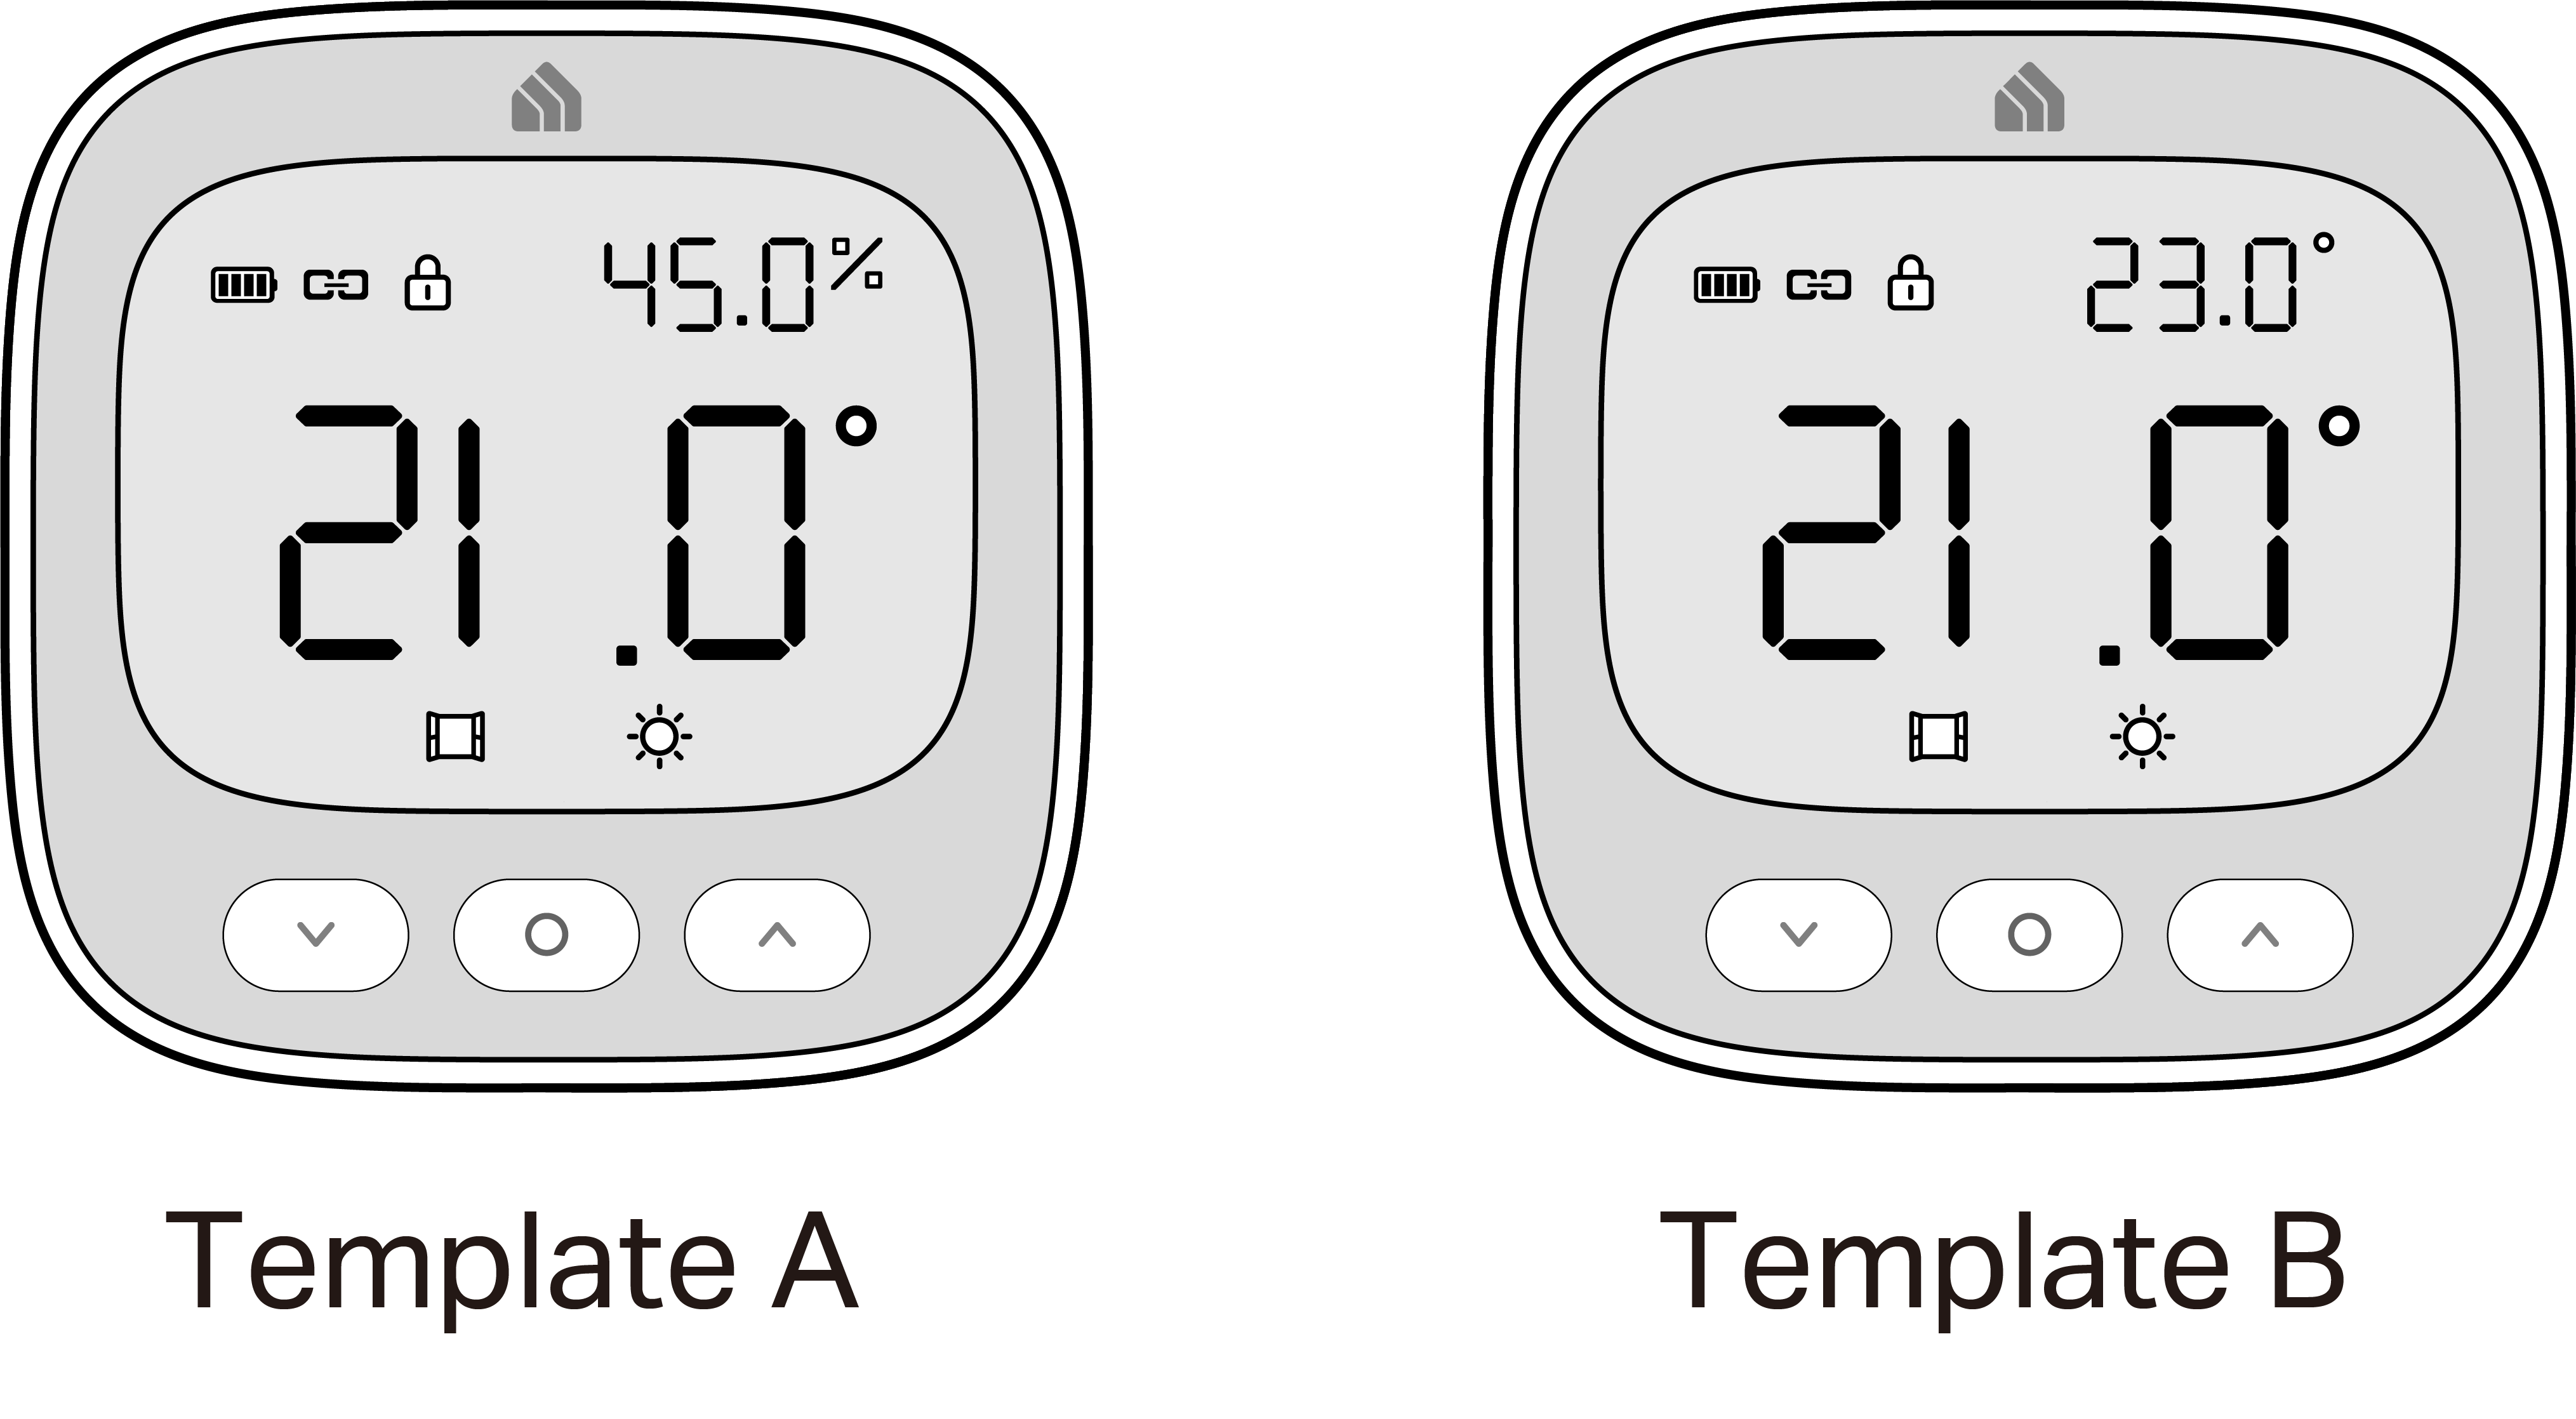
| 3 | Humidity/Target Temperature | Display humidity under default template (Template A). Display target temperature when switched to the other template (Template B). |
| 4 | Temperature/OFF Status | Display OFF when the connected TRVs have turned off heating. |
| 5 | Switch Display/SYNC Button | Press and hold for 5 seconds to reset your device to enter pairing mode. Single press to switch the display template. |
| 6 | Lower Temperature Button | Lower temperature (When activated). |
| 7 | On/Off Button | Turn on/off heating. |
| 8 | Increase Temperature Button | Raise temperature (When activated). |
| 6+8 | Child Lock | Press and hold simultaneously for 3 seconds to enable/disable child lock. |
| 7+8 | Boost | Press and hold simultaneously for 3 seconds to enable/disable Boost Heating. |
Set Up Your Device
Follow the steps below to get started with your new Room Thermostat.
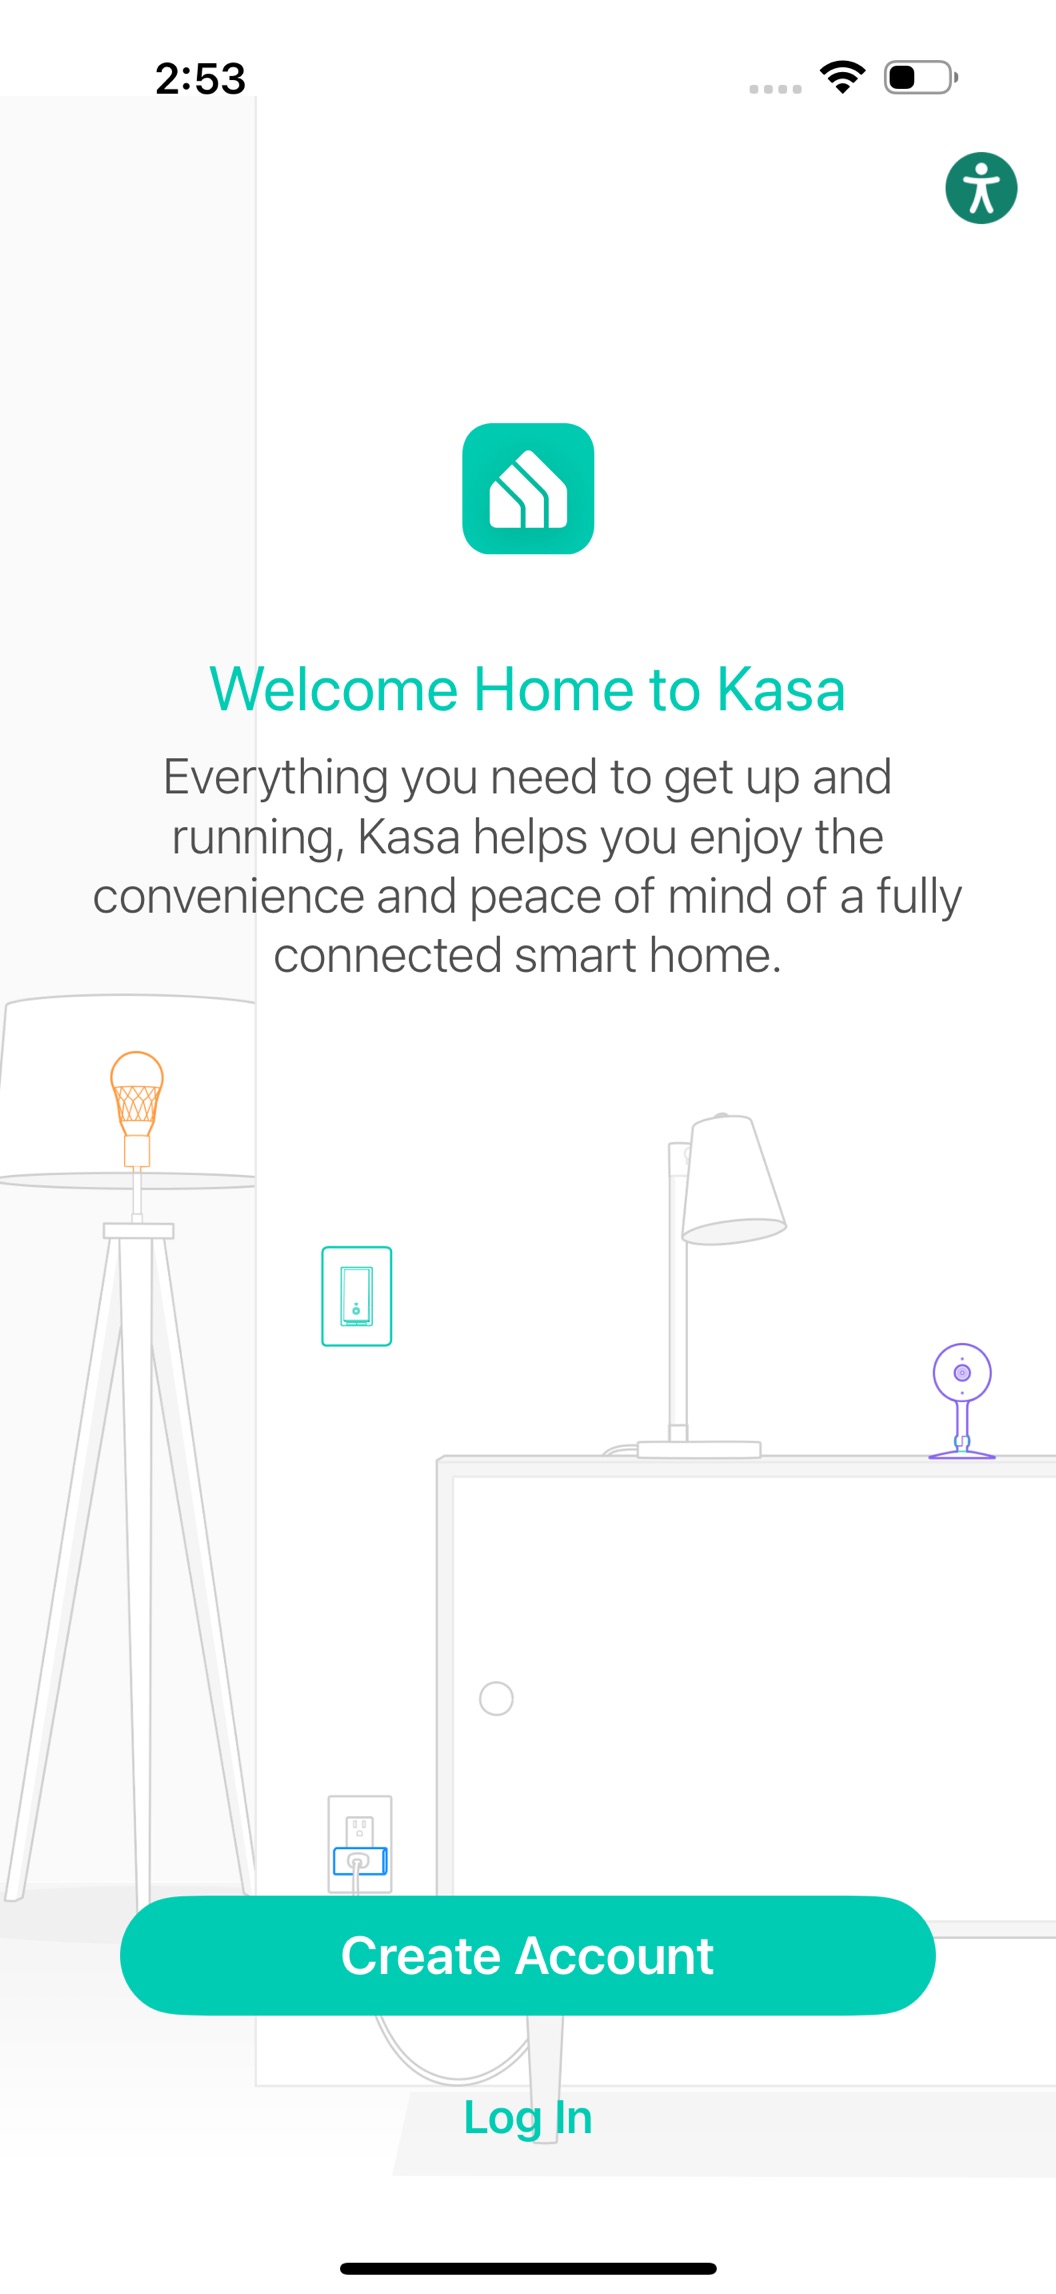
Step 1. Download Kasa Smart App
Get the Kasa Smart app from the App Store or Google Play, or by scanning the QR code below.

Step 2. Log In
Open the app, and log in with your TP-Link ID. If you don't have an account, create one first.
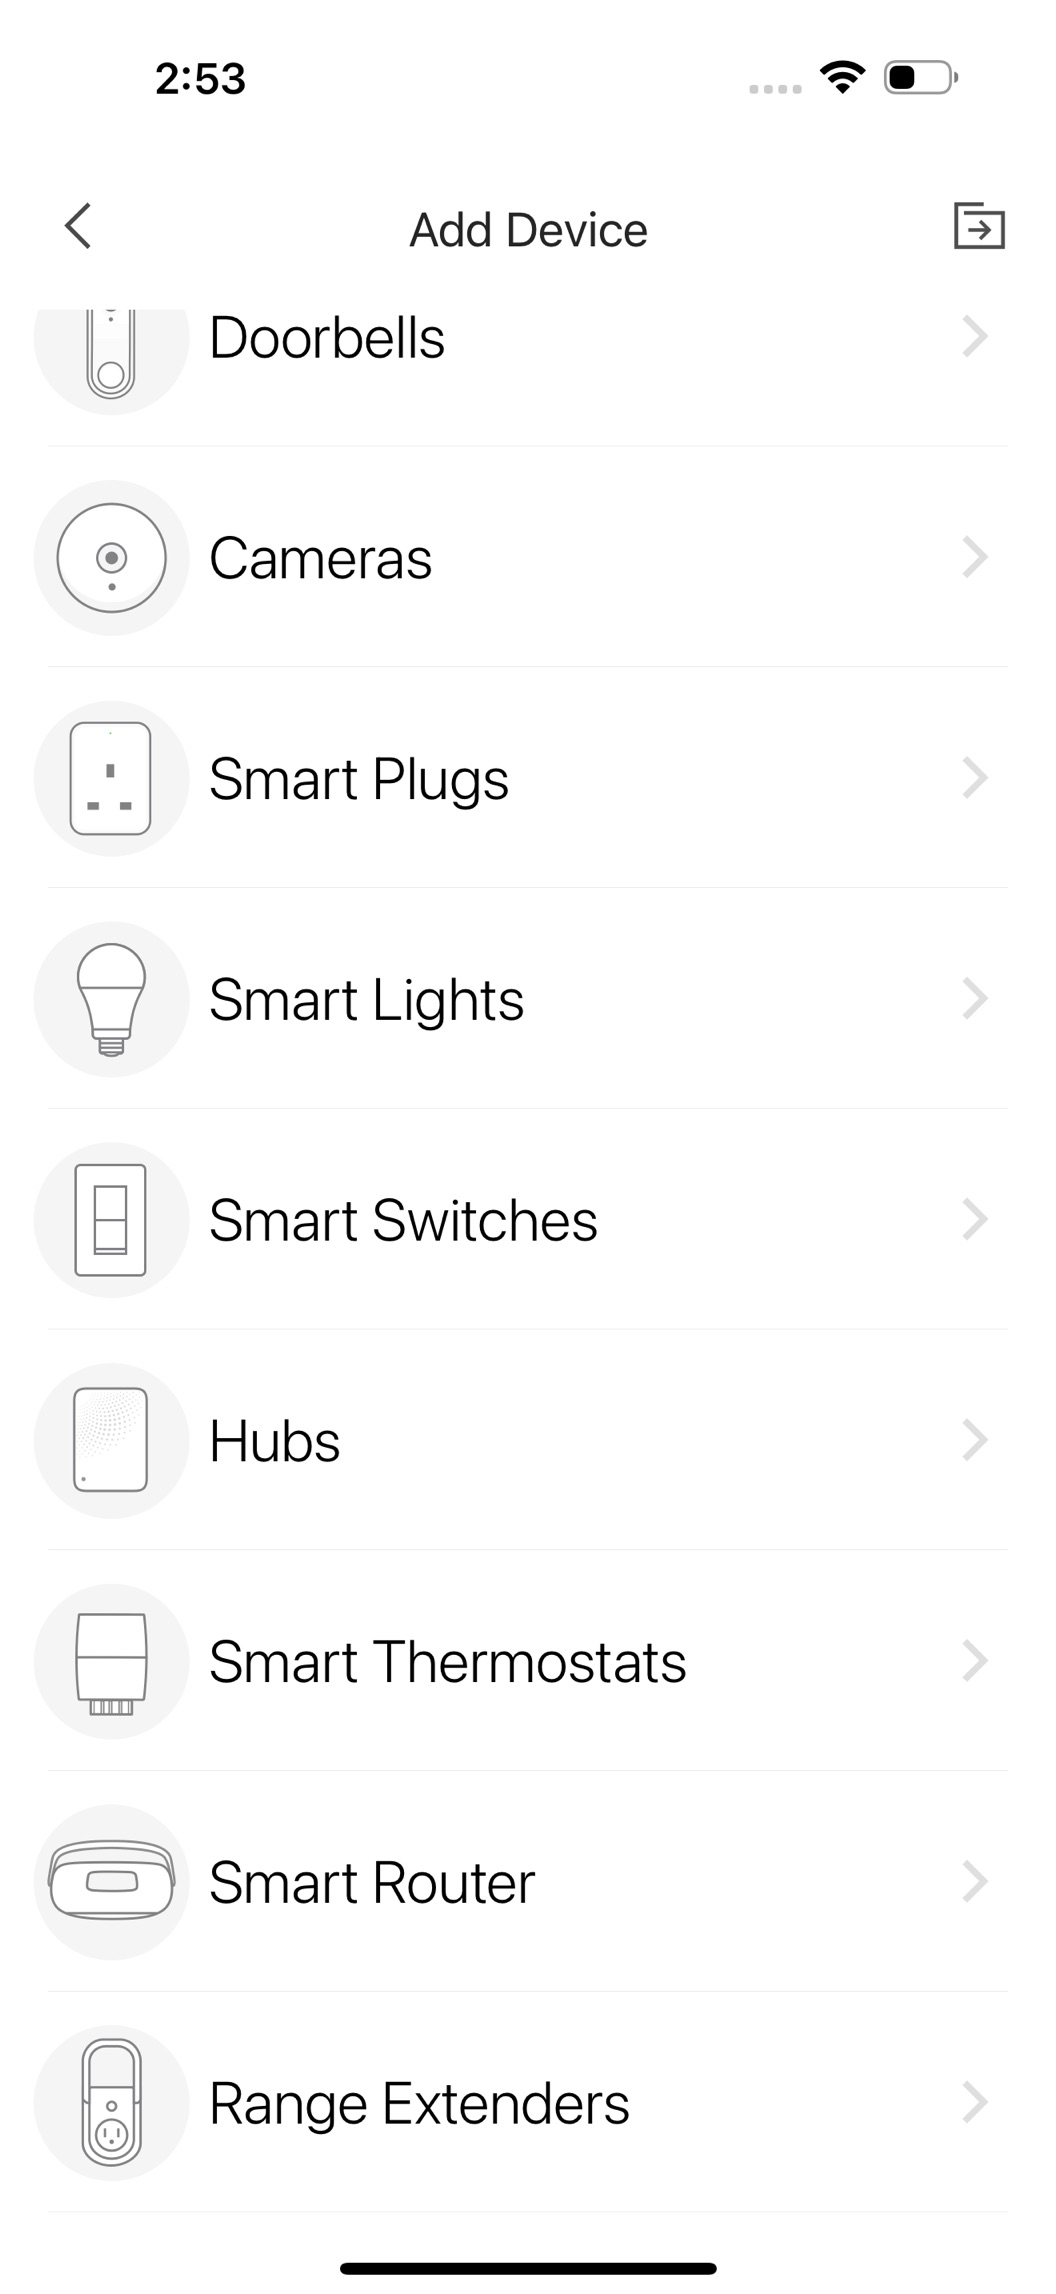
Step 3. Add Your Device
Tap the + button, choose Add Device in the app, and search for your model. Follow the app instructions to complete the setup.
Install Your Device
You can also check the video for setup and mounting.
Note: The installation height should not exceed 2 meters.
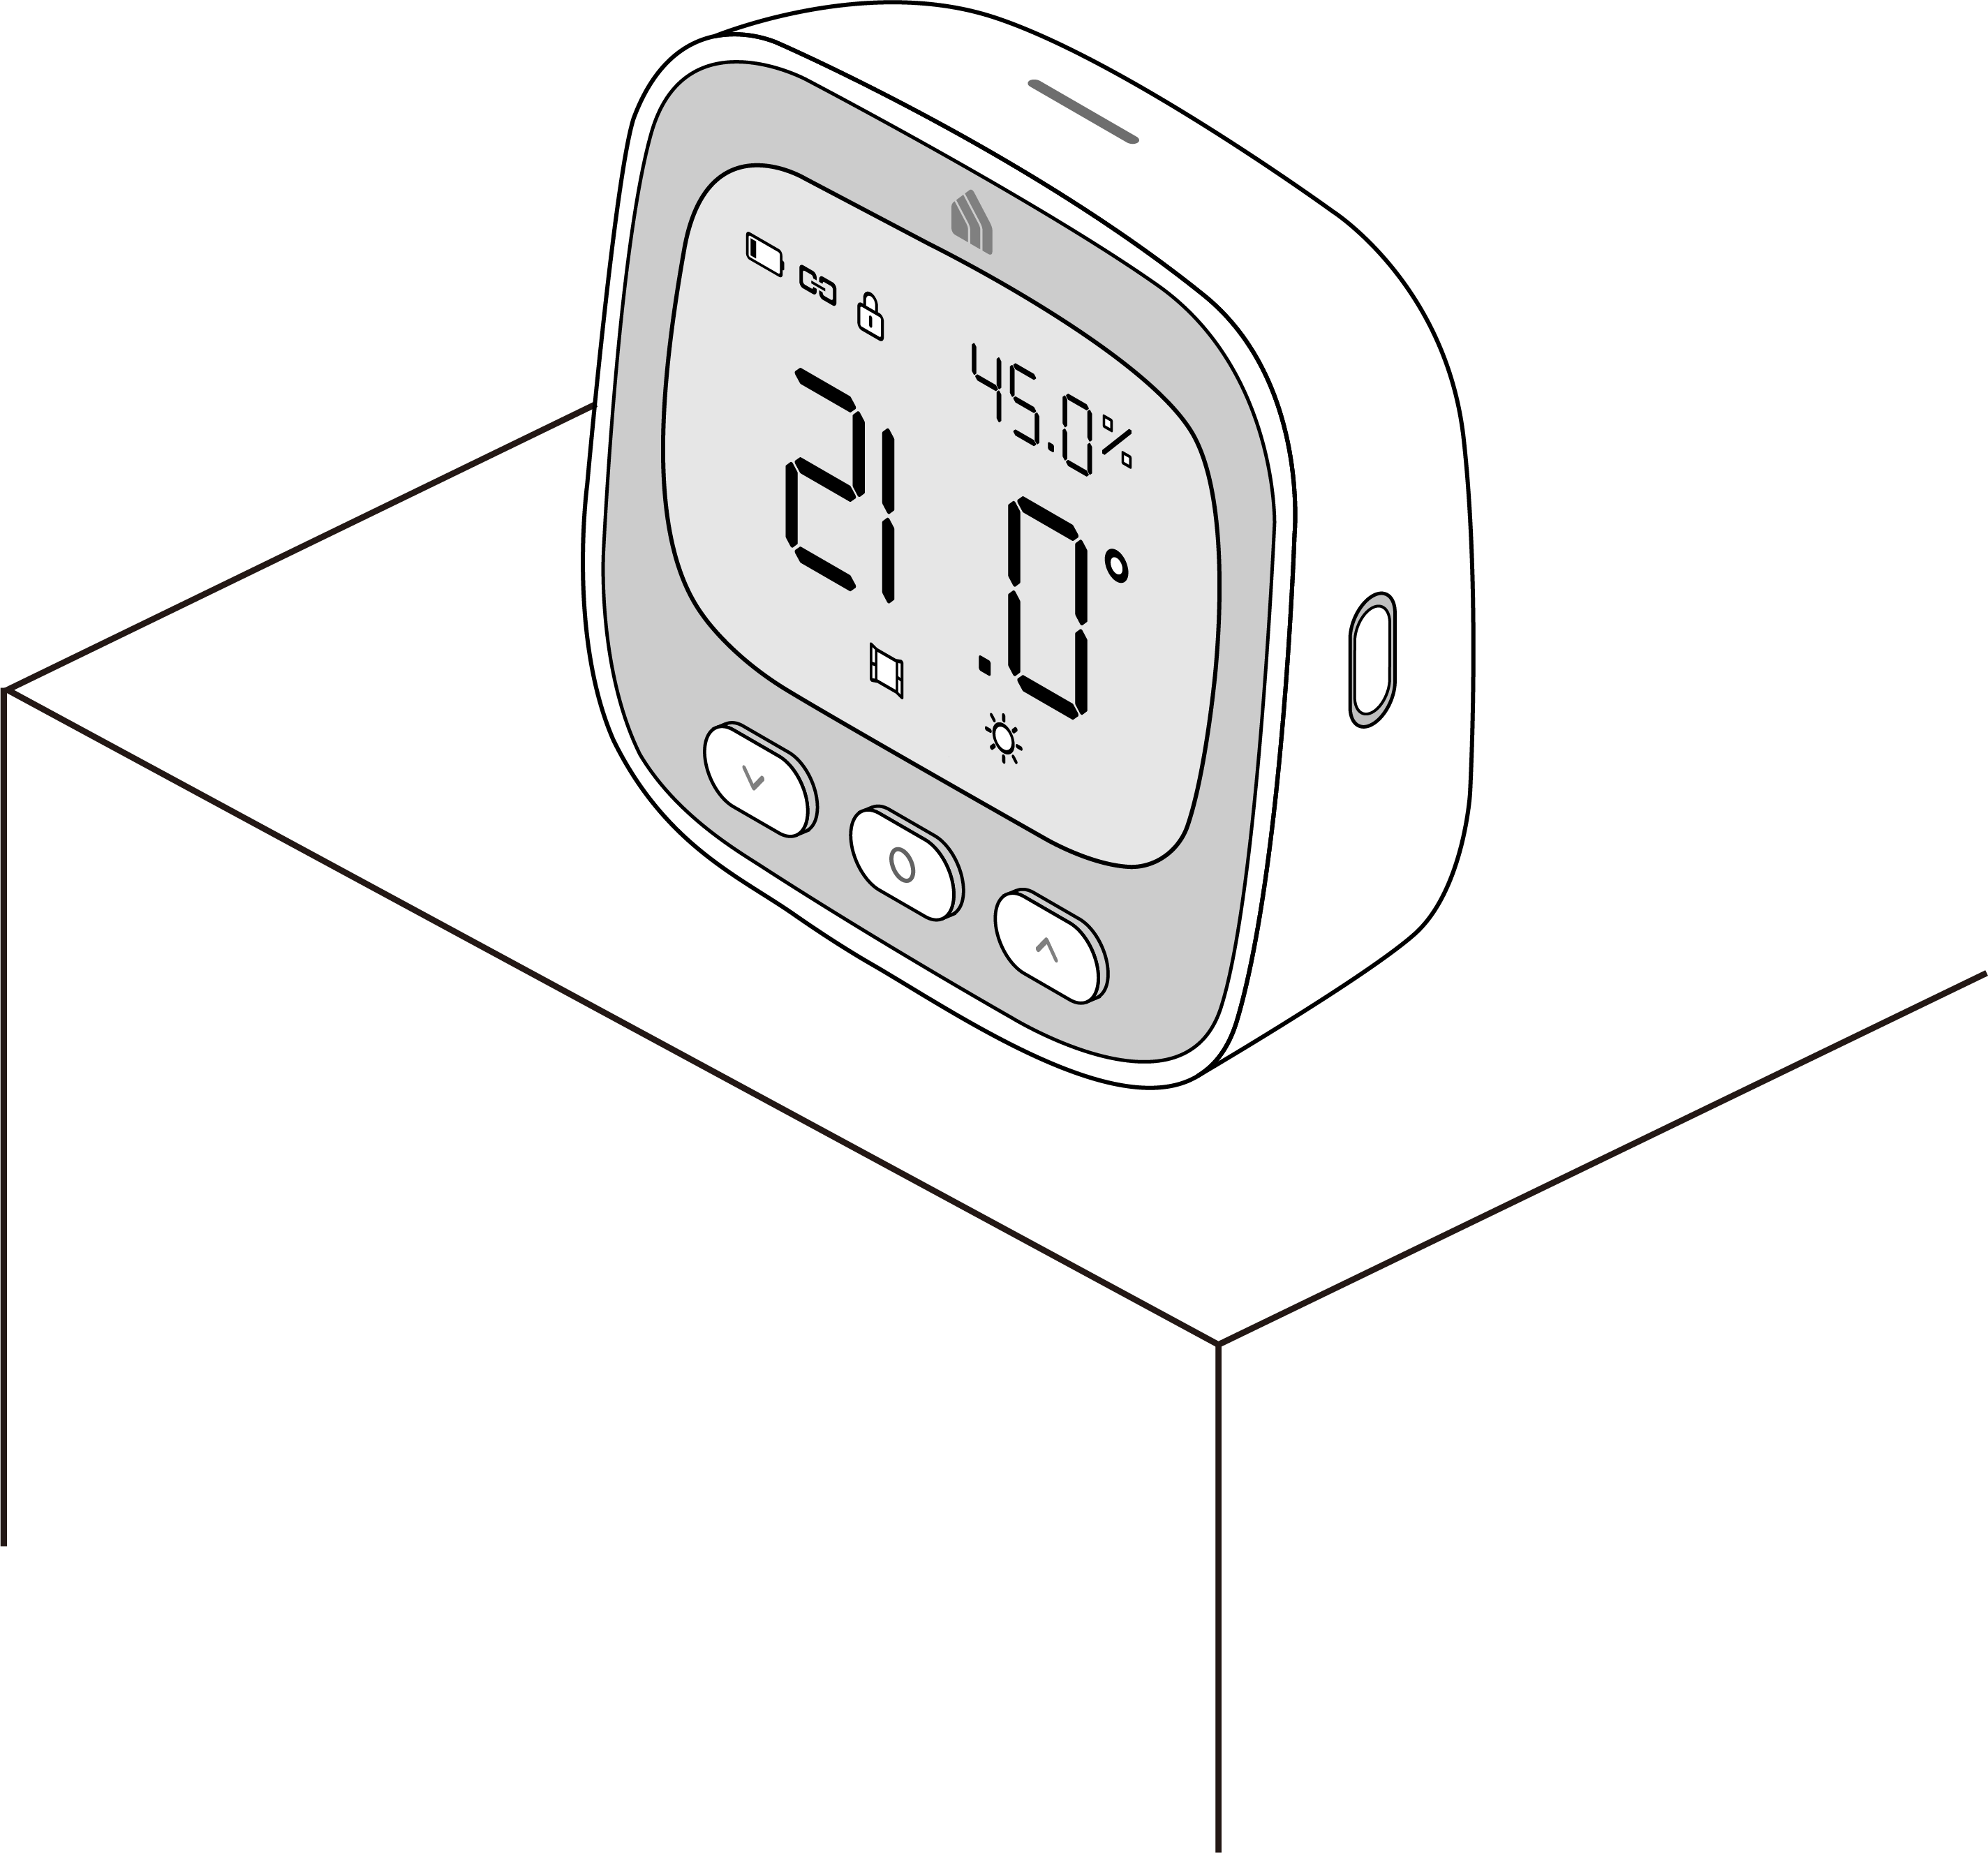
Option 1: Place it on a table or shelf
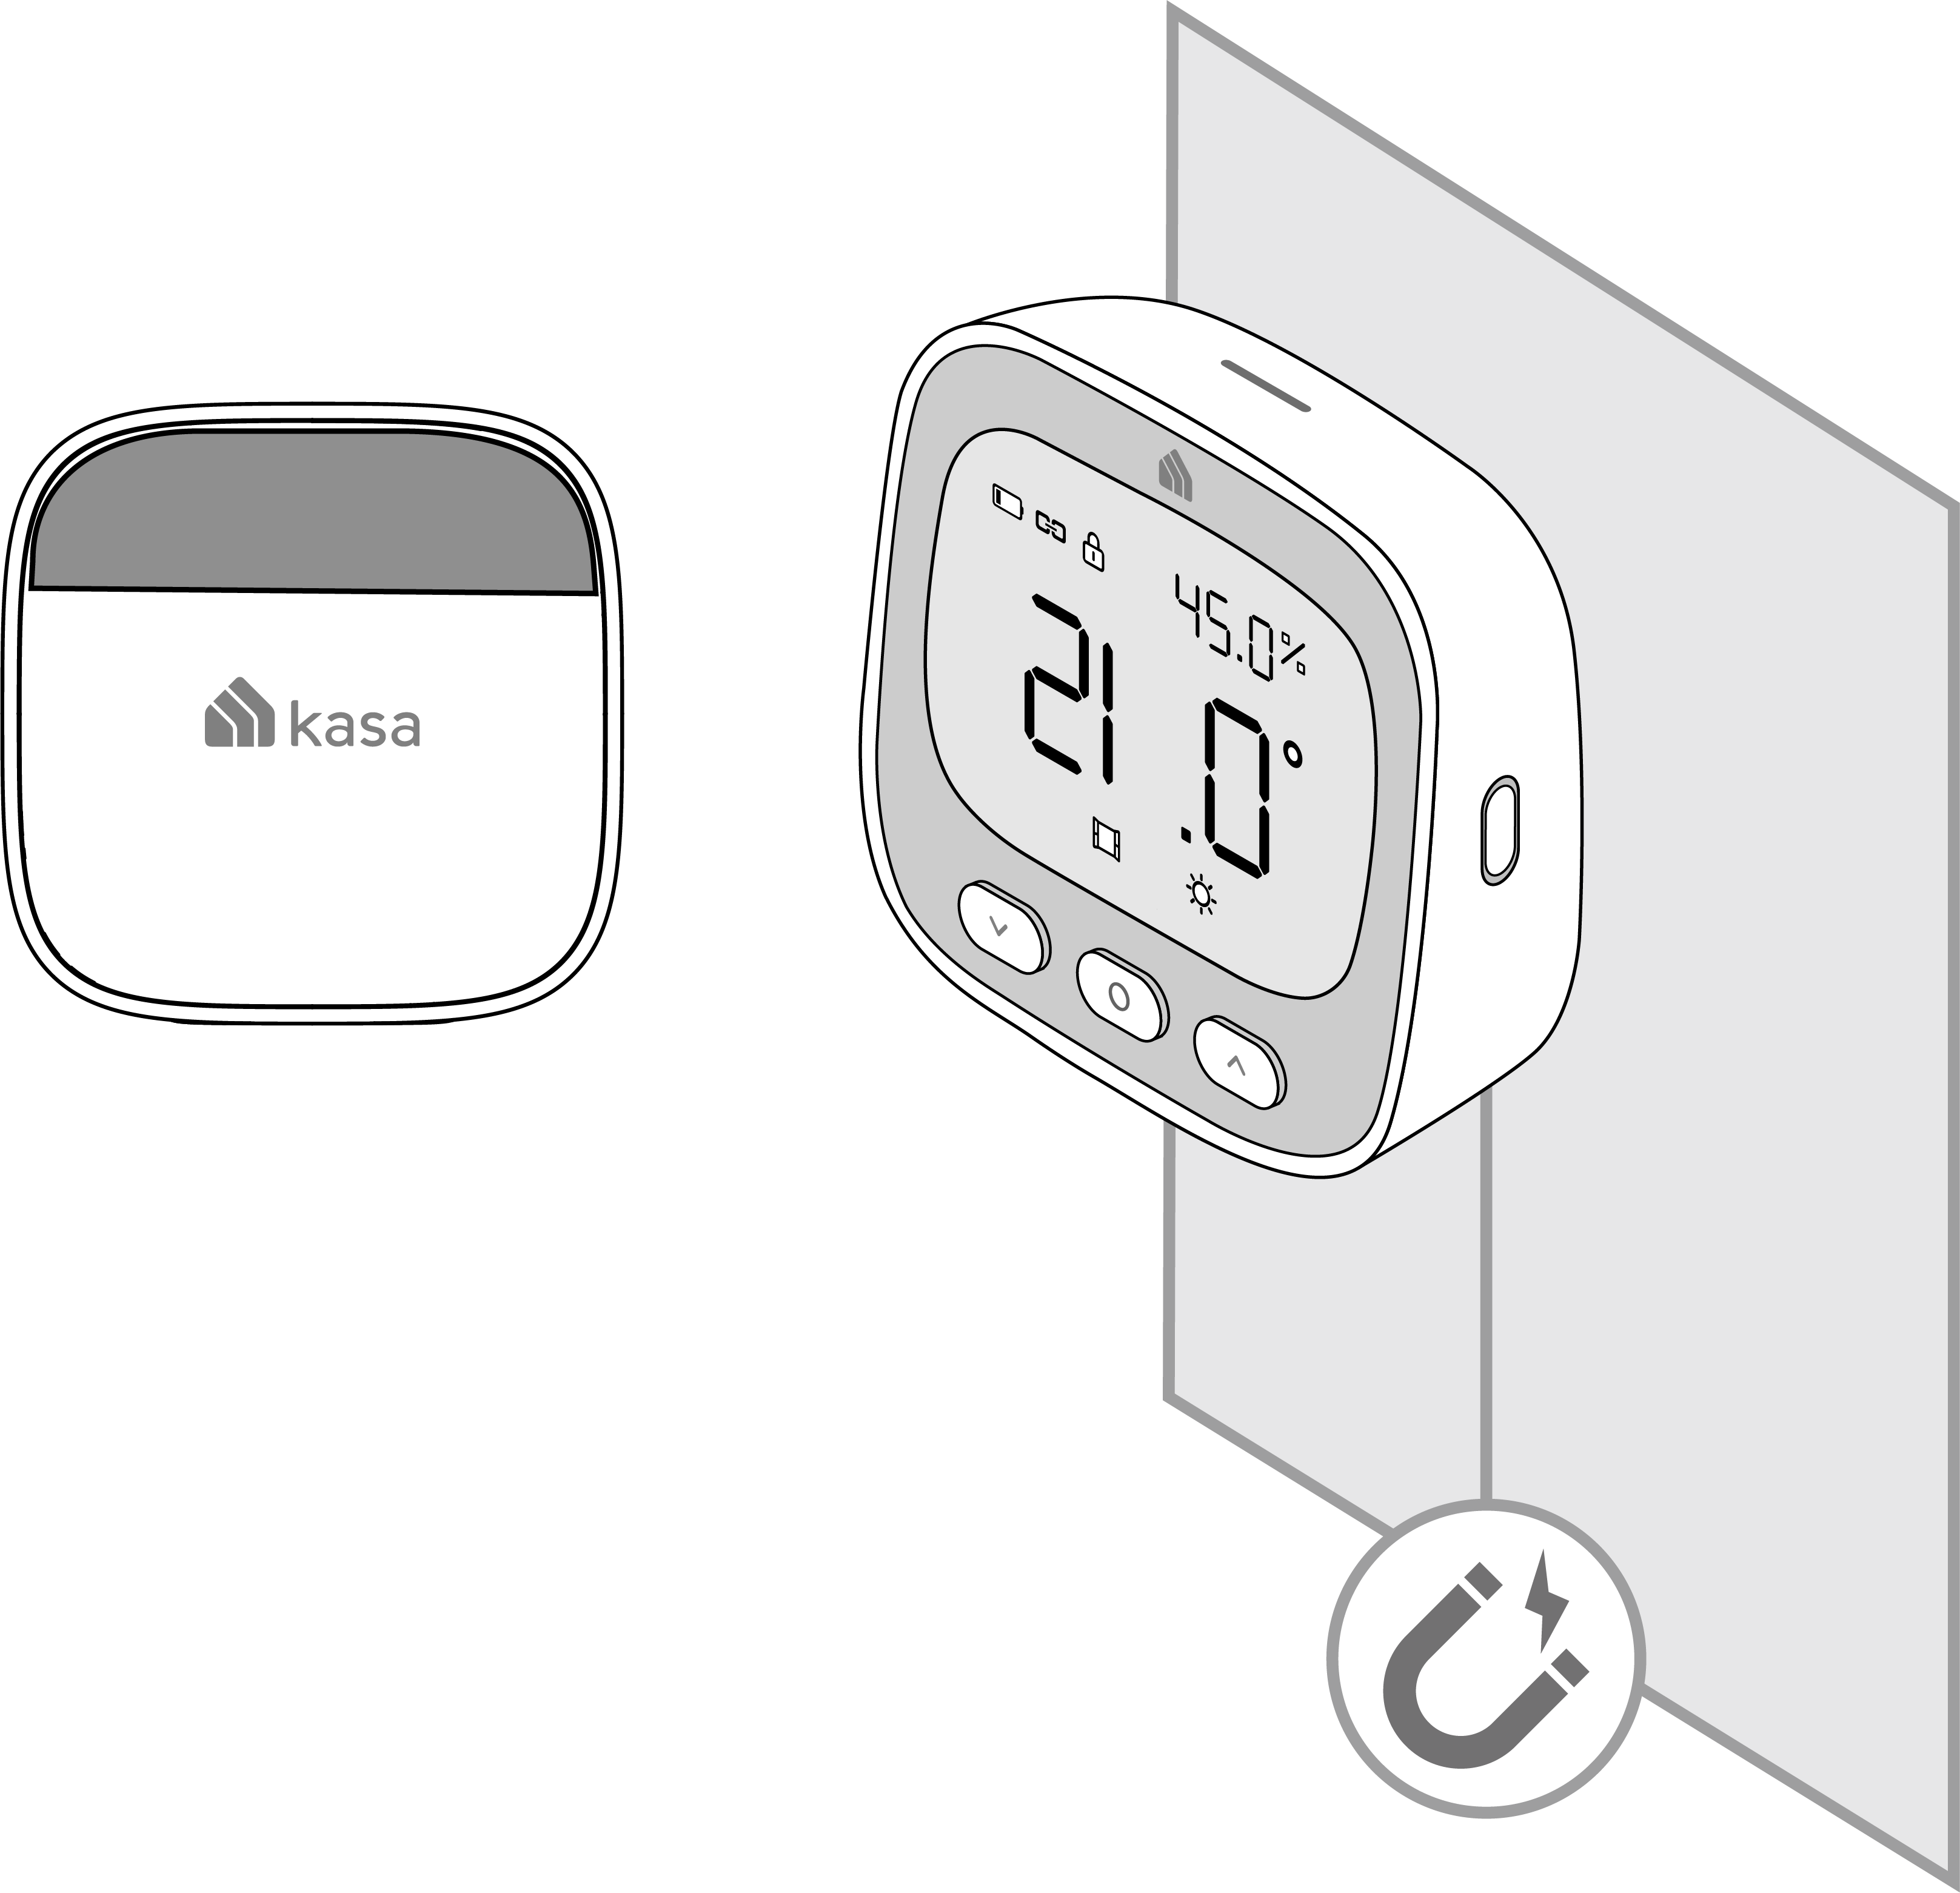
Option 2: Magnetical Mount
Attach the non-slip pad to the back and magnetically attach to a metallic surface.
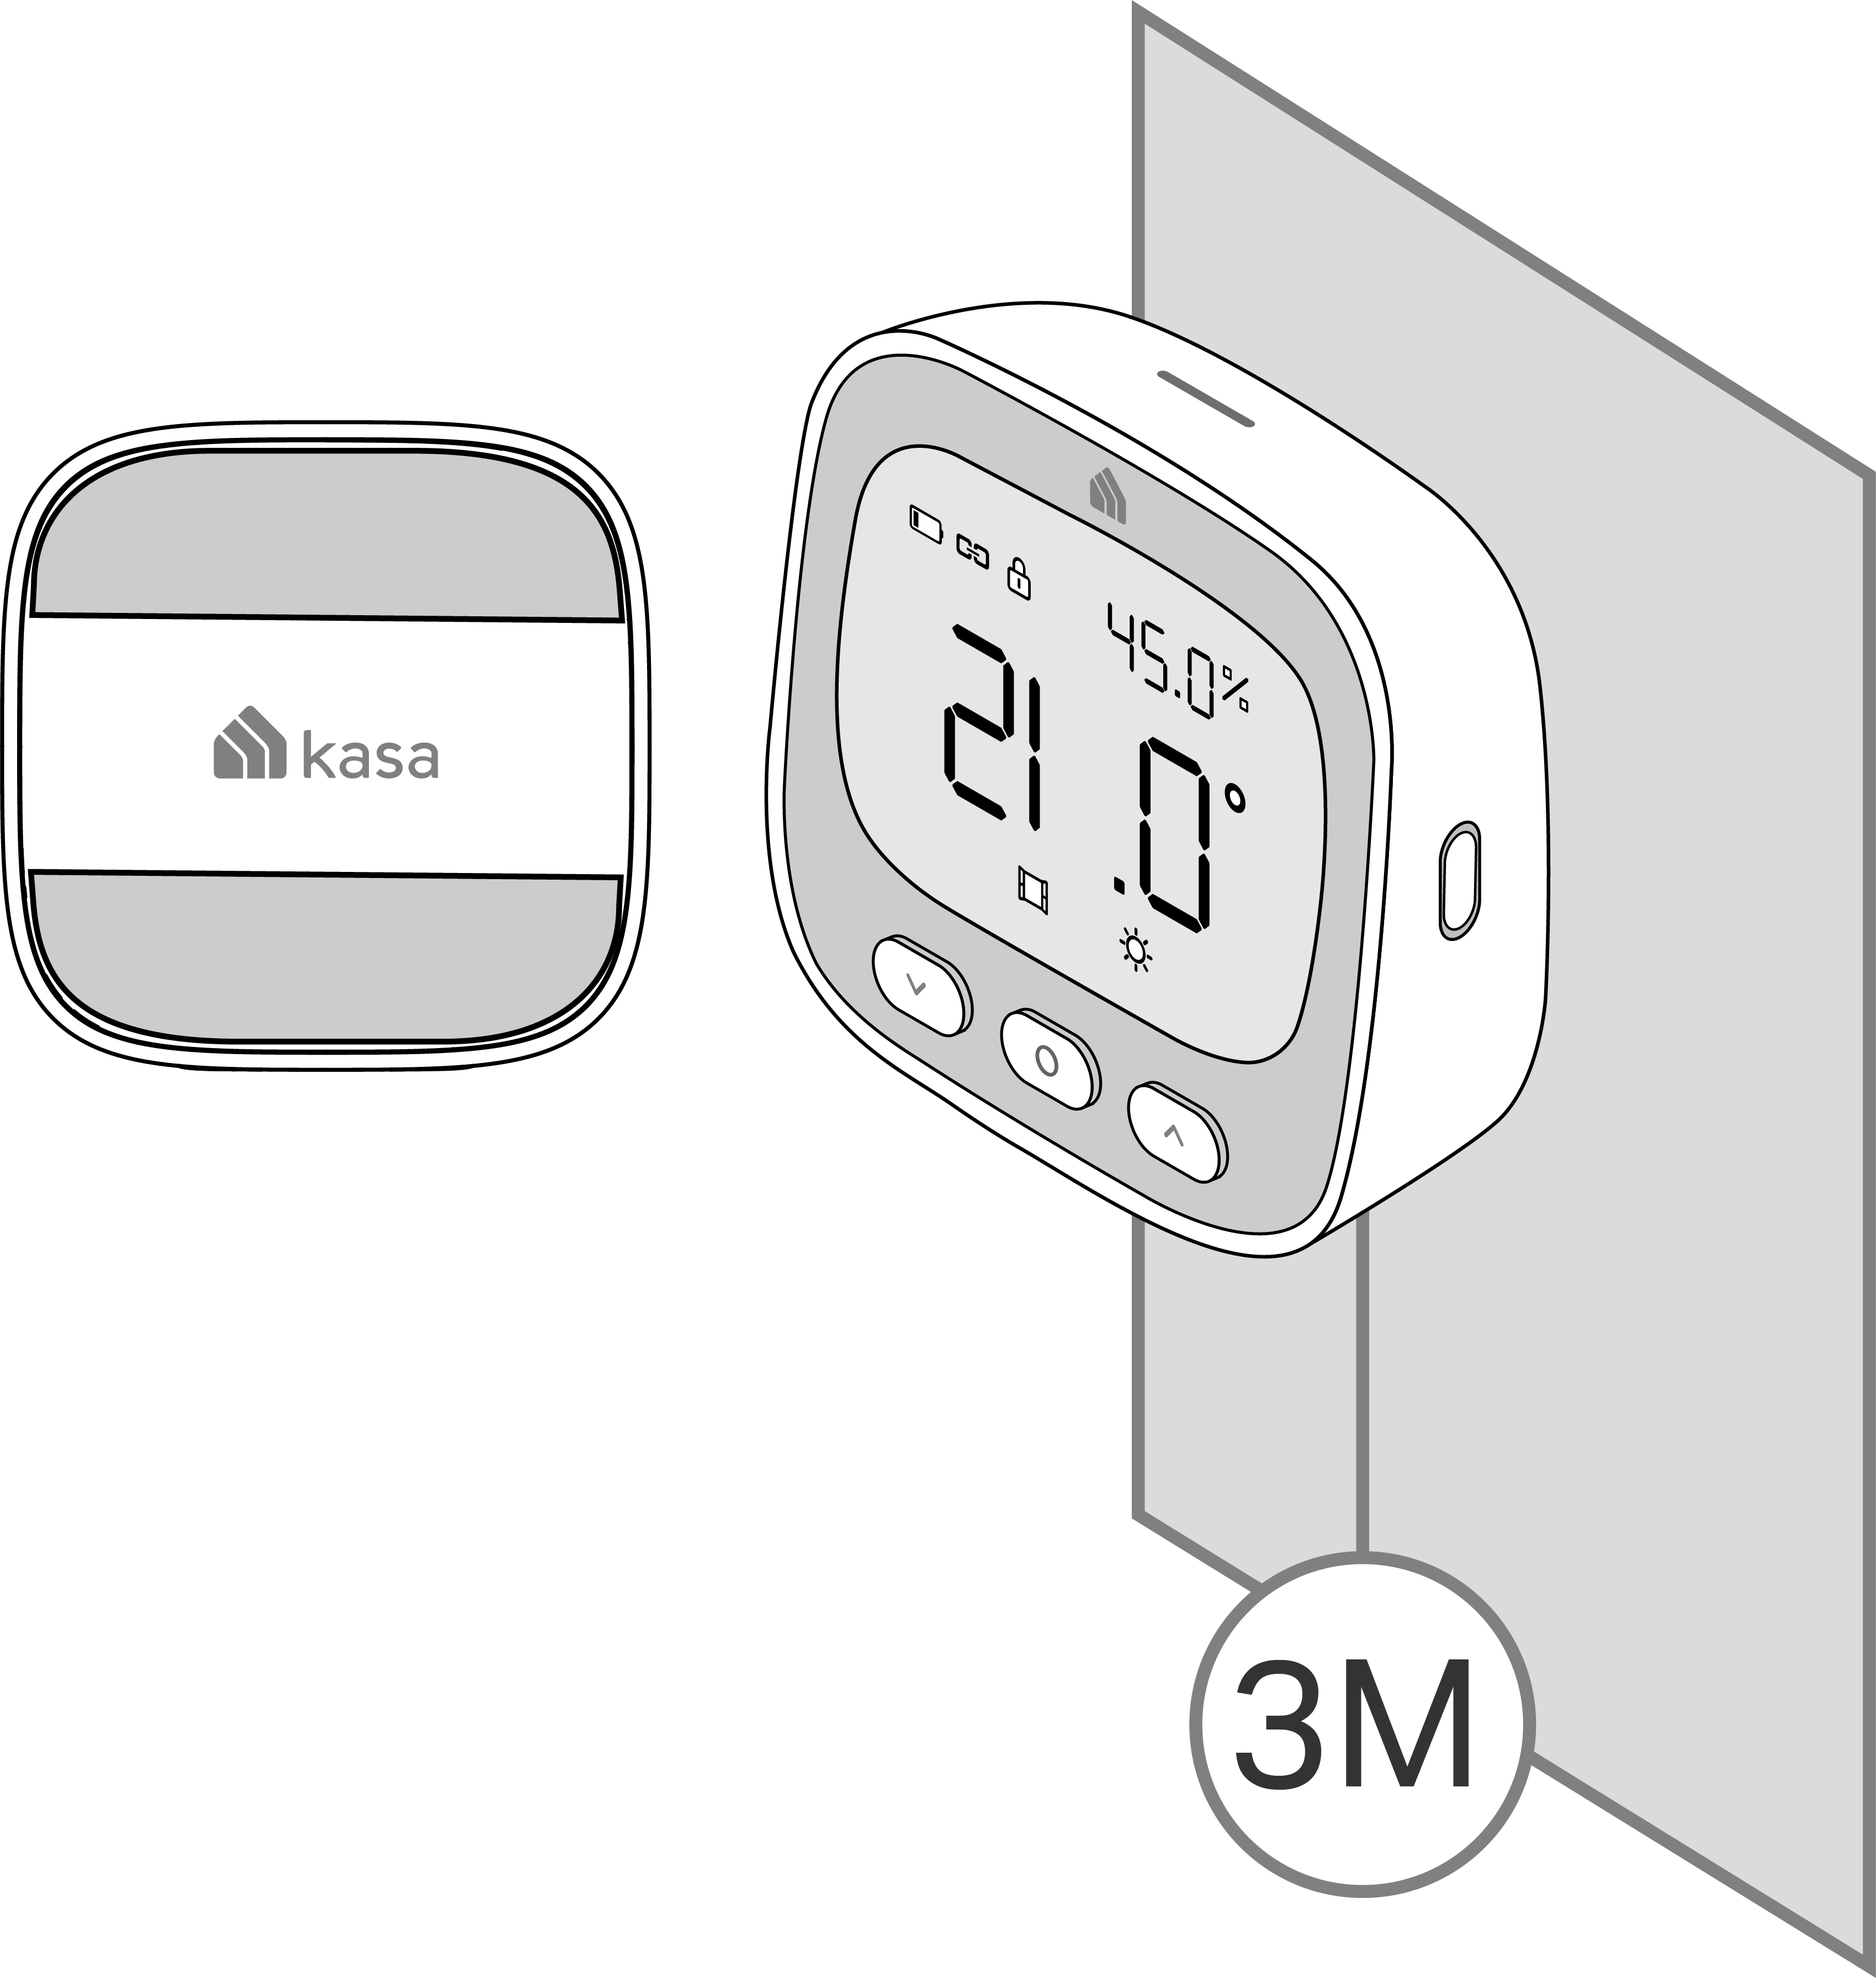
Option 3: 3M Adhesive Mount
Stick to a clean wall with the included adhesive.
Main Device Control
After setup, your device will be listed on the Home page. You can tap your device to manage it.
Home Page Status Page

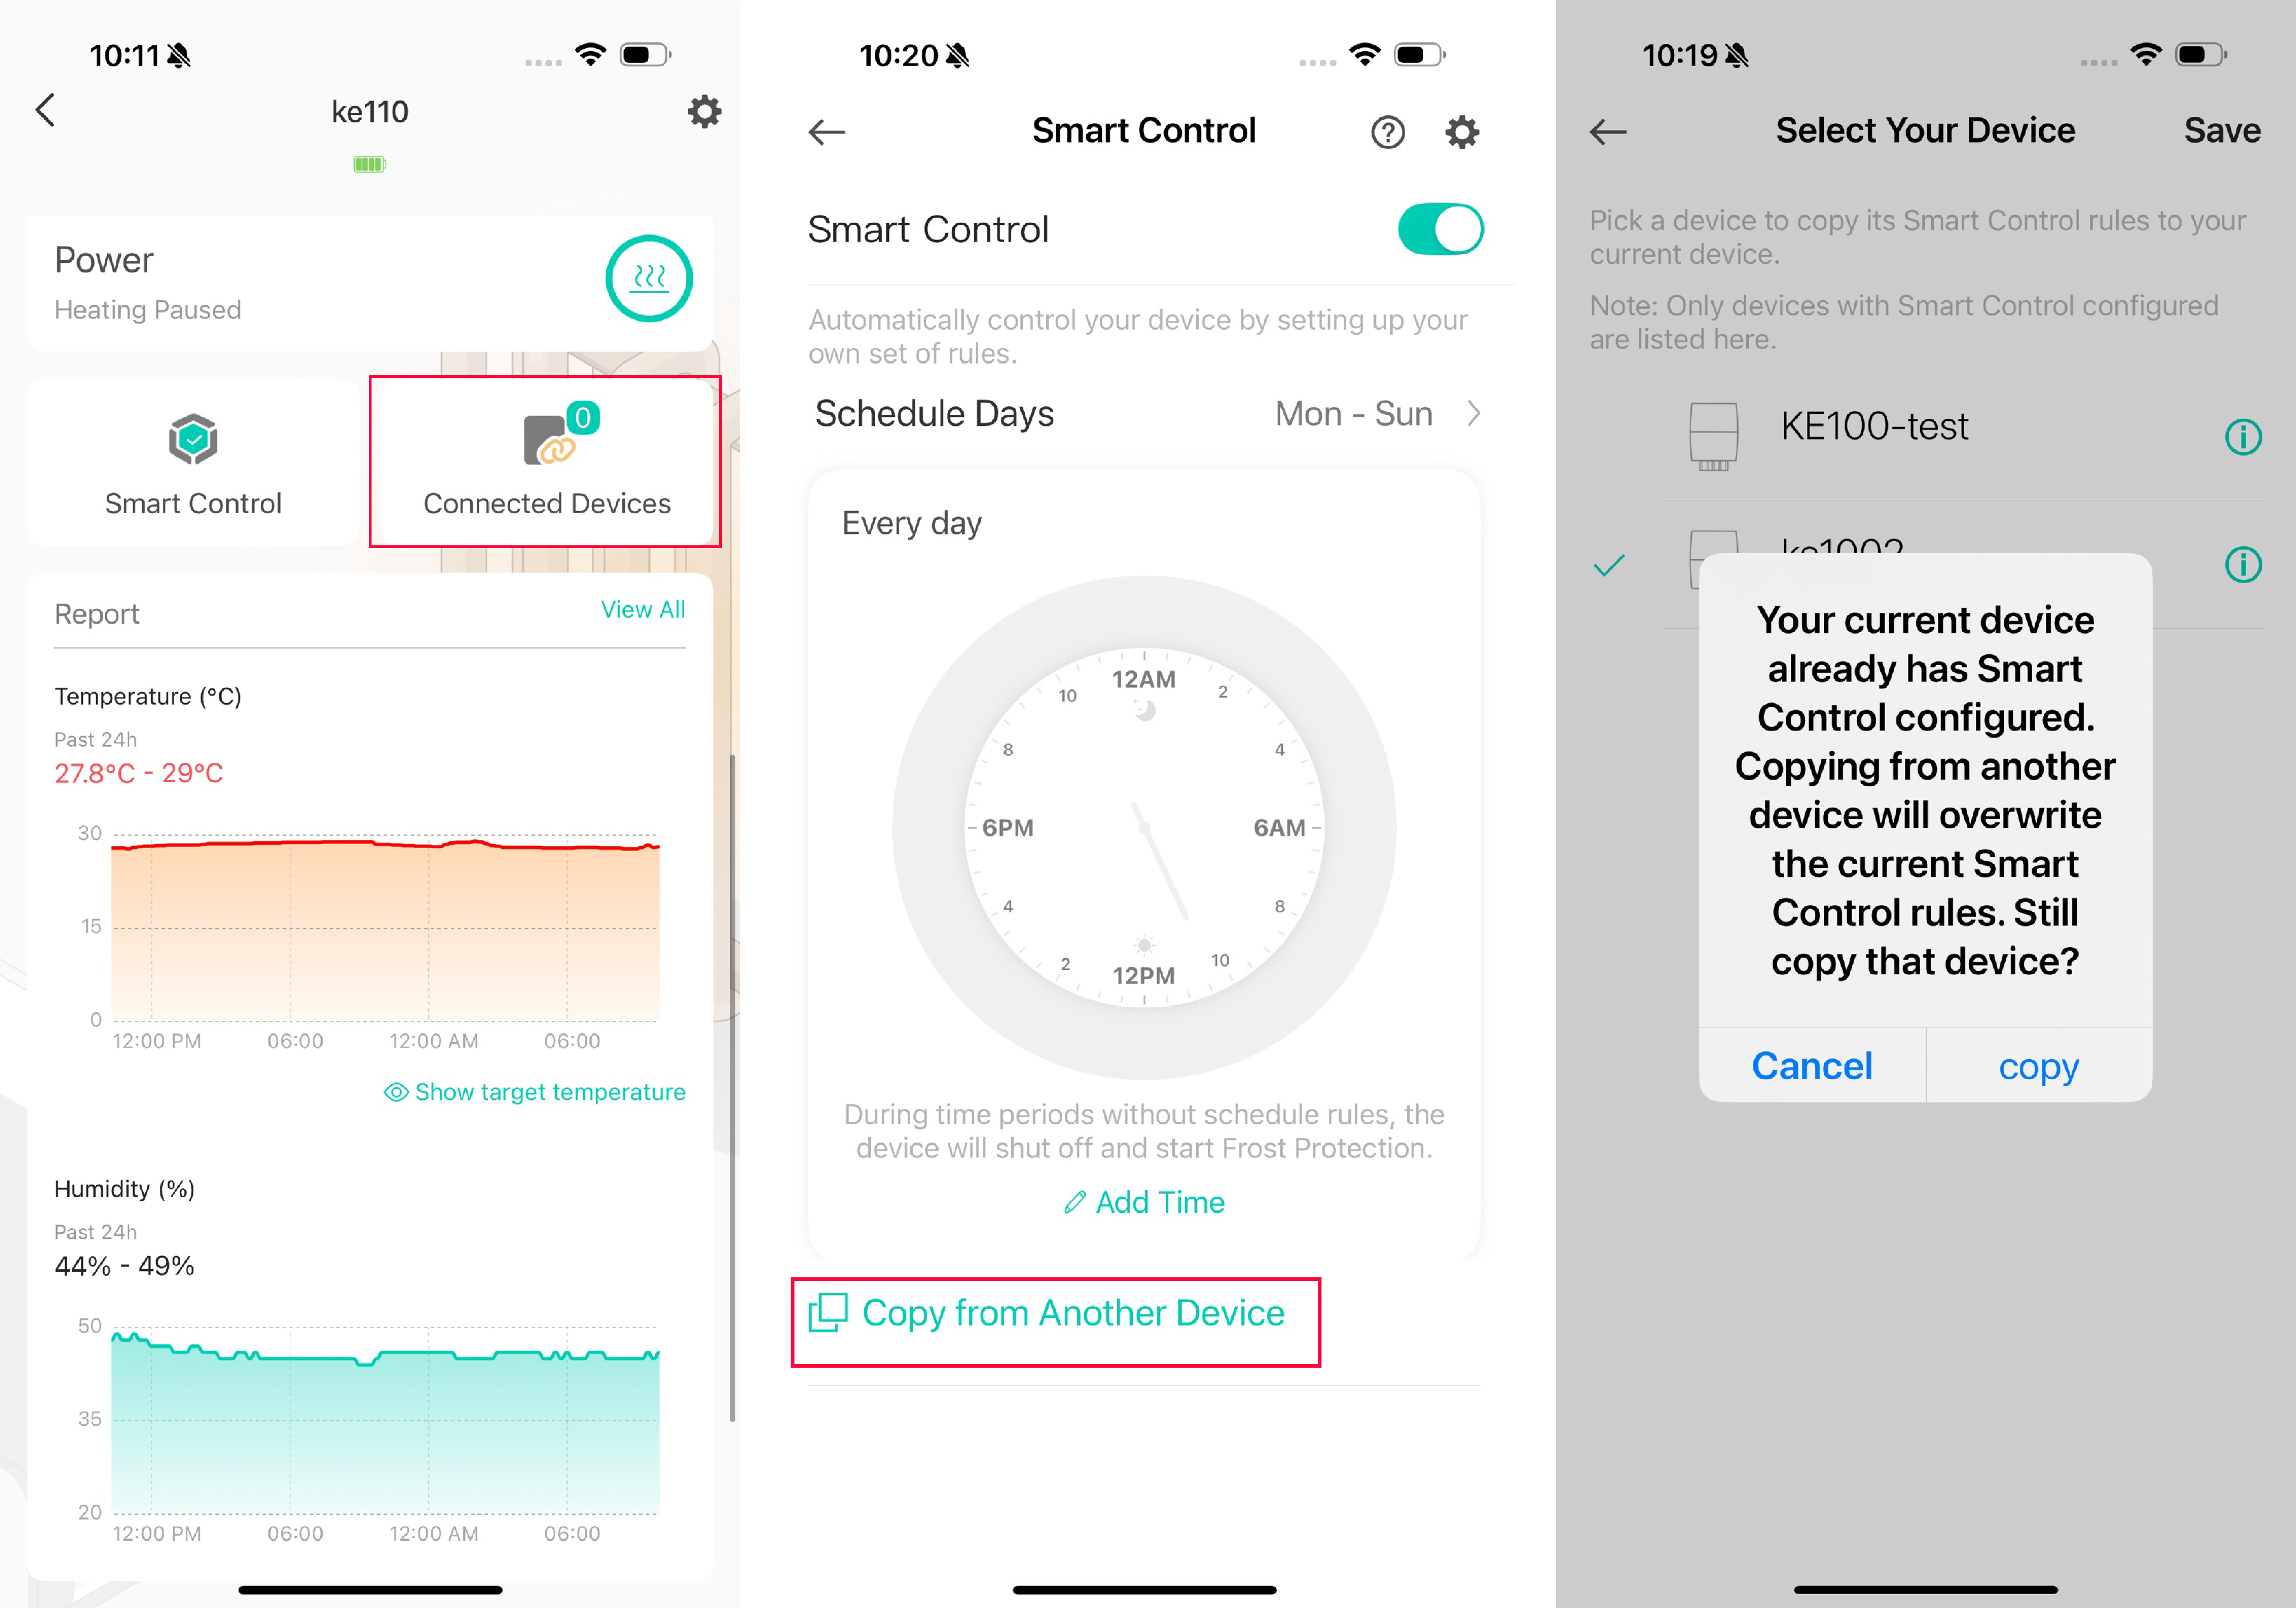
Check Temperature and Humidity Report
Add TRVs to KE110
Bind TRVs to your KE110 so you can control a single TRV in a room anytime, anywhere, or seamlessly control multiple TRVs simultaneously in a room with just a tap.
Set Smart Control
Automatically control the connected TRVs by settings up your own set of rule to regulate the temperature. You can set the temperature control for each day, or copy smart control rules from another device.
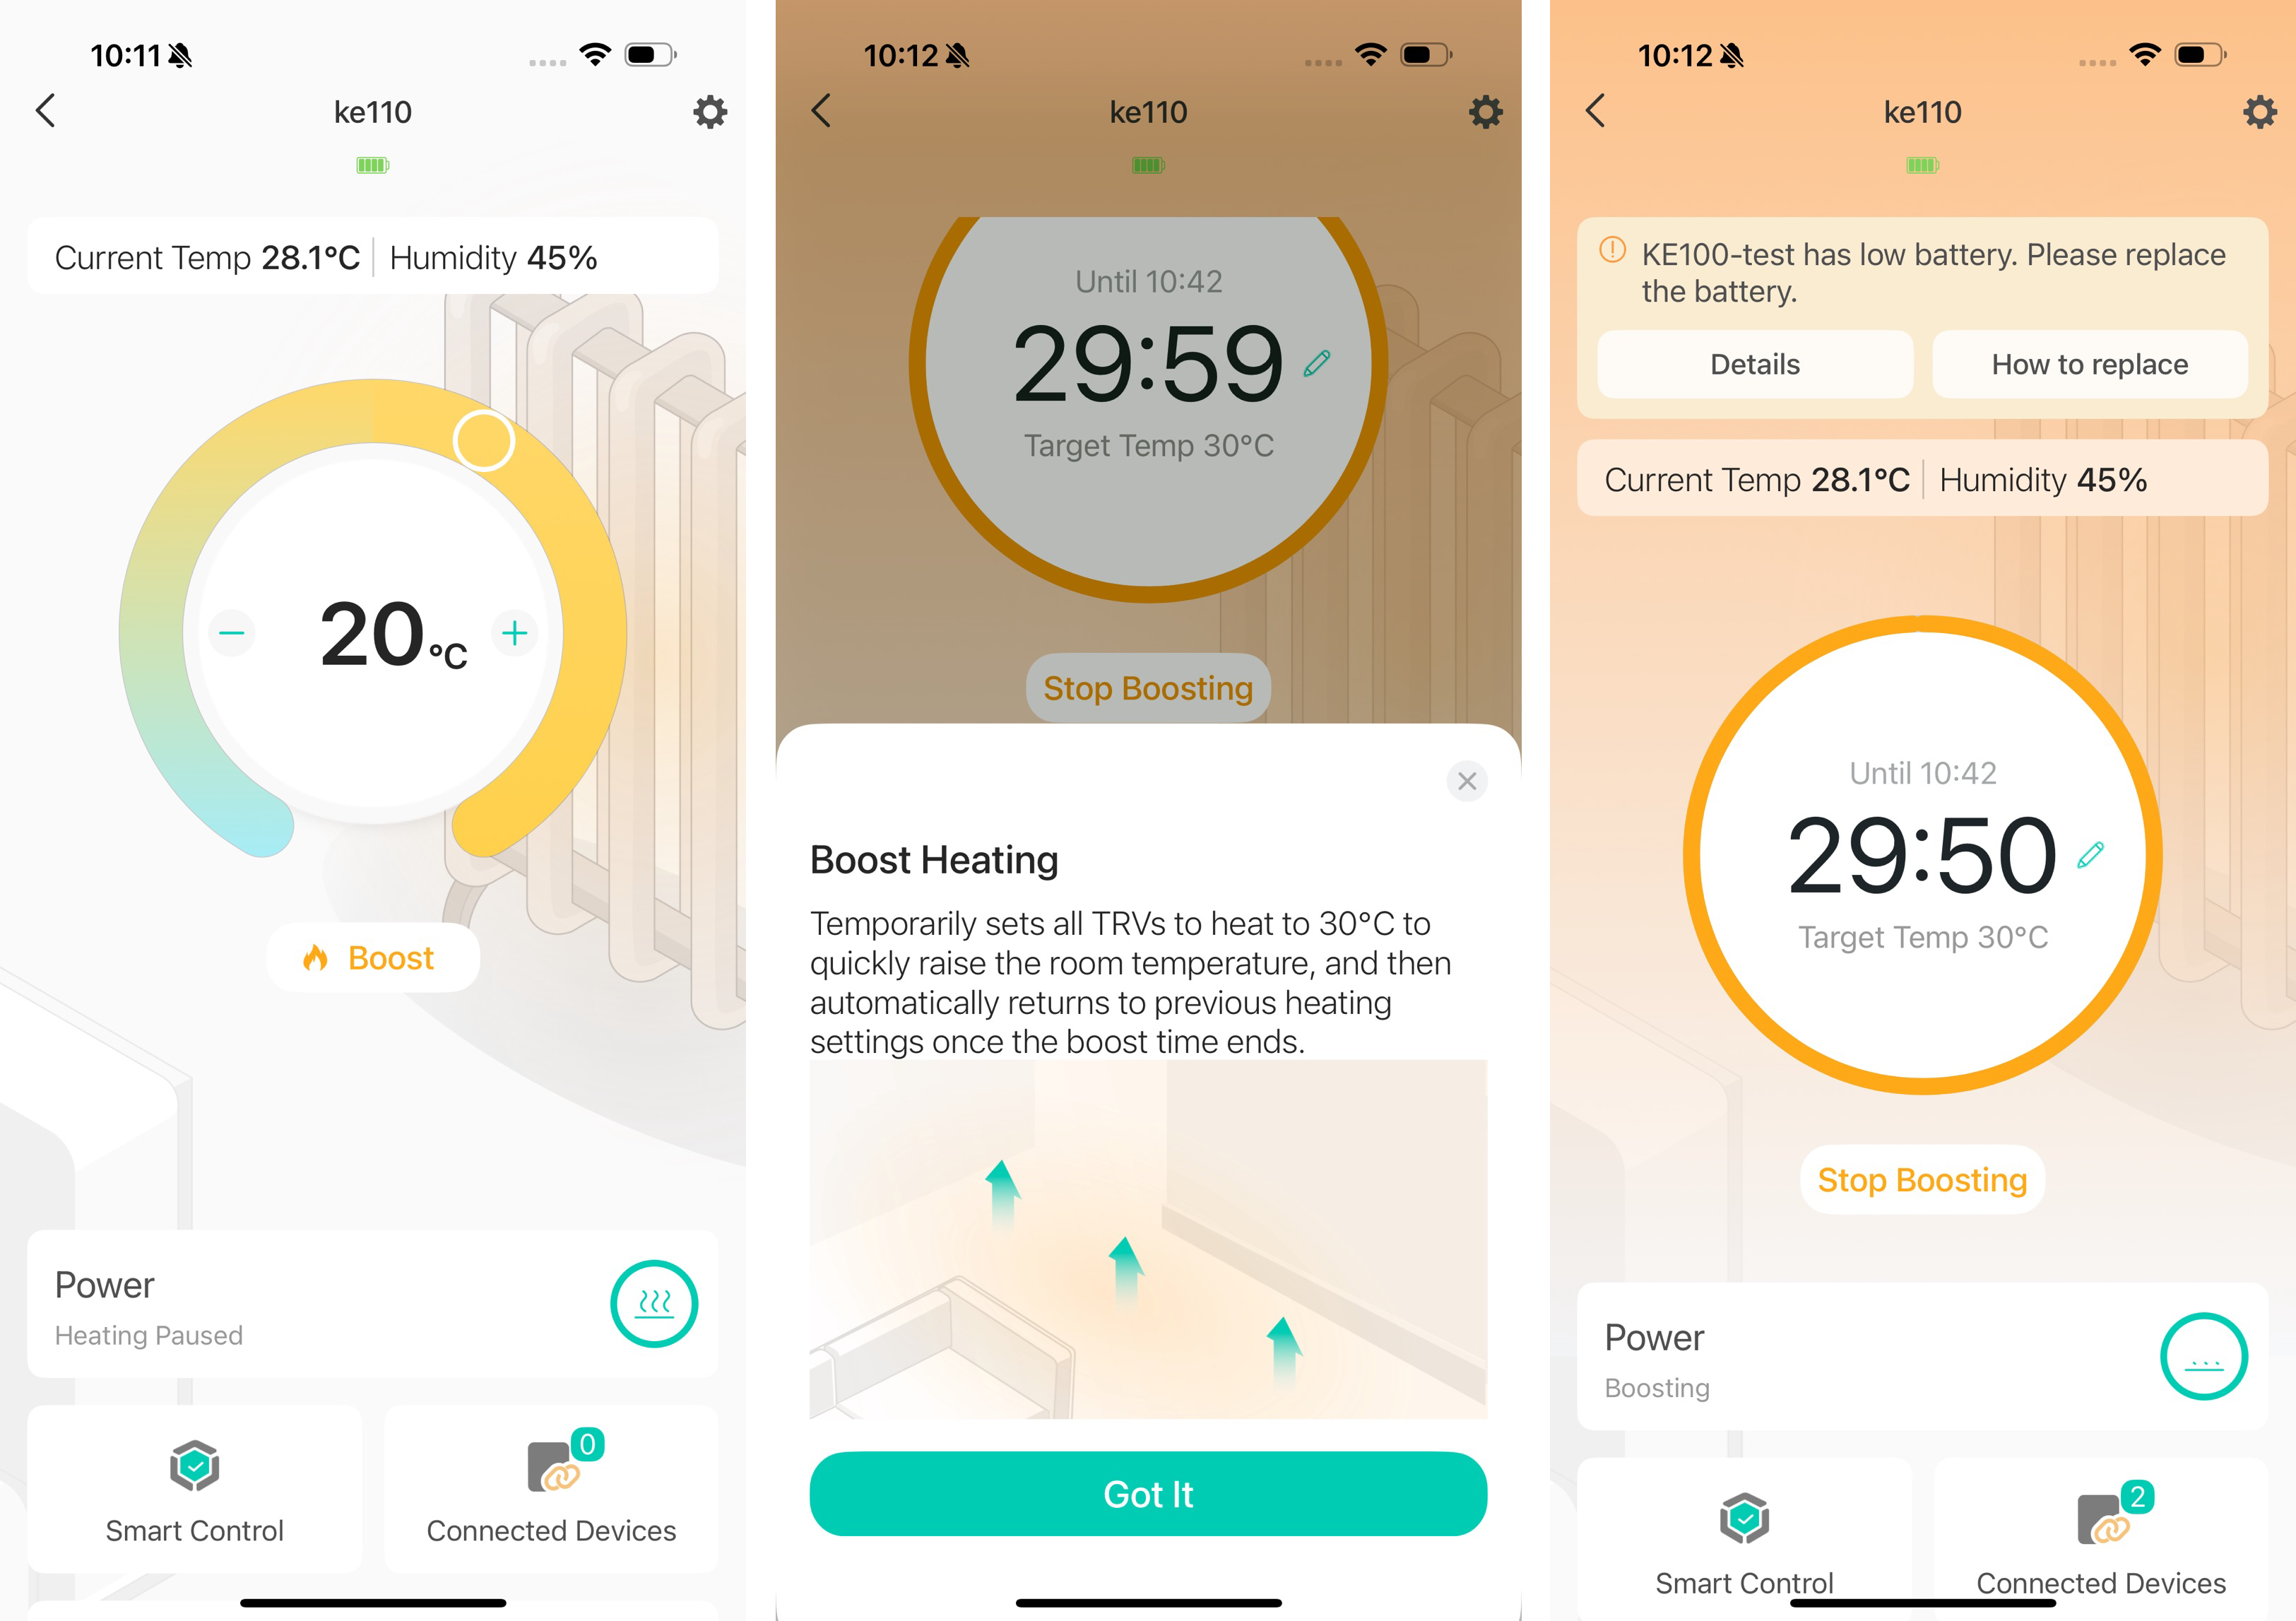
Start Boost Heating
Tap Boost on the Status page to quickly start Boost heating that will raise temperature to 30℃. You can set the Boost duration in Device Settings.
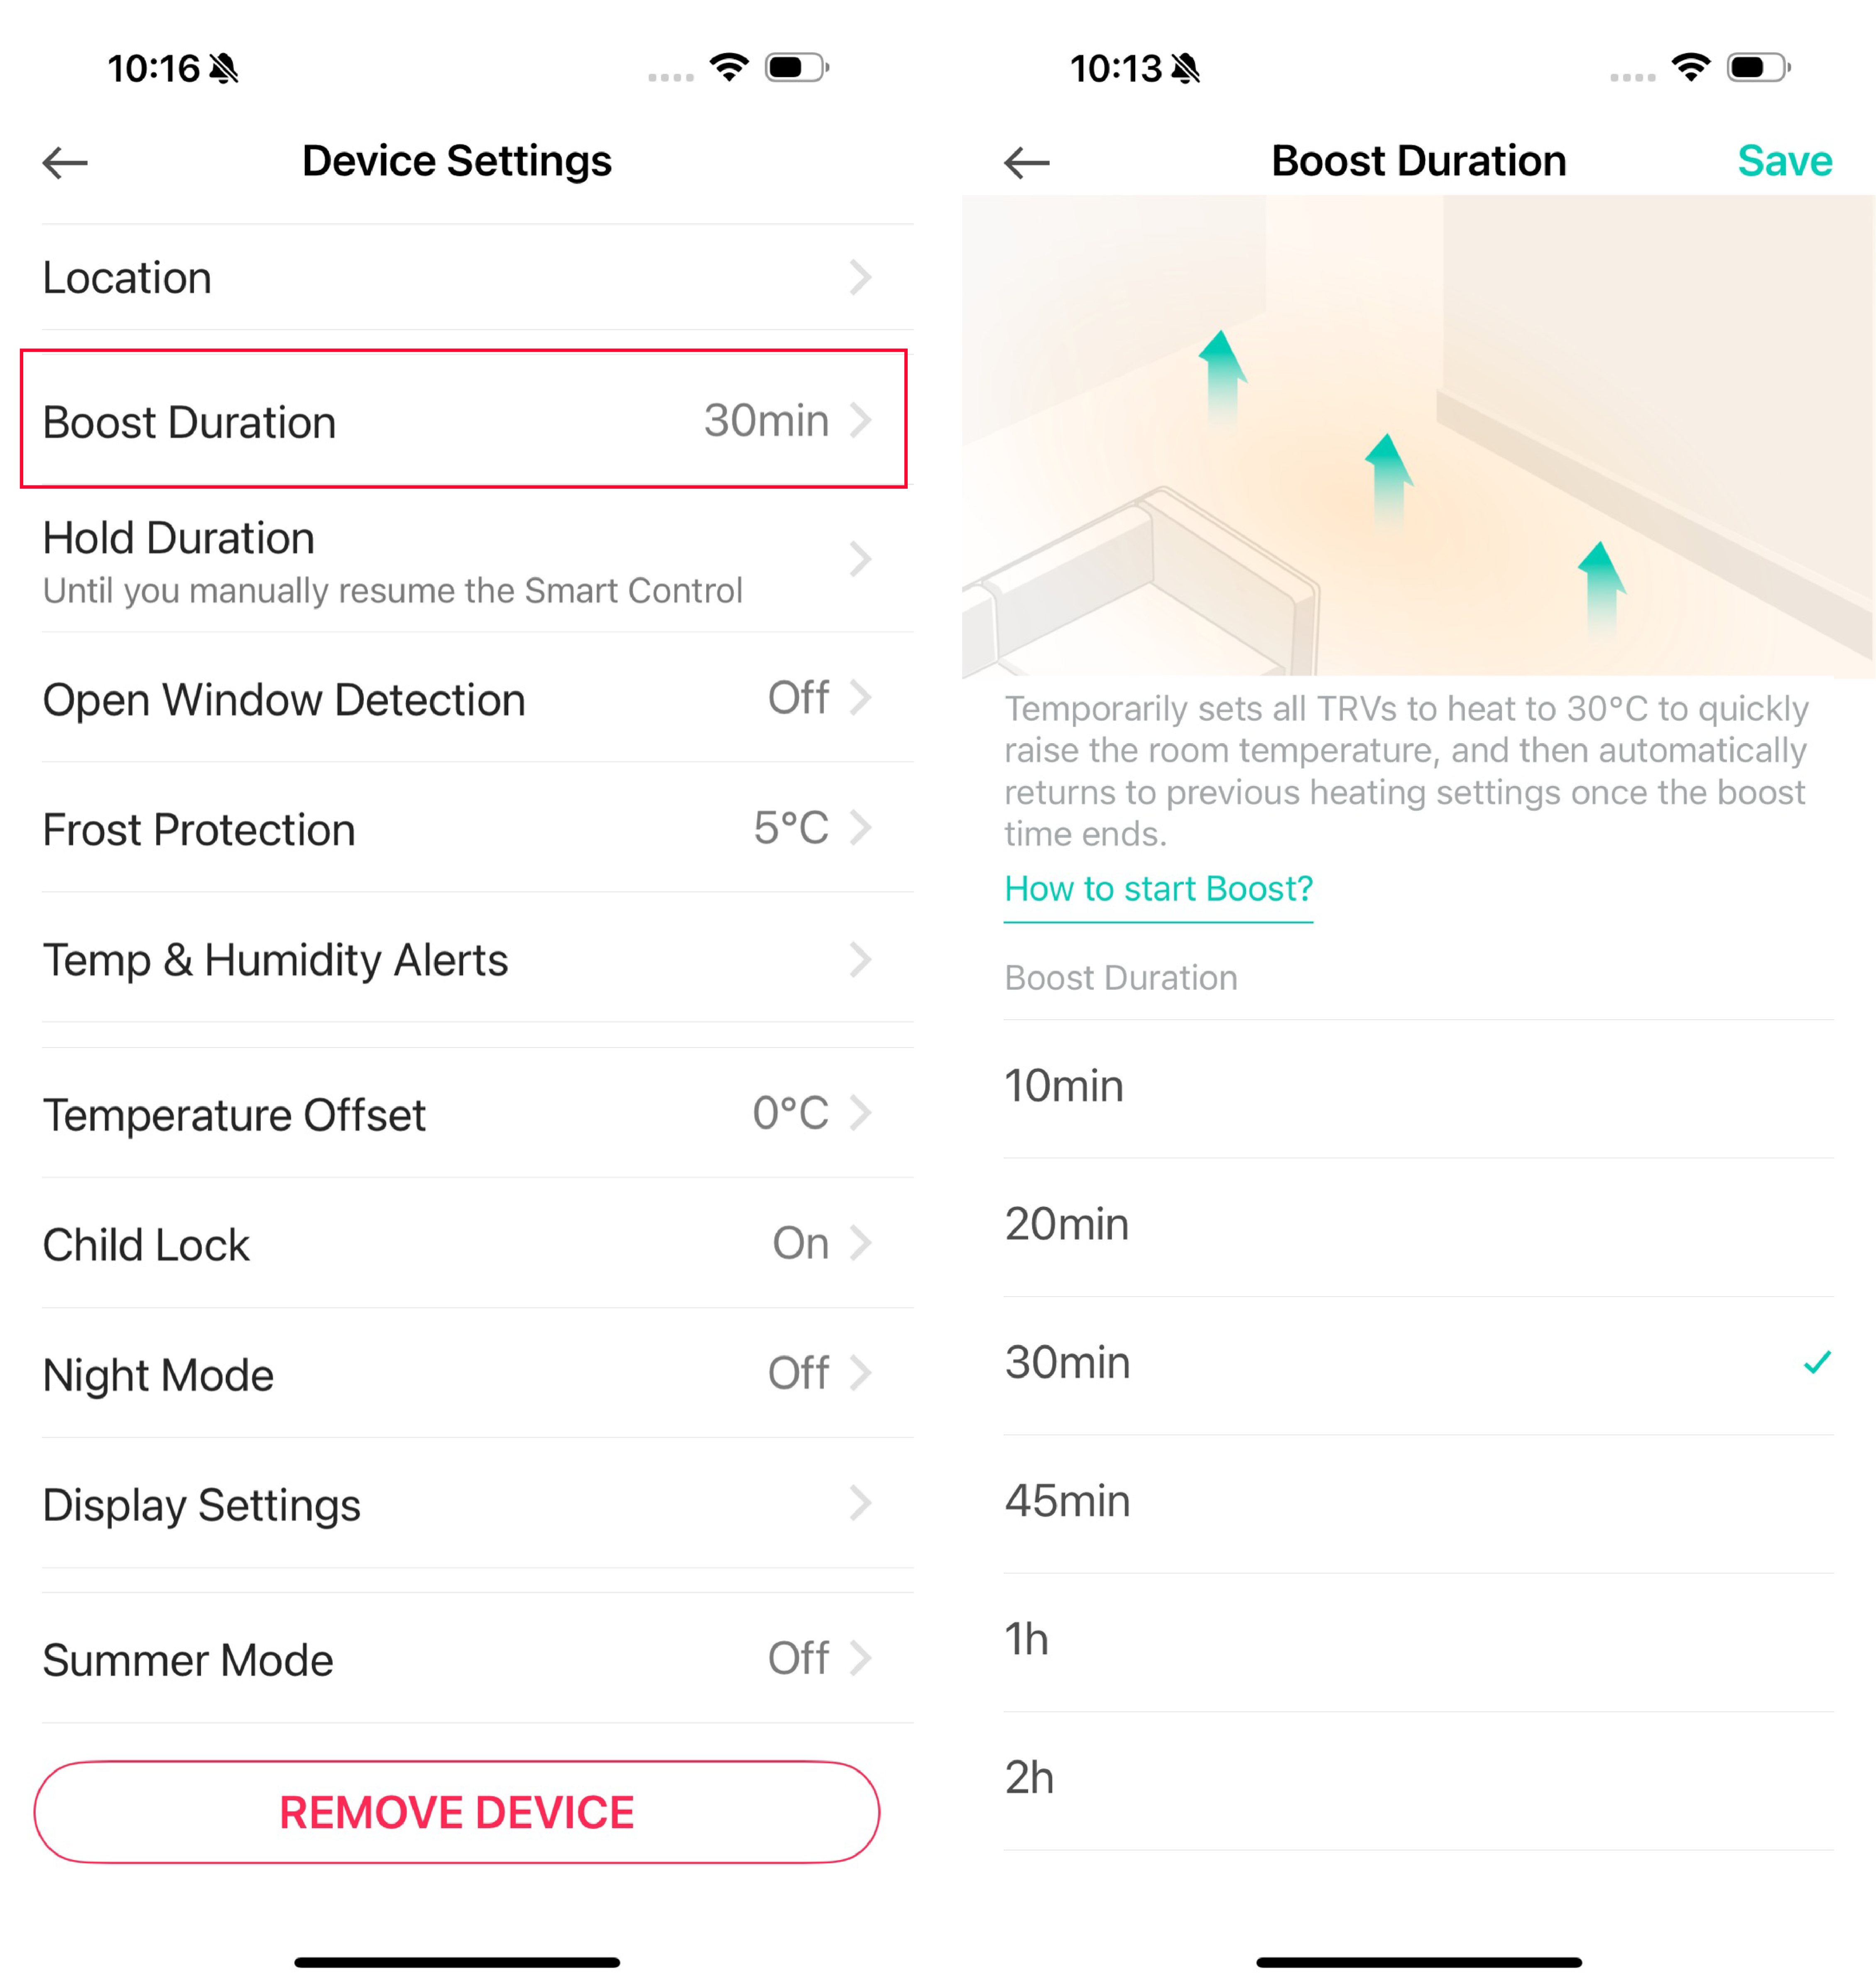
Manage Device Settings
Tap the icon on the upper right corner on the Status page to enter the Device Settings page.
1. Set Boost Duration
Set how long you want the Boost to maintain.
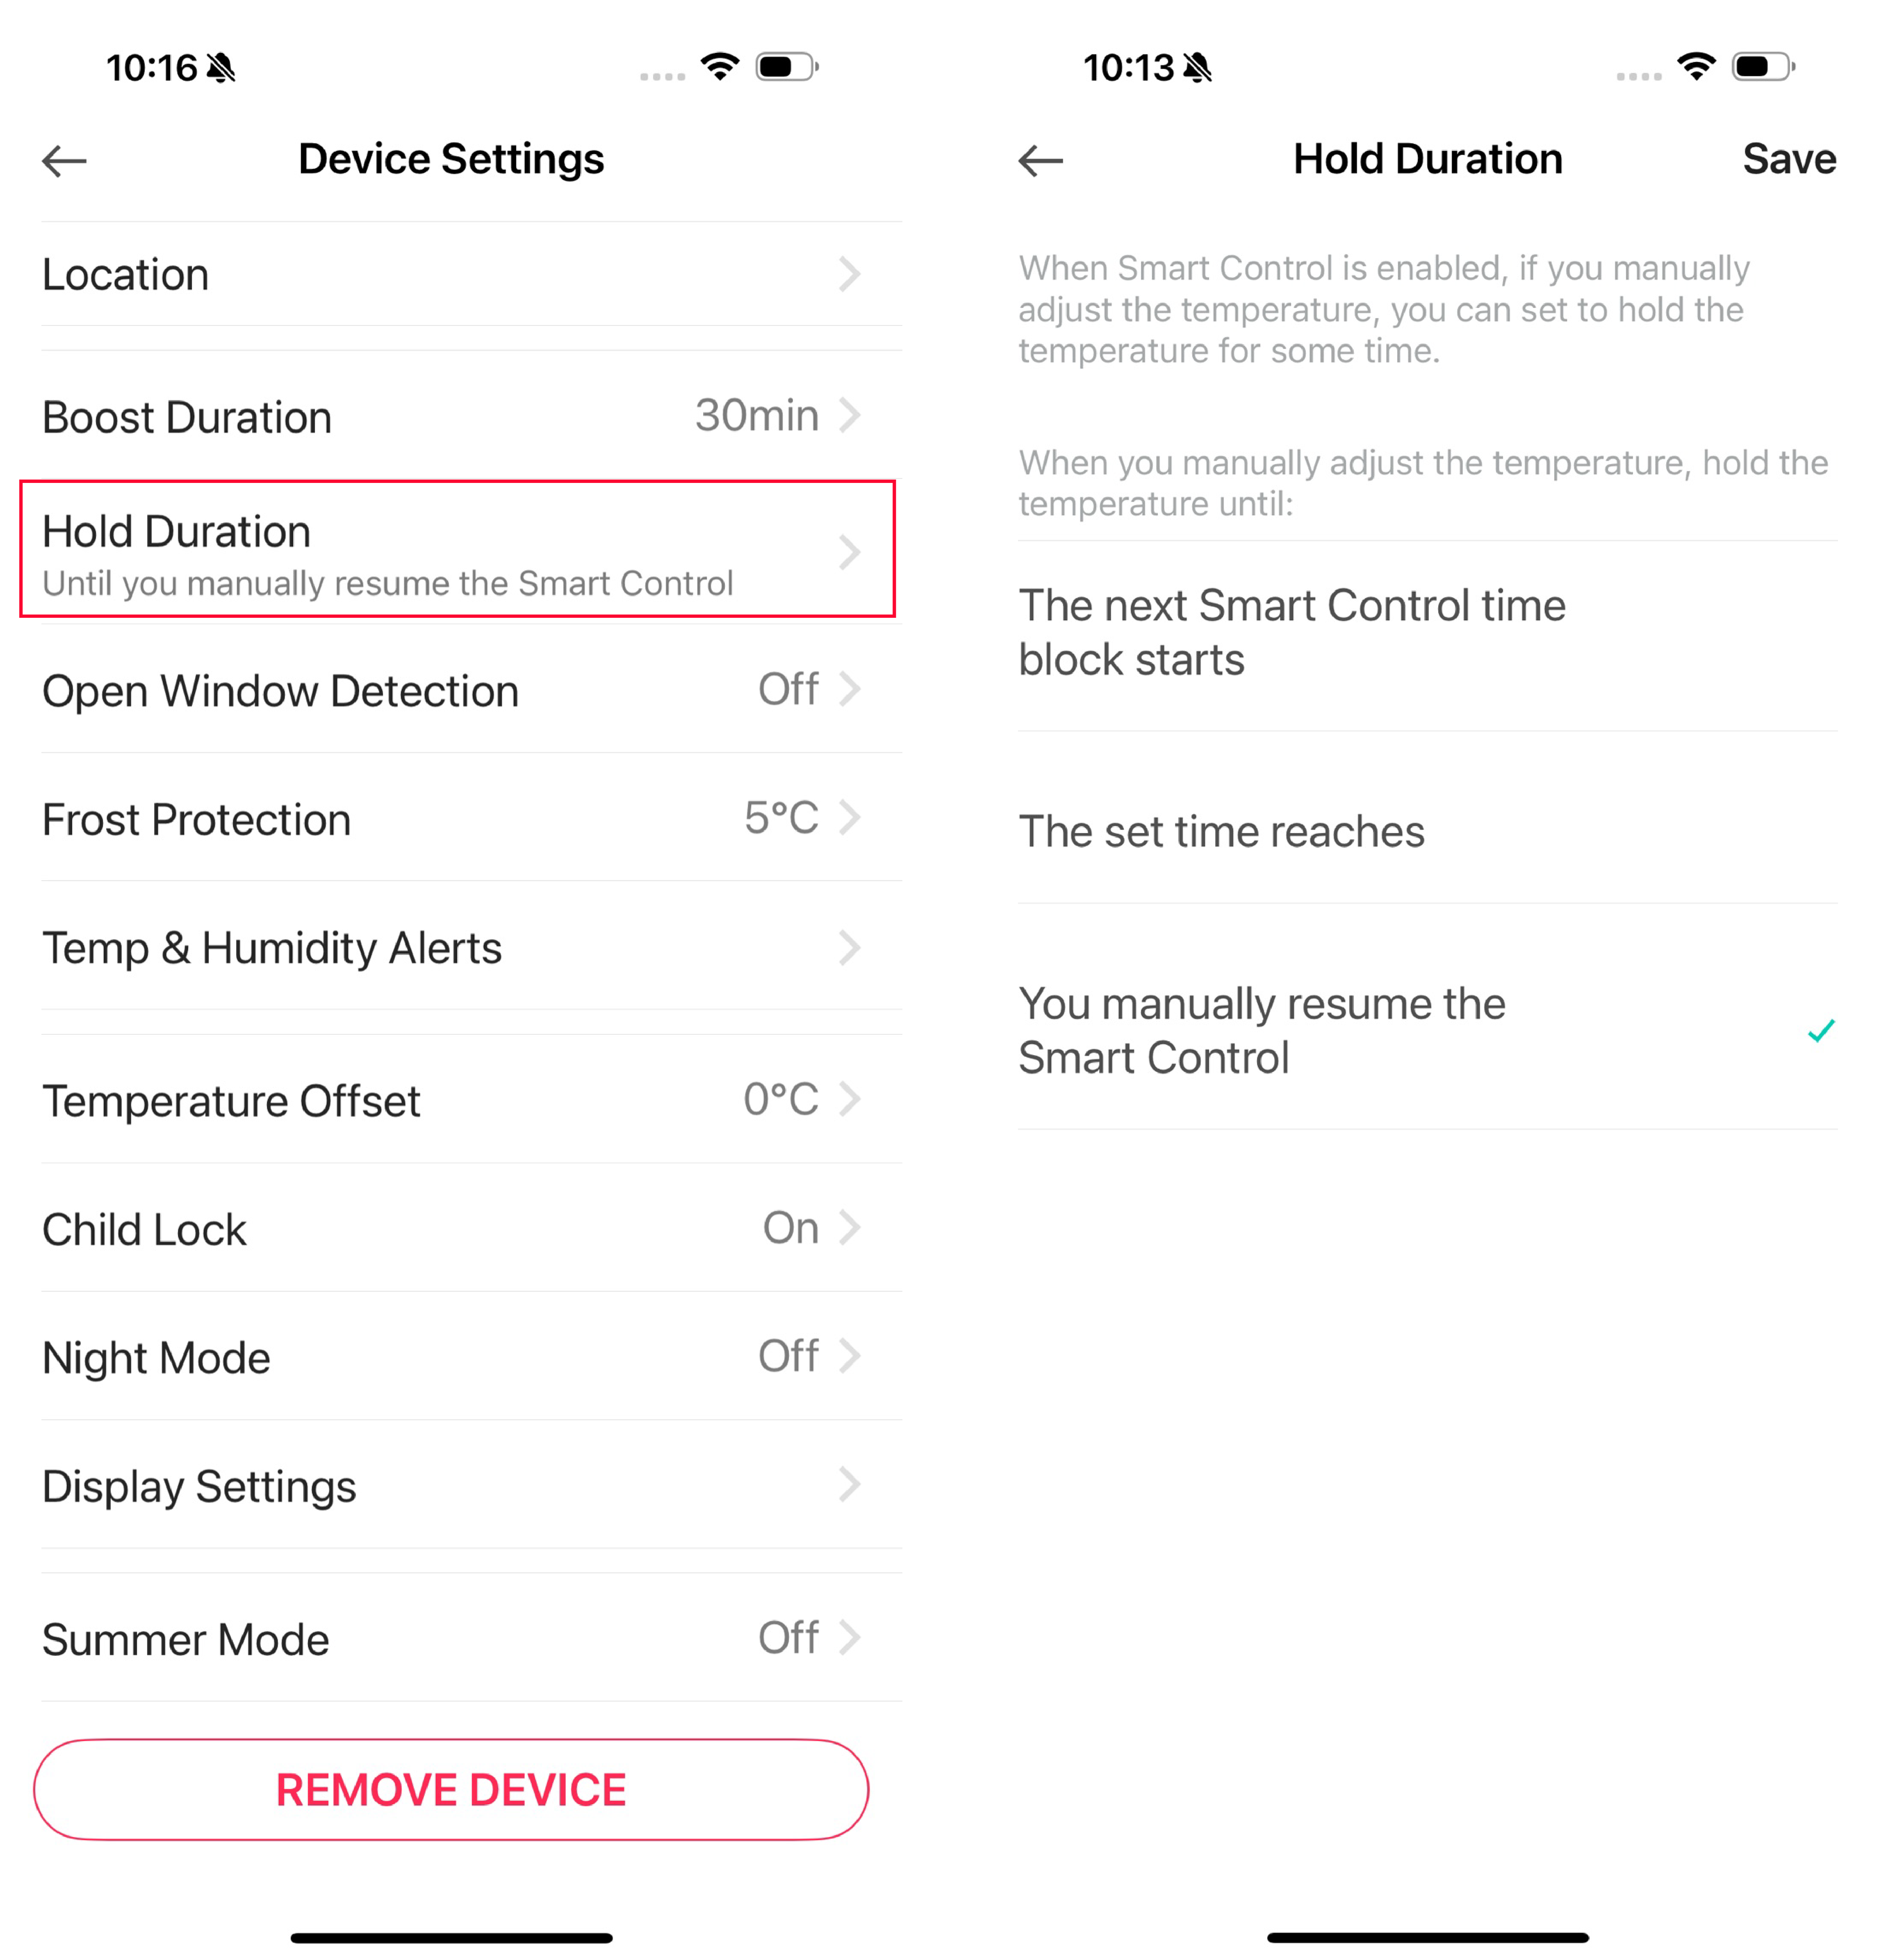
2. Set Hold Duration
When Smart Control is enabled, if you manually adjust the temperature, you can set to hold the temperature for some time.
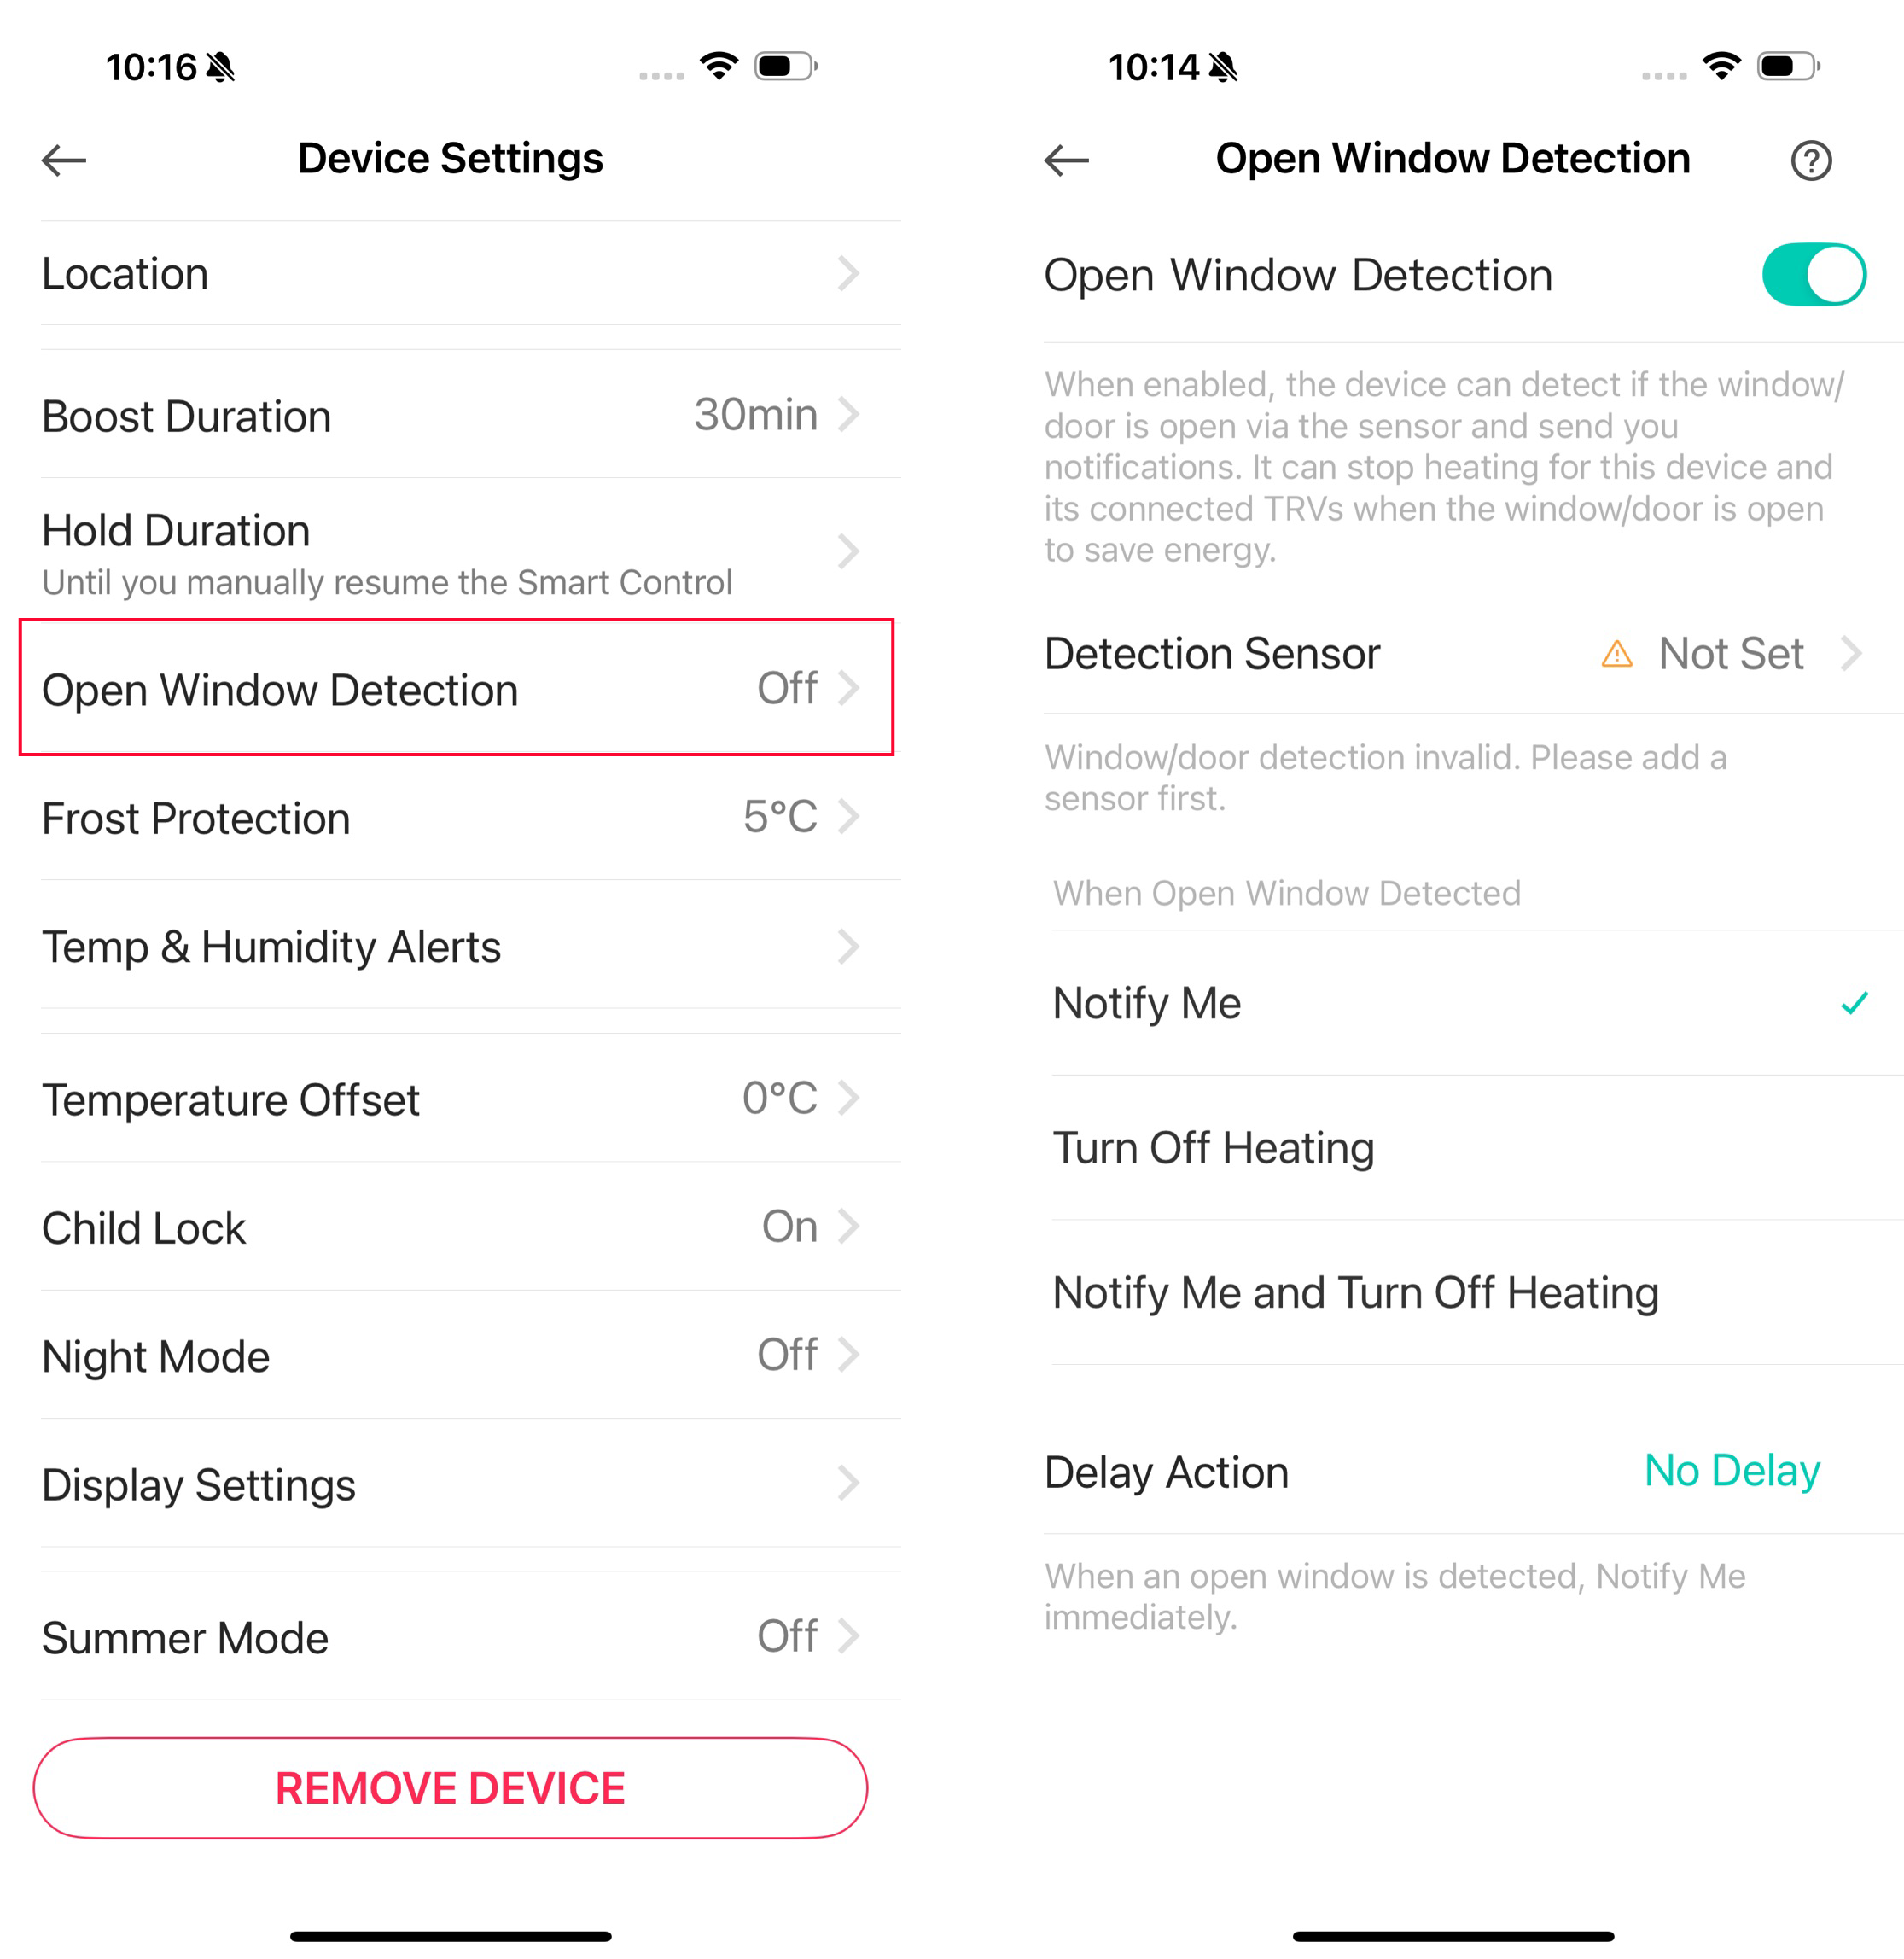
3. Open Window Detection
When enabled, the device can detect if a window/door is open via the sensor. It can stop heating for the connected TRVs when the window/door is detected open to save energy.
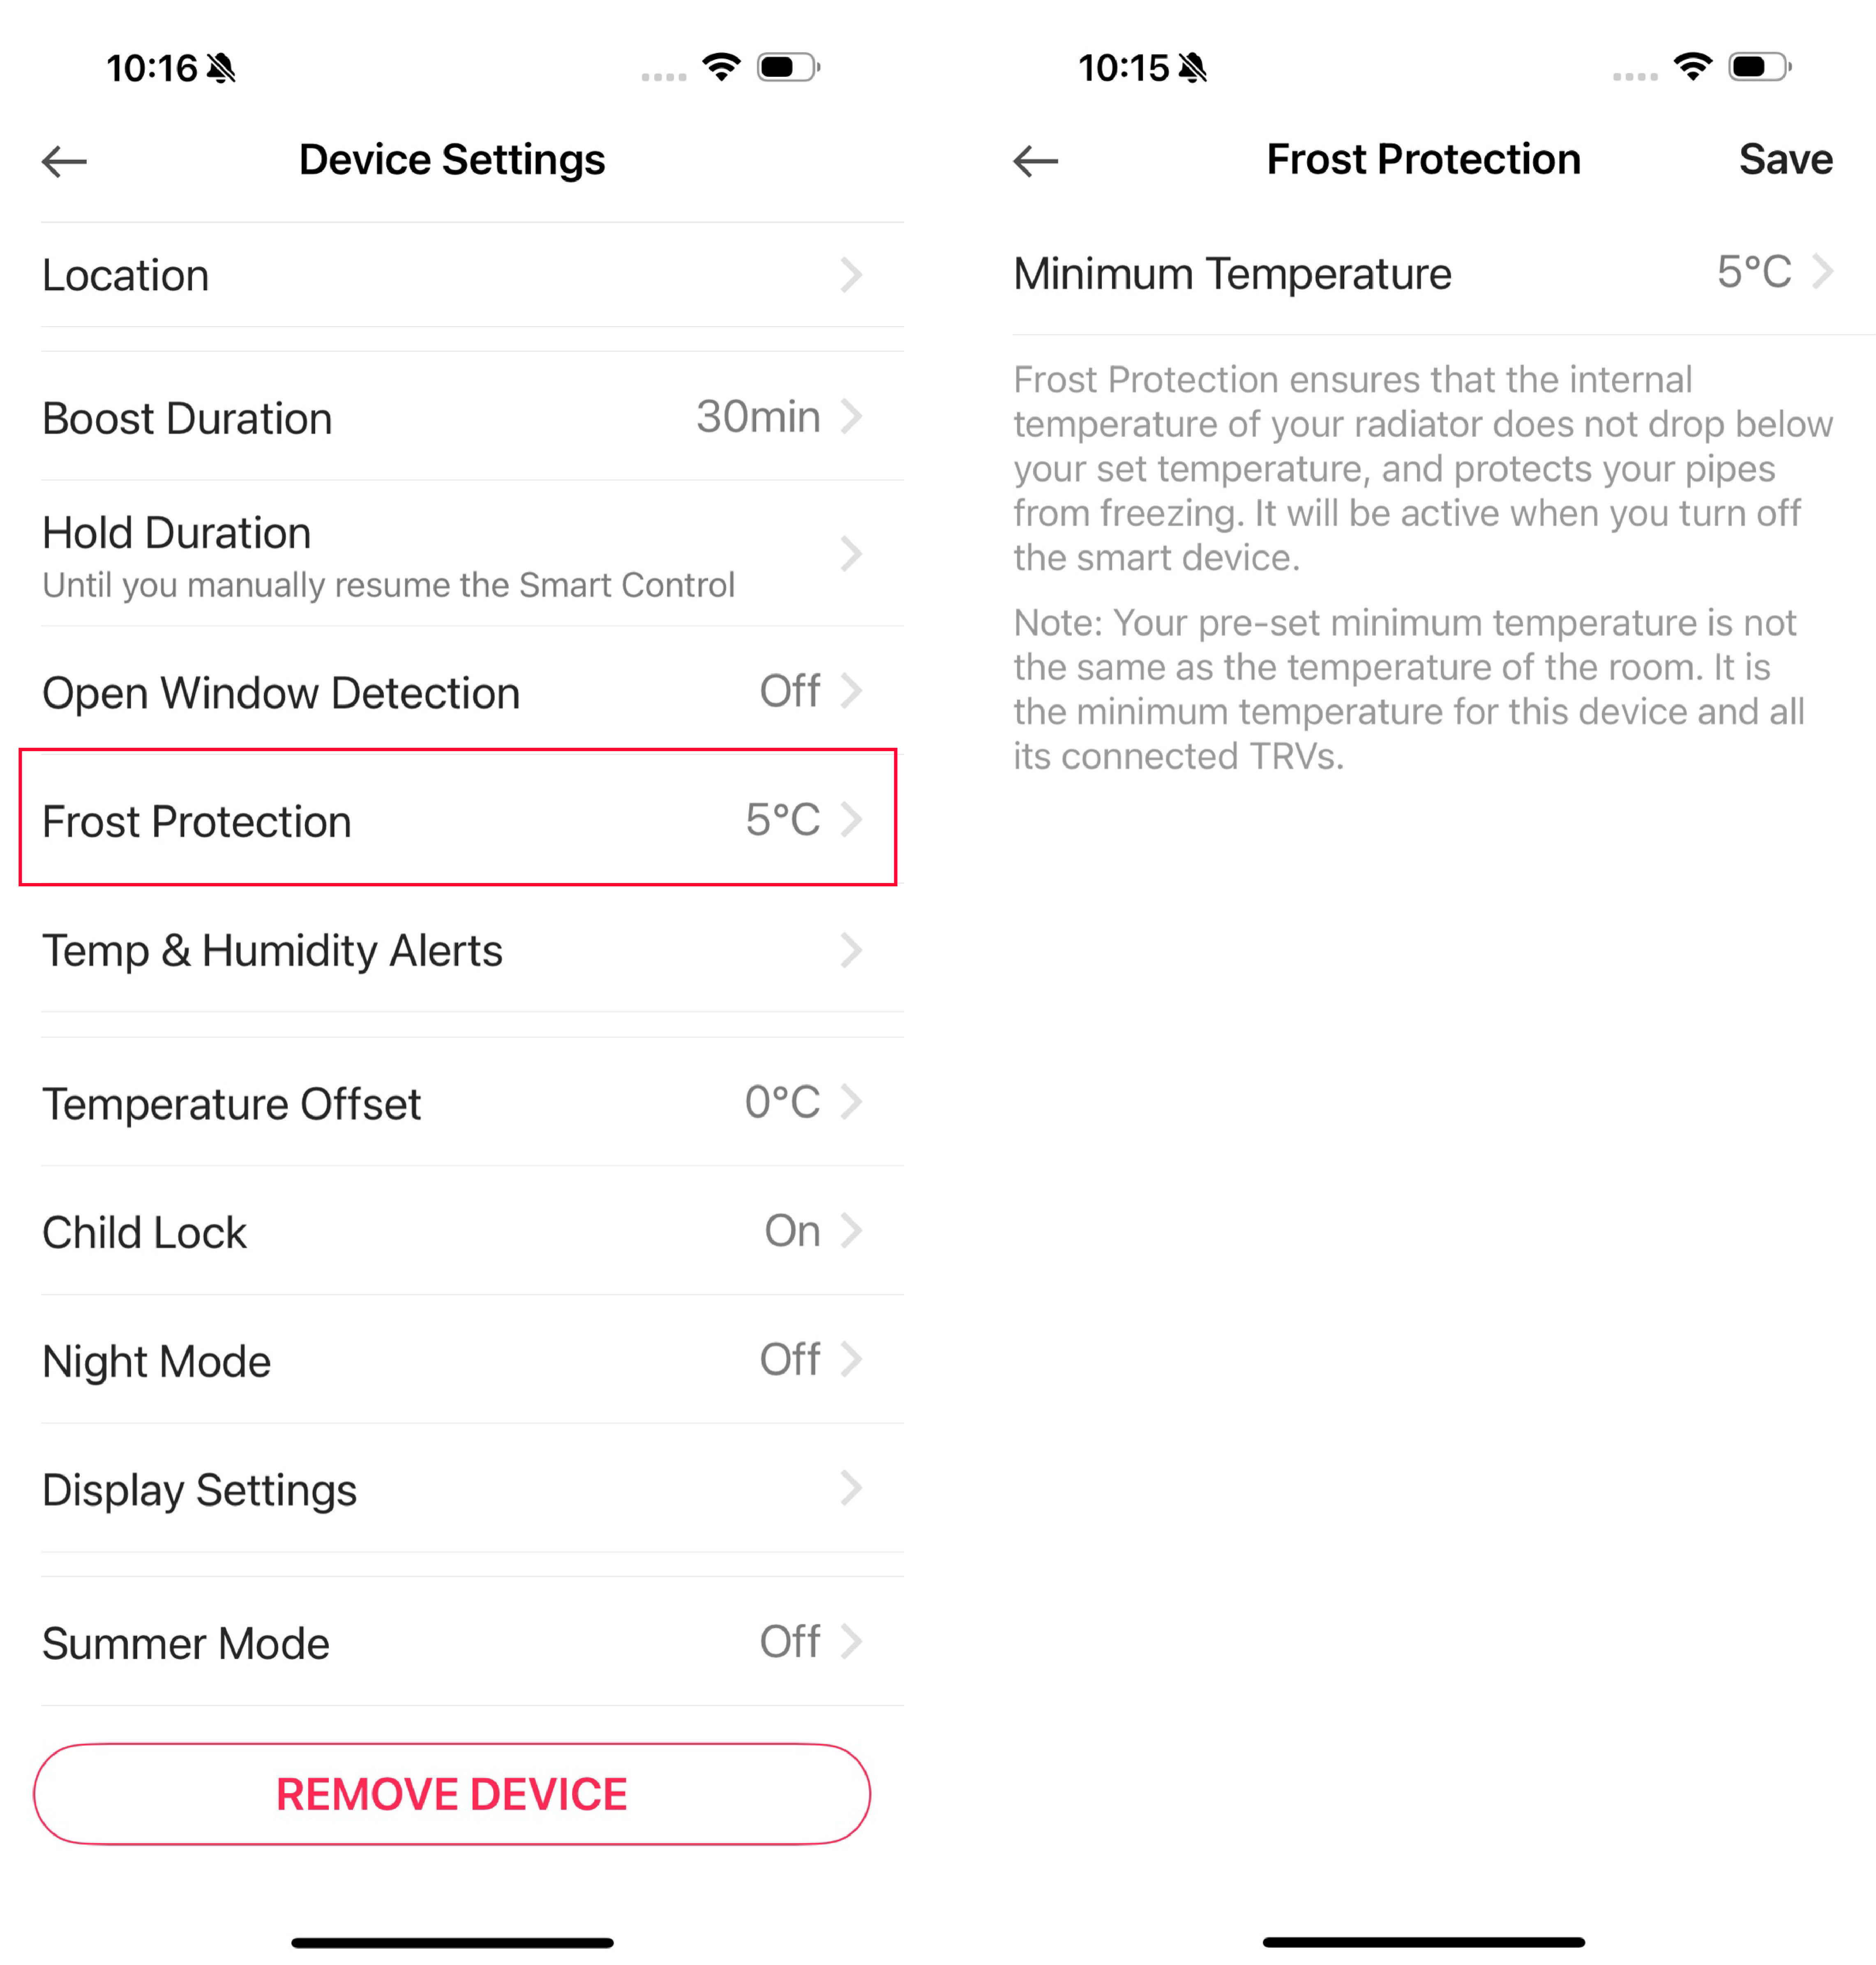
4. Frost Protection
When the device is turned off, Frost Protection will be activated to protect your pipes from freezing.
5. Temp & Humidity Alerts
Get instant alerts when the room temperature/humidity goes beyond your set range.

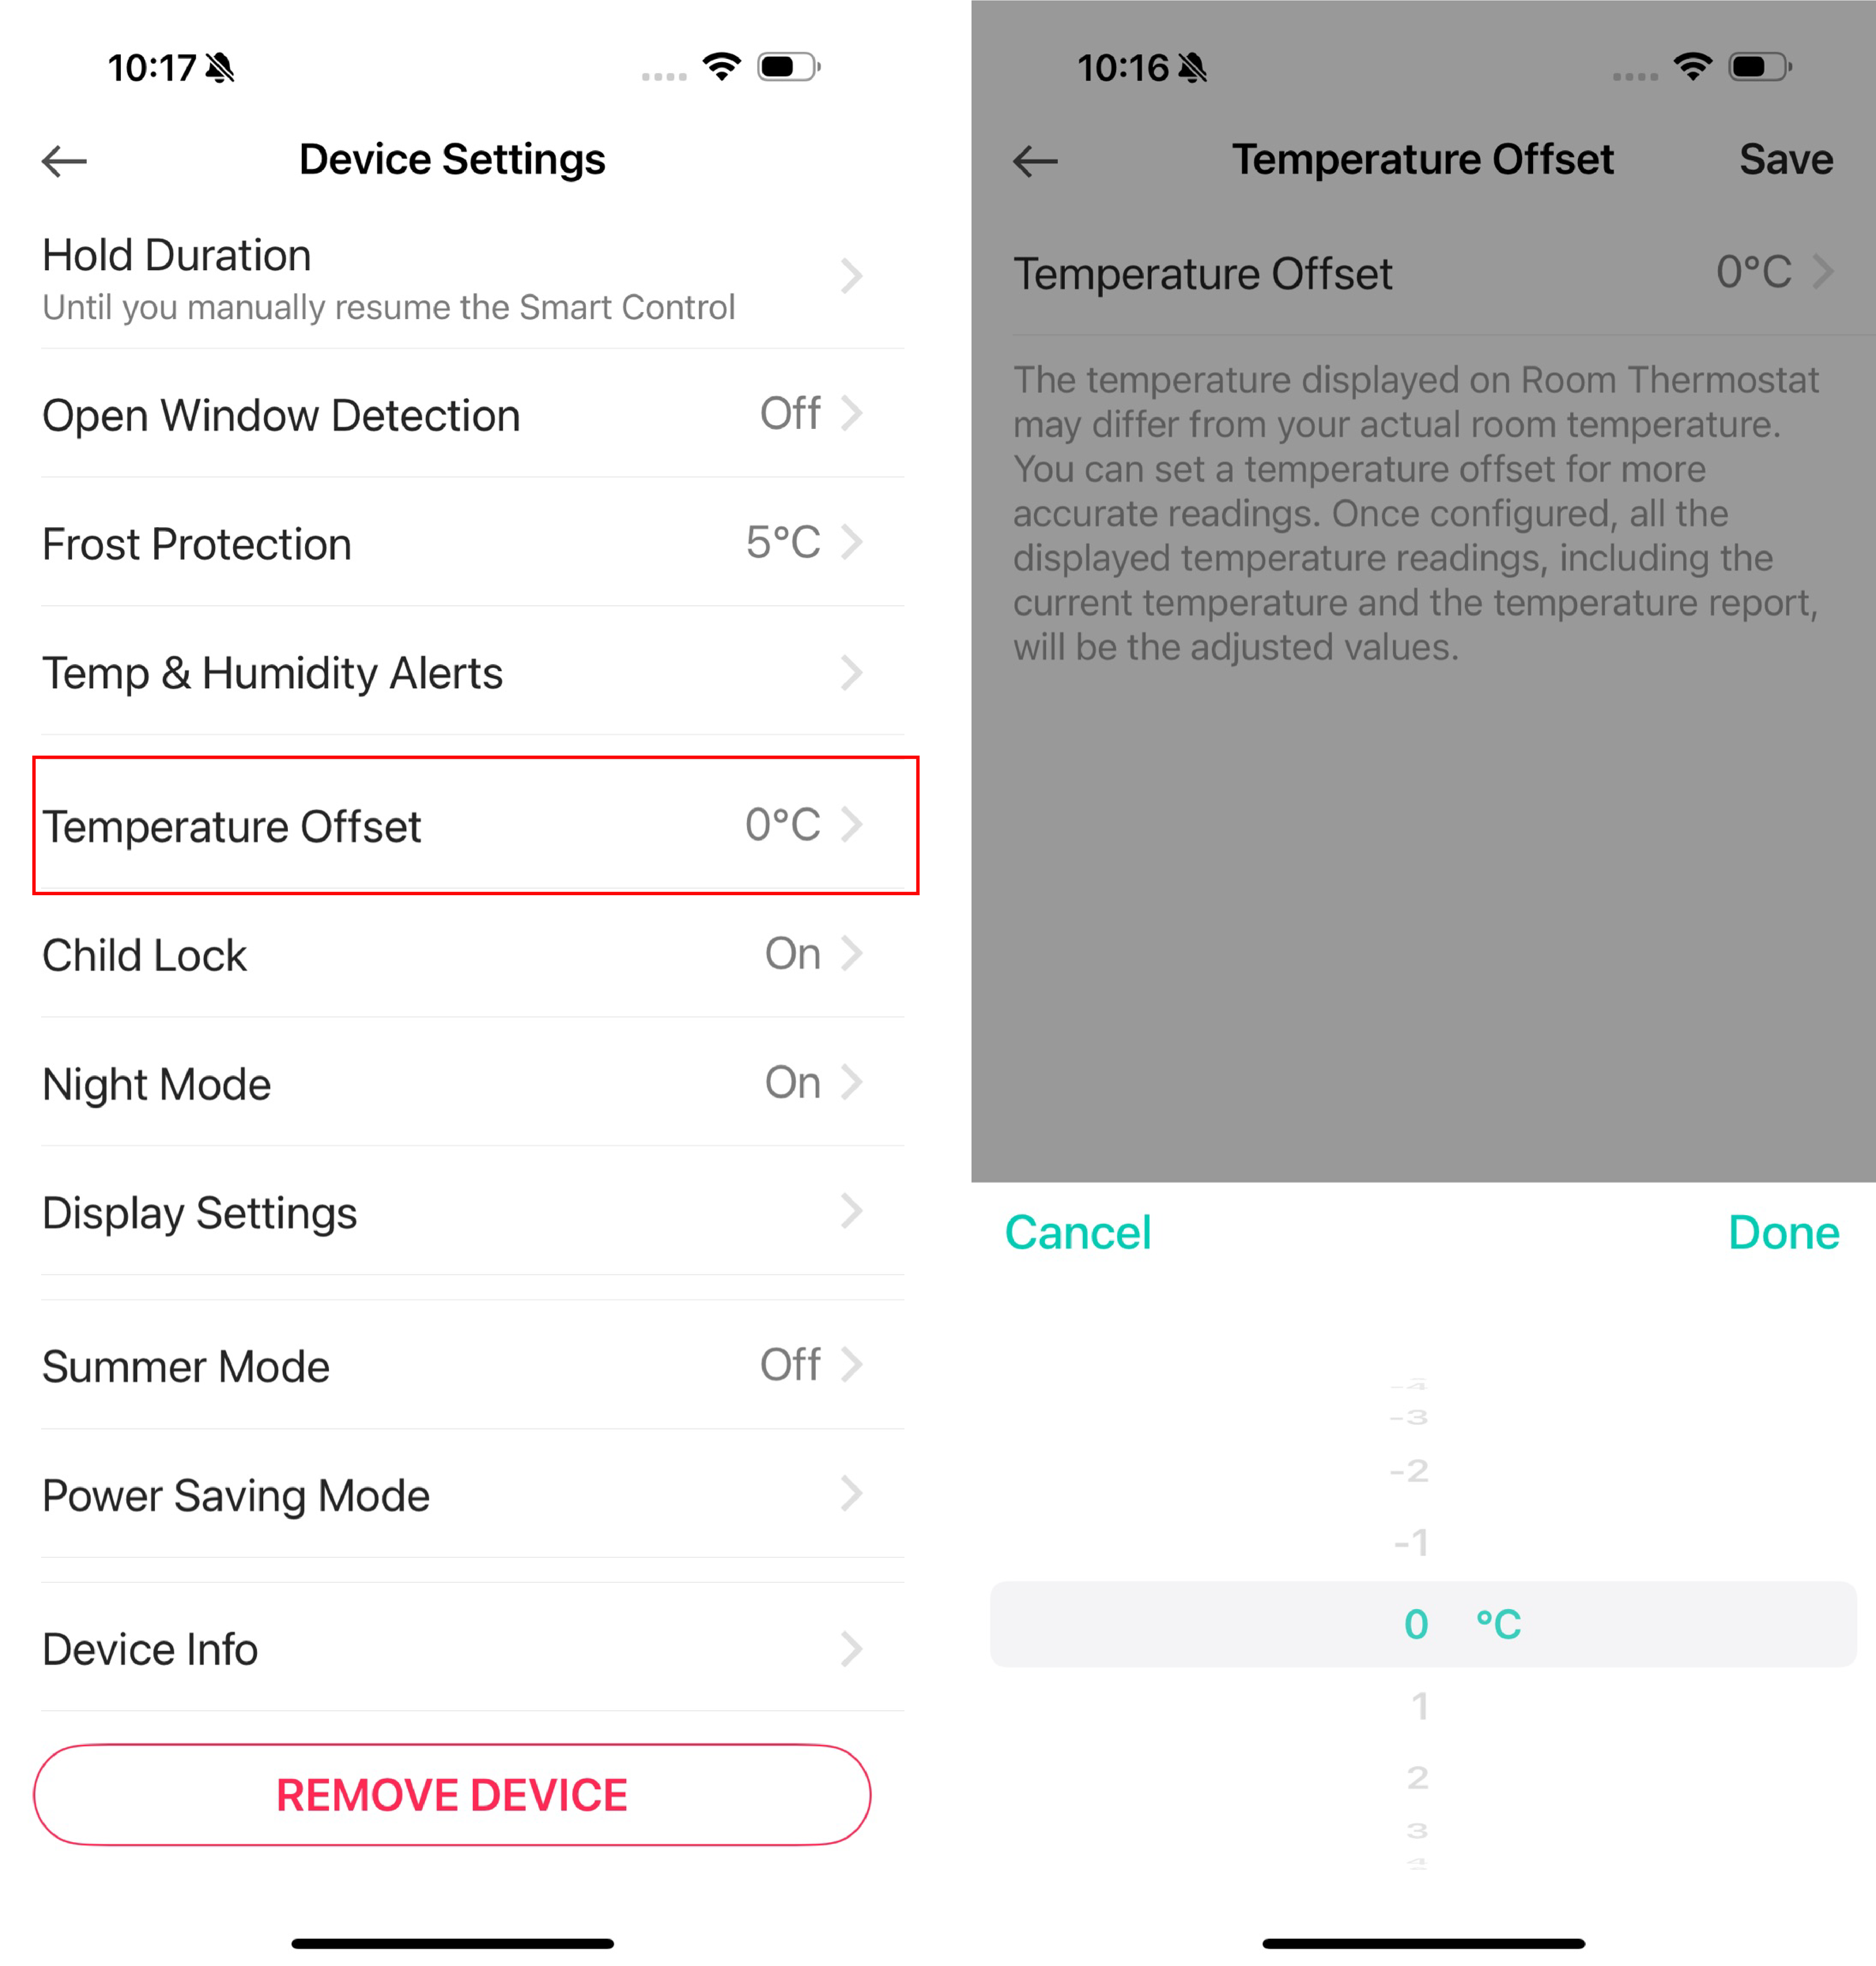
6. Temperature Offset
If you want more accurate readings, you can set a temperature offset.
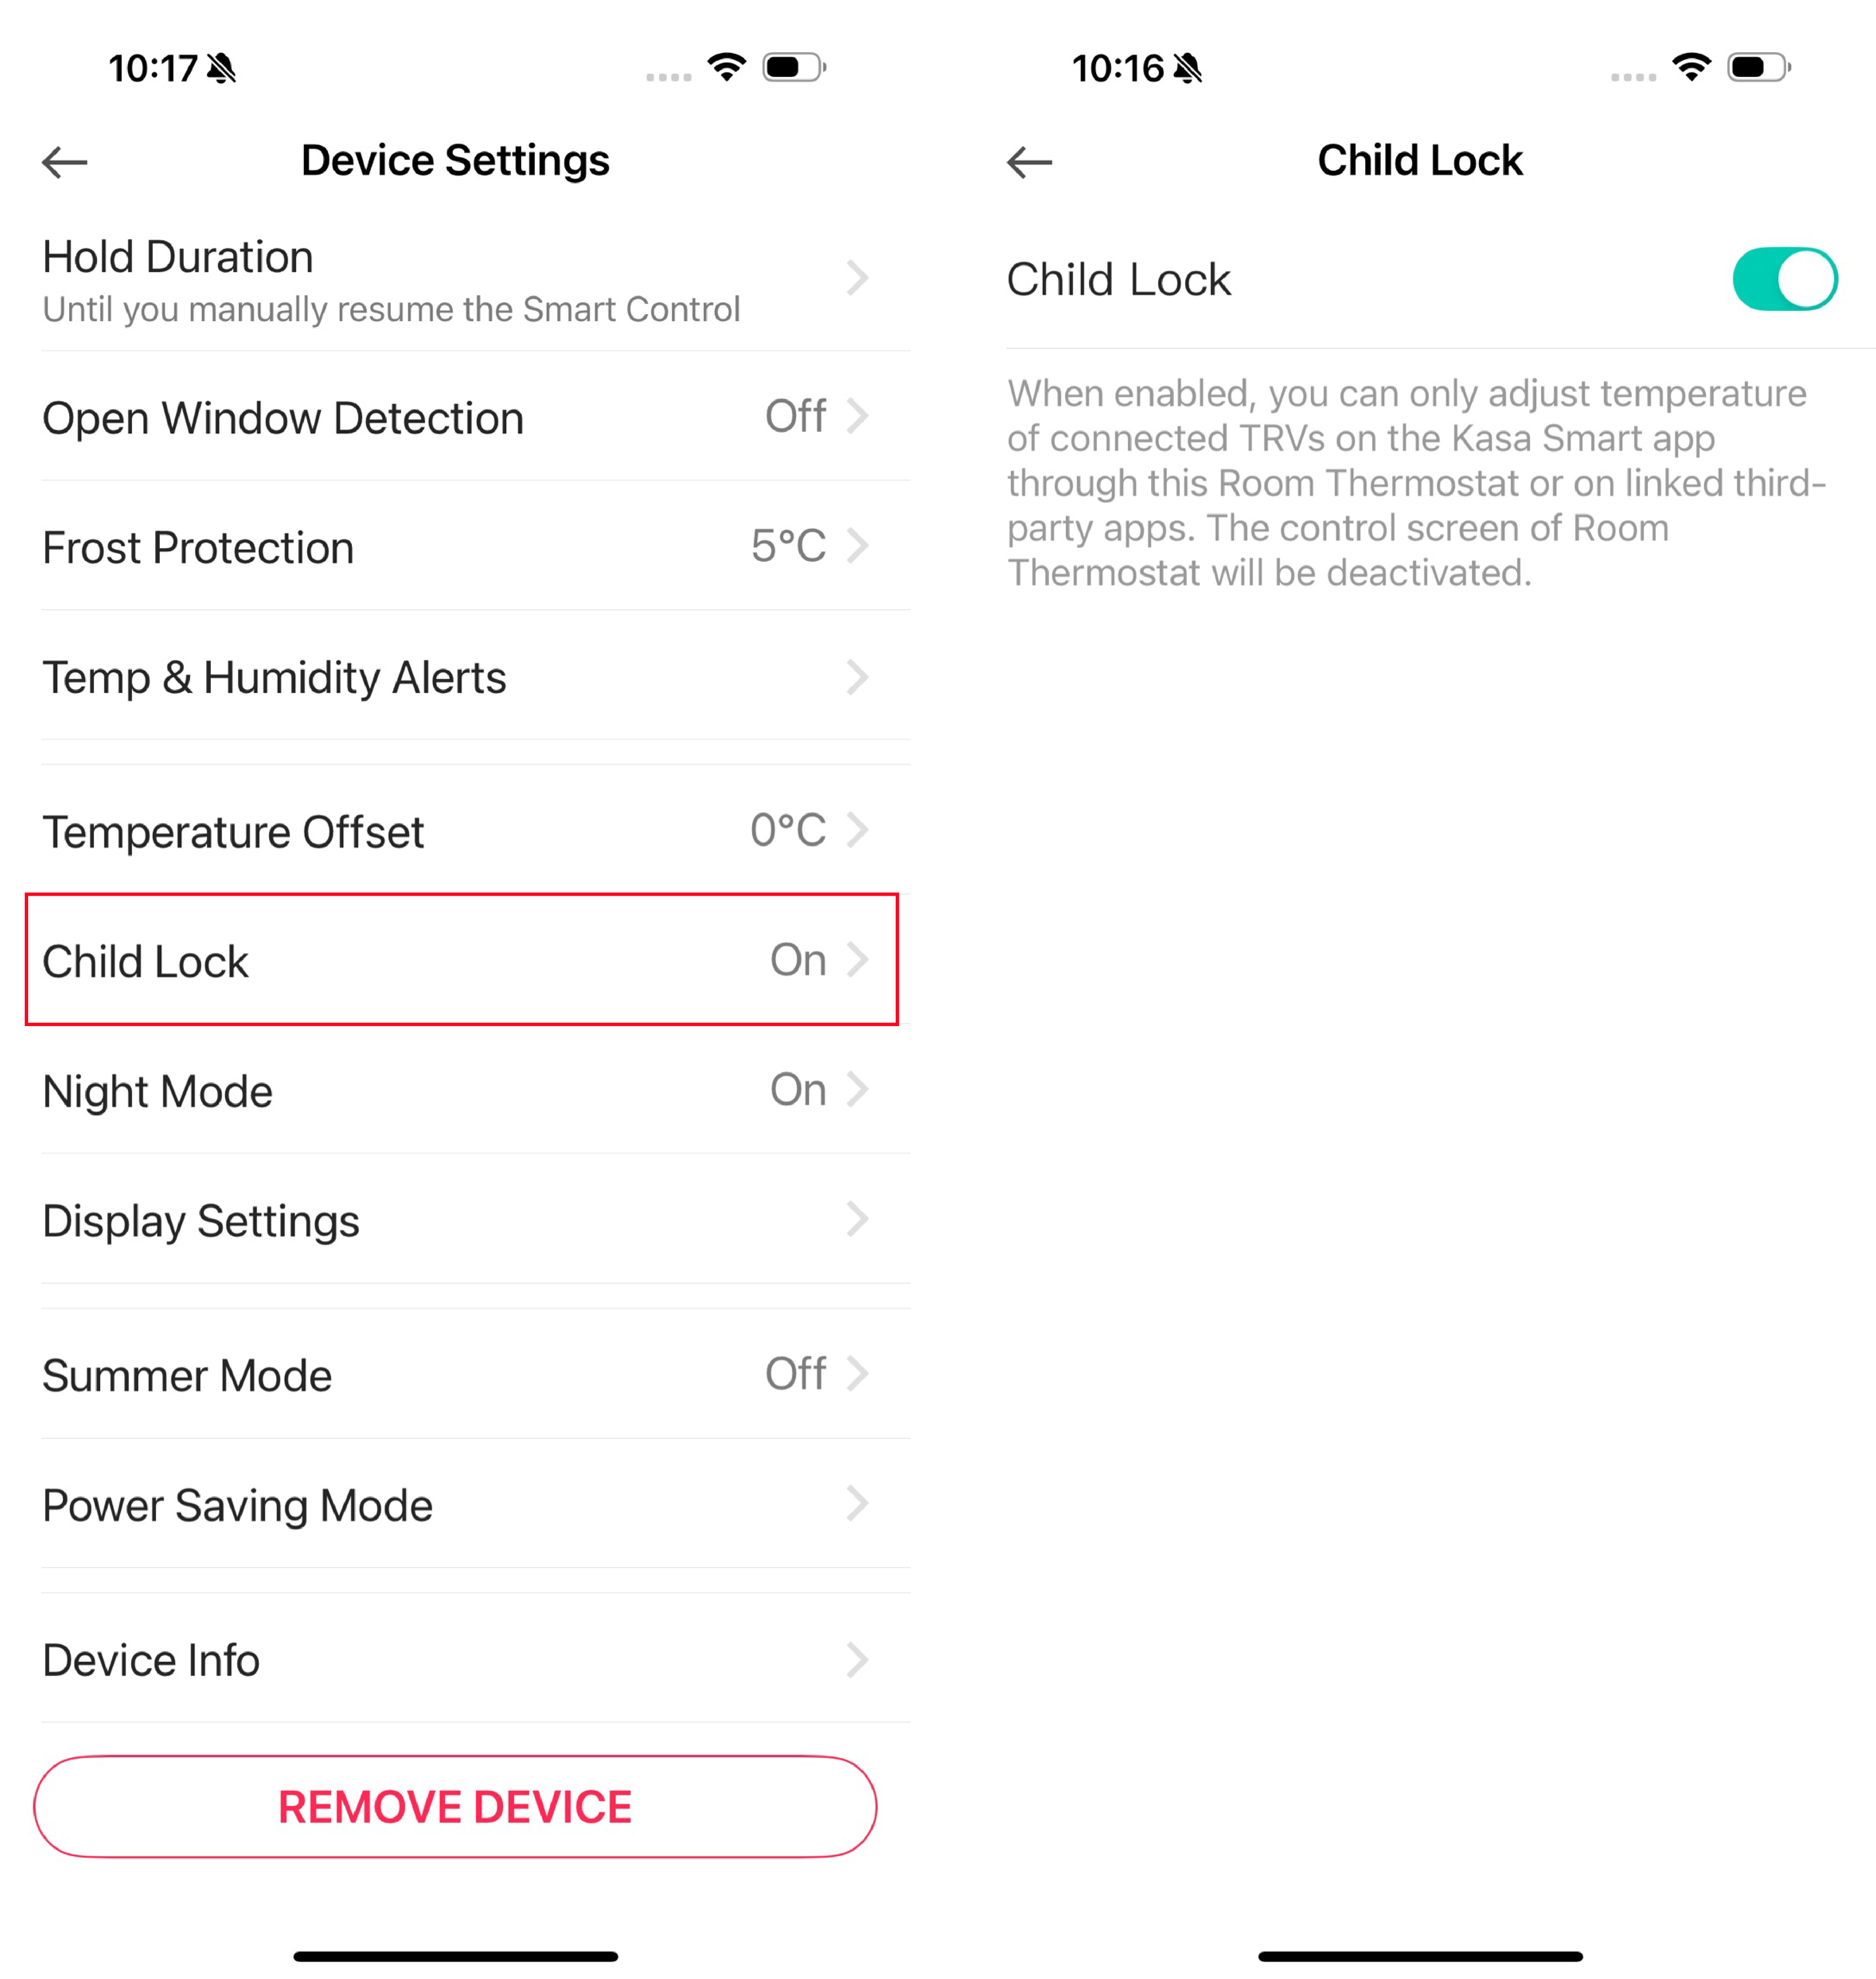
7. Child Lock
When enabled, you can only adjust temperature of connected TRVs on the Kasa Smart app through KE110 or on linked third-party app. The control screen of KE110 will be deactivated.
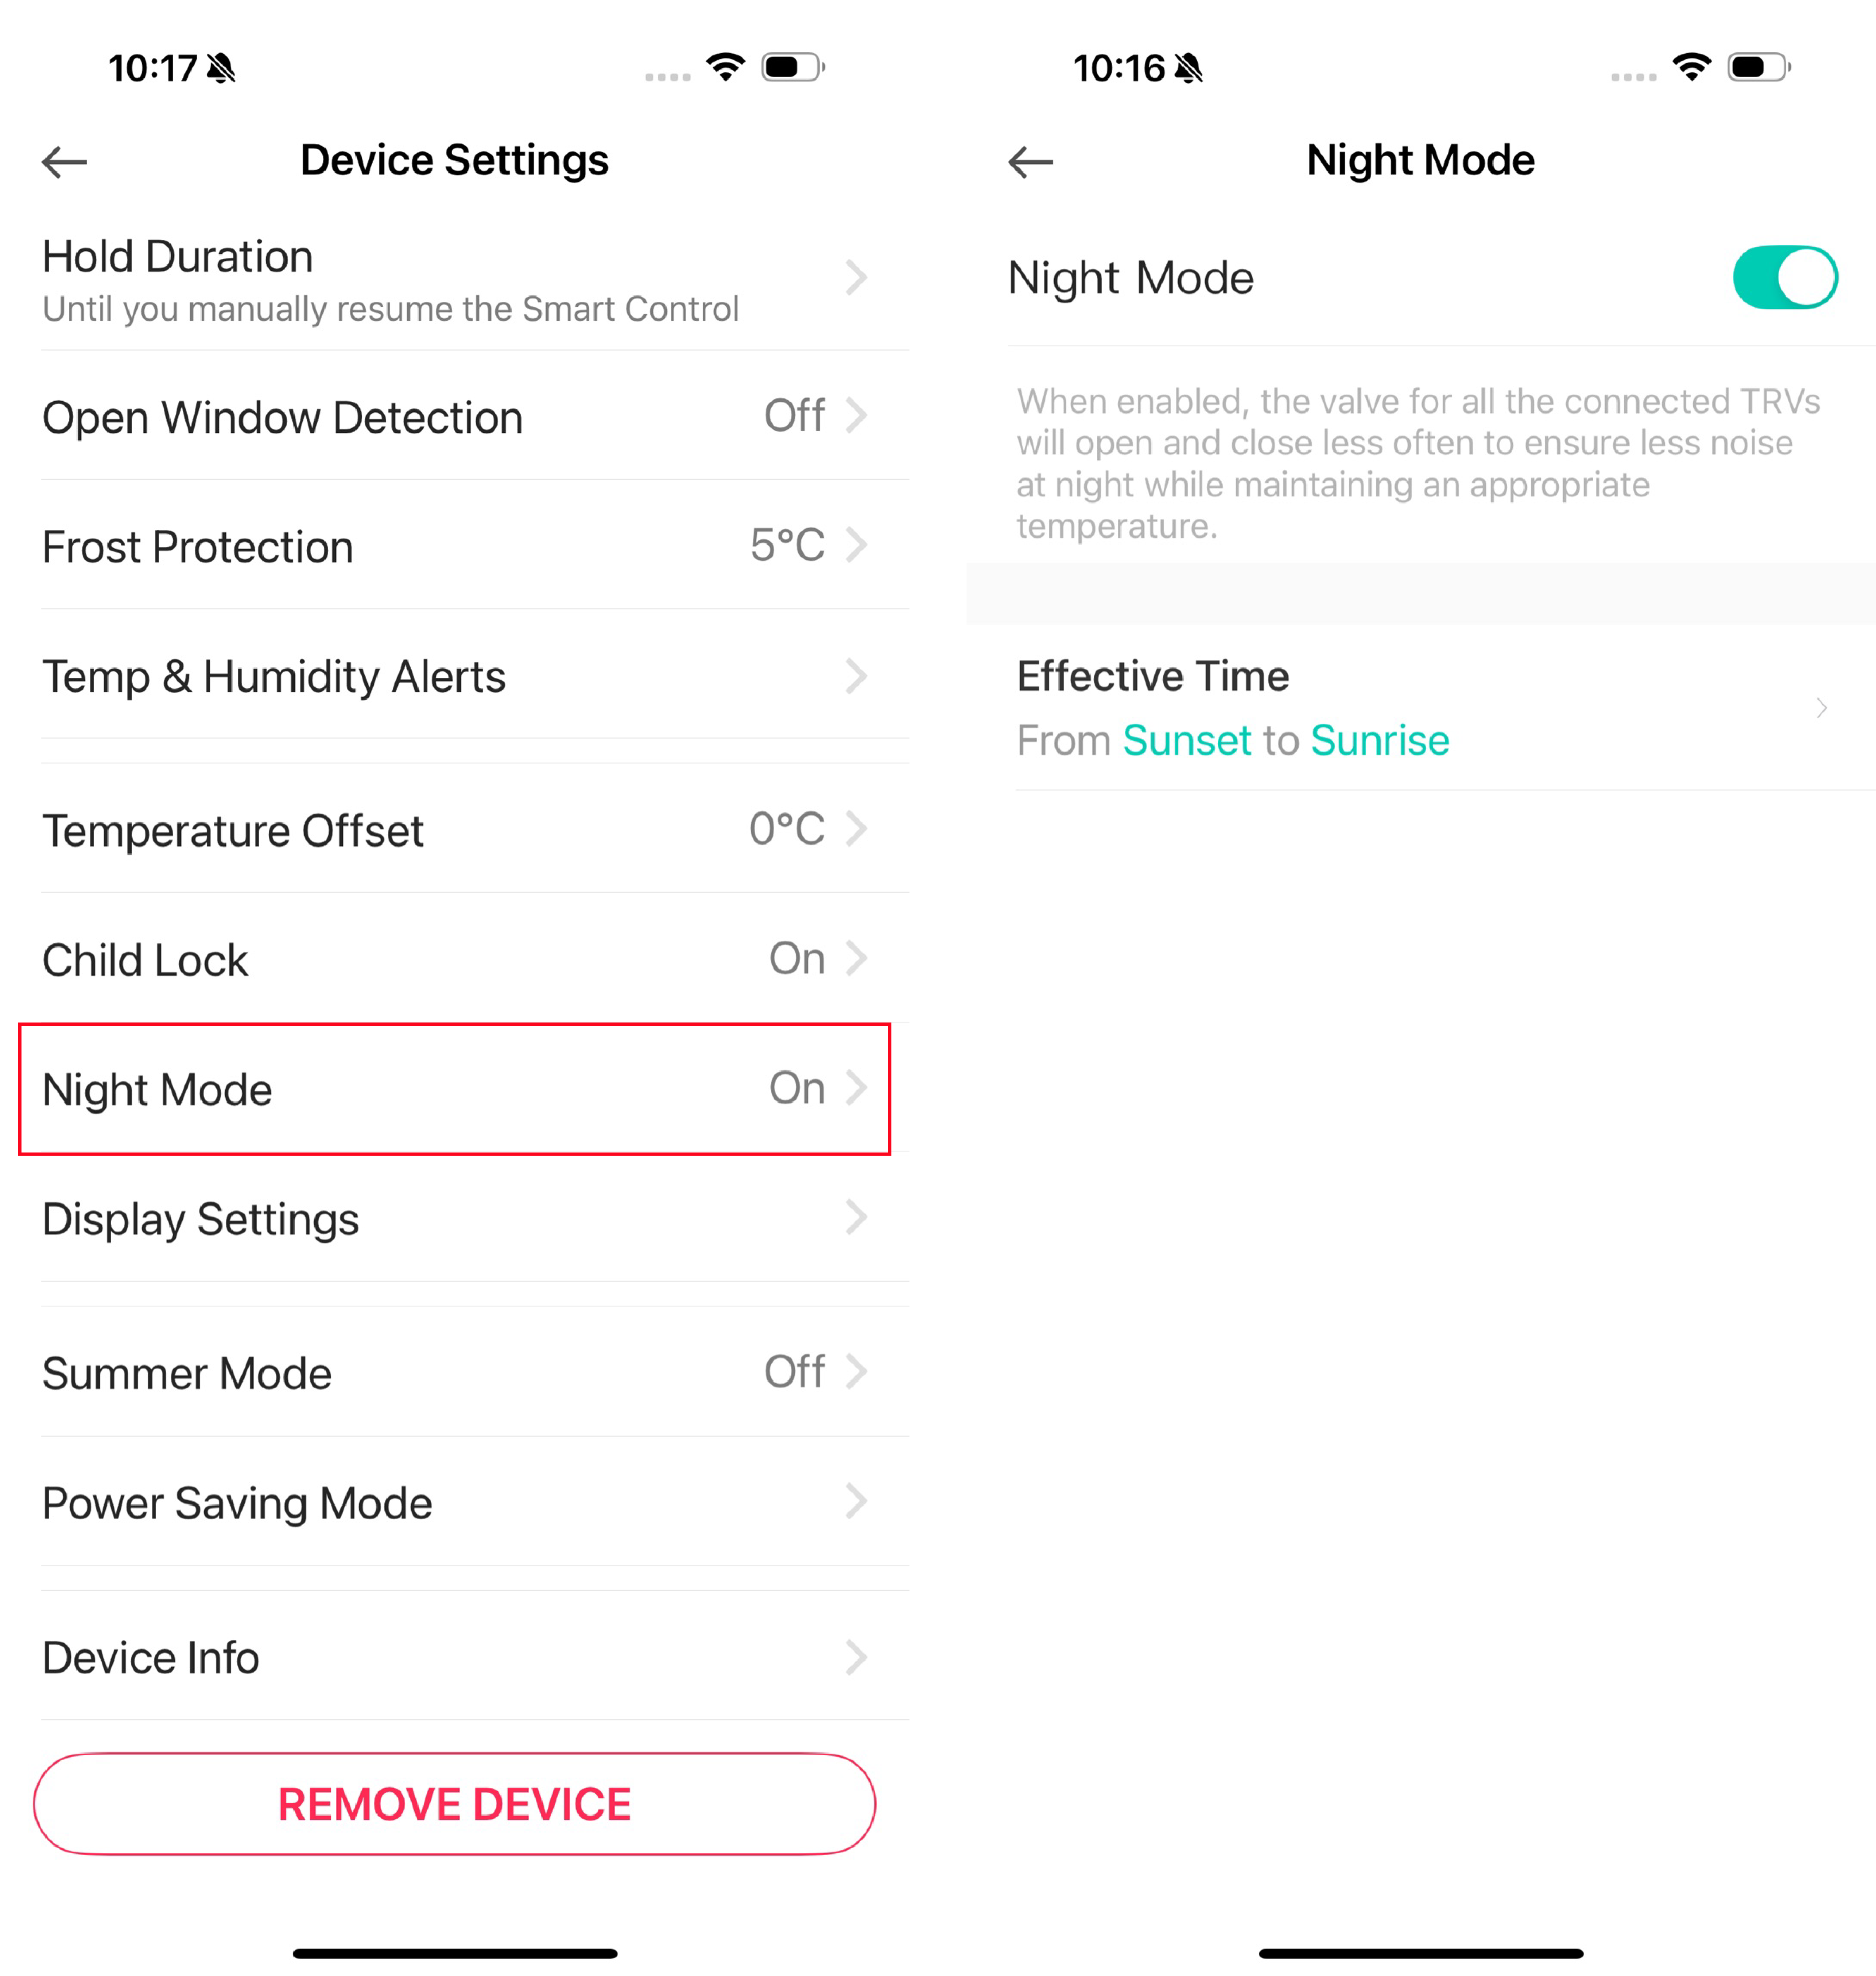
8. Night Mode
When enabled, the valve for all the connected TRVs will open and close less often to ensure less noise at night while mainting an appropriate temperature.
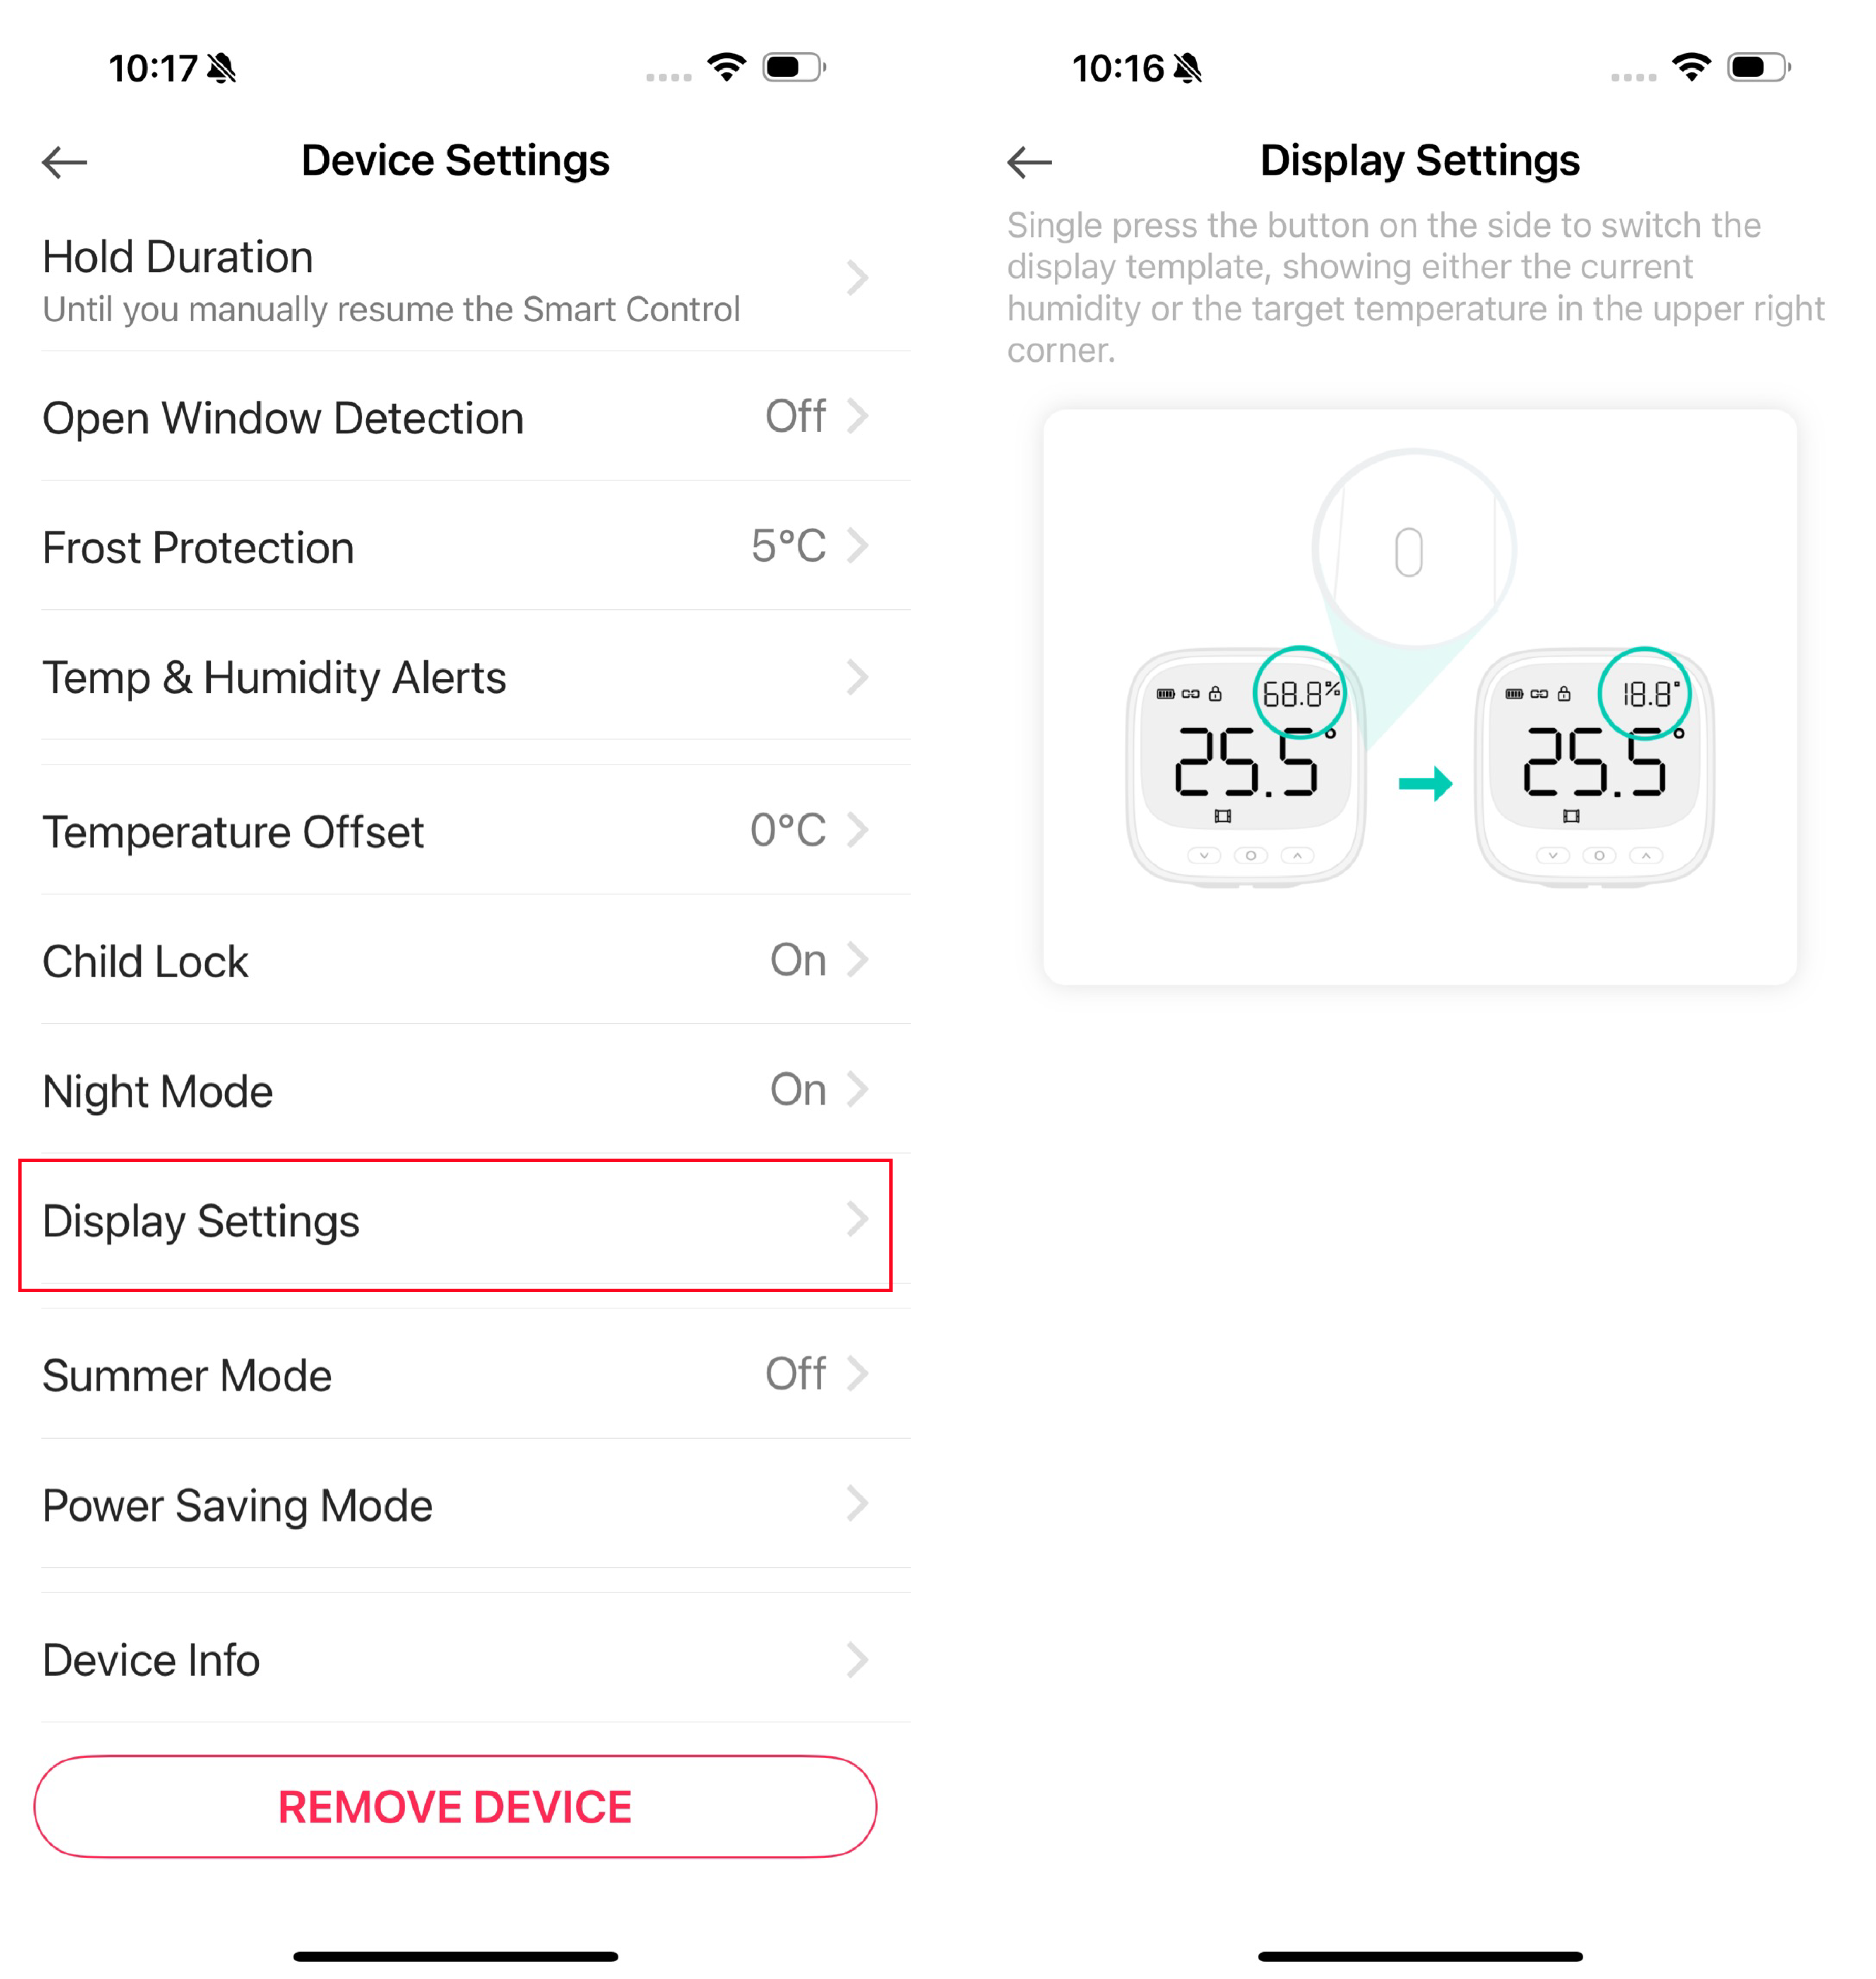
9. Display Settings
Single press the button on the side to switch the display template.
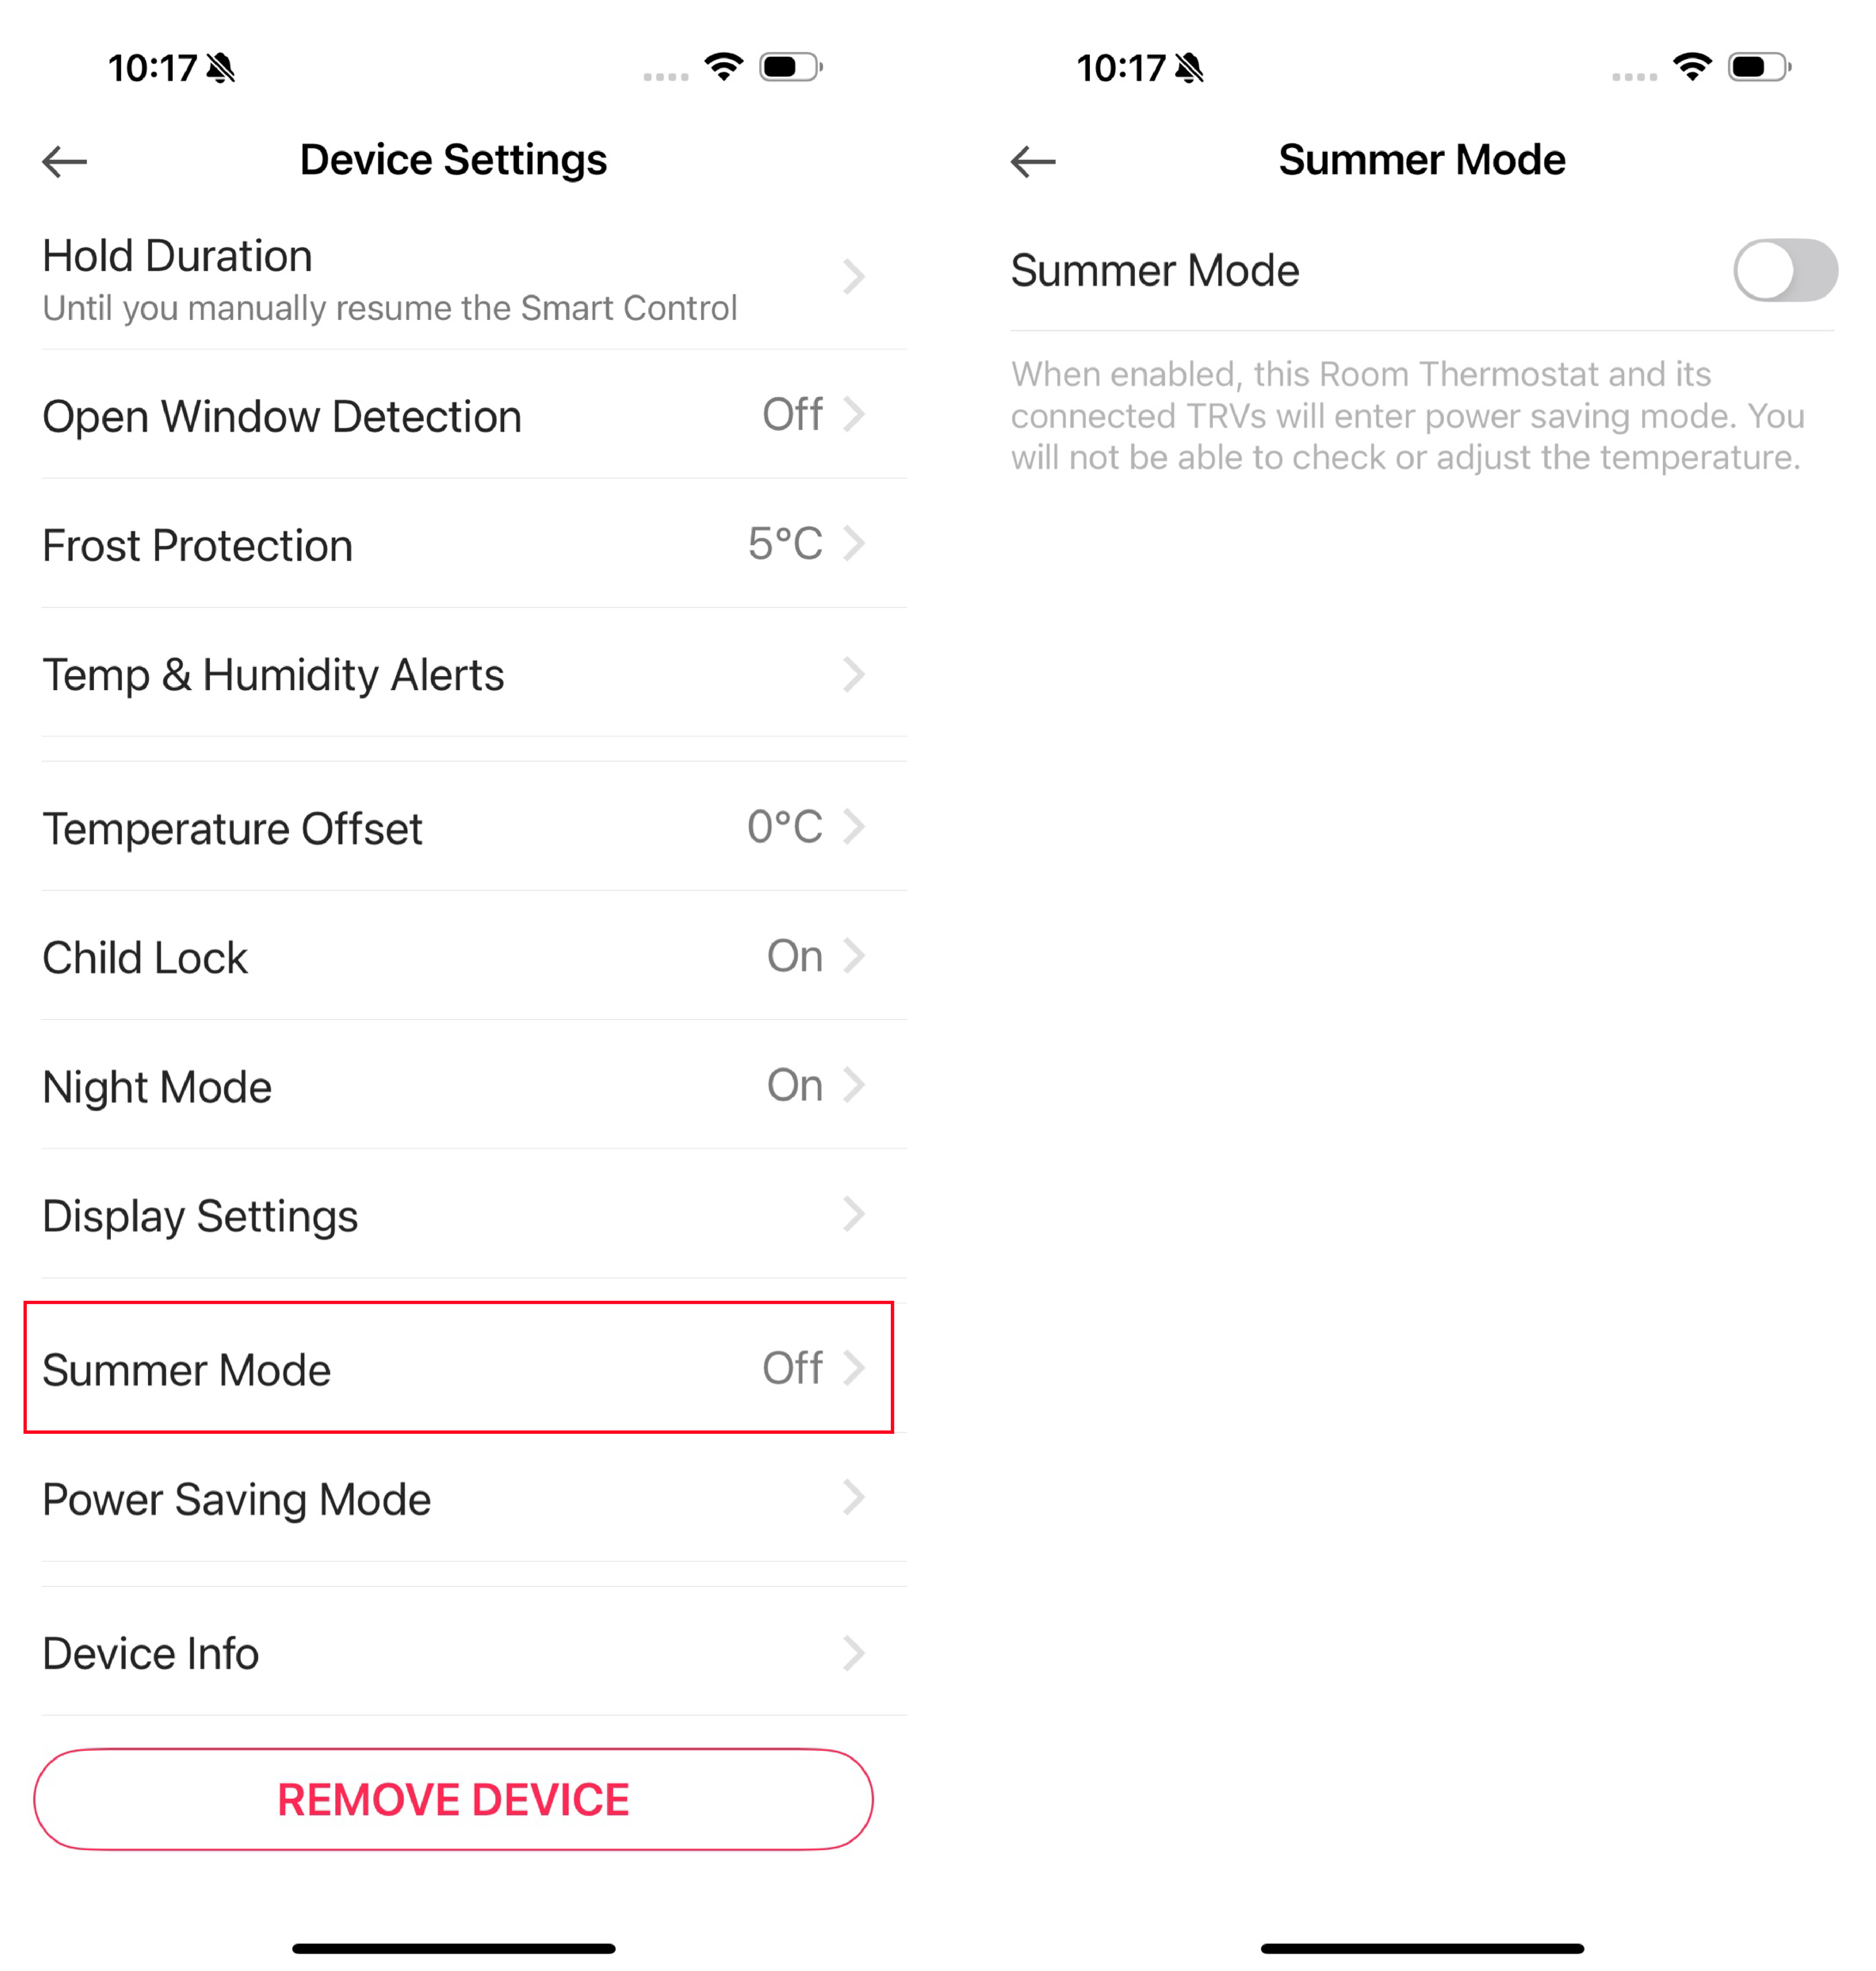
10. Summer Mode
When enabled, you will not be abled to check or adjust the temperature.
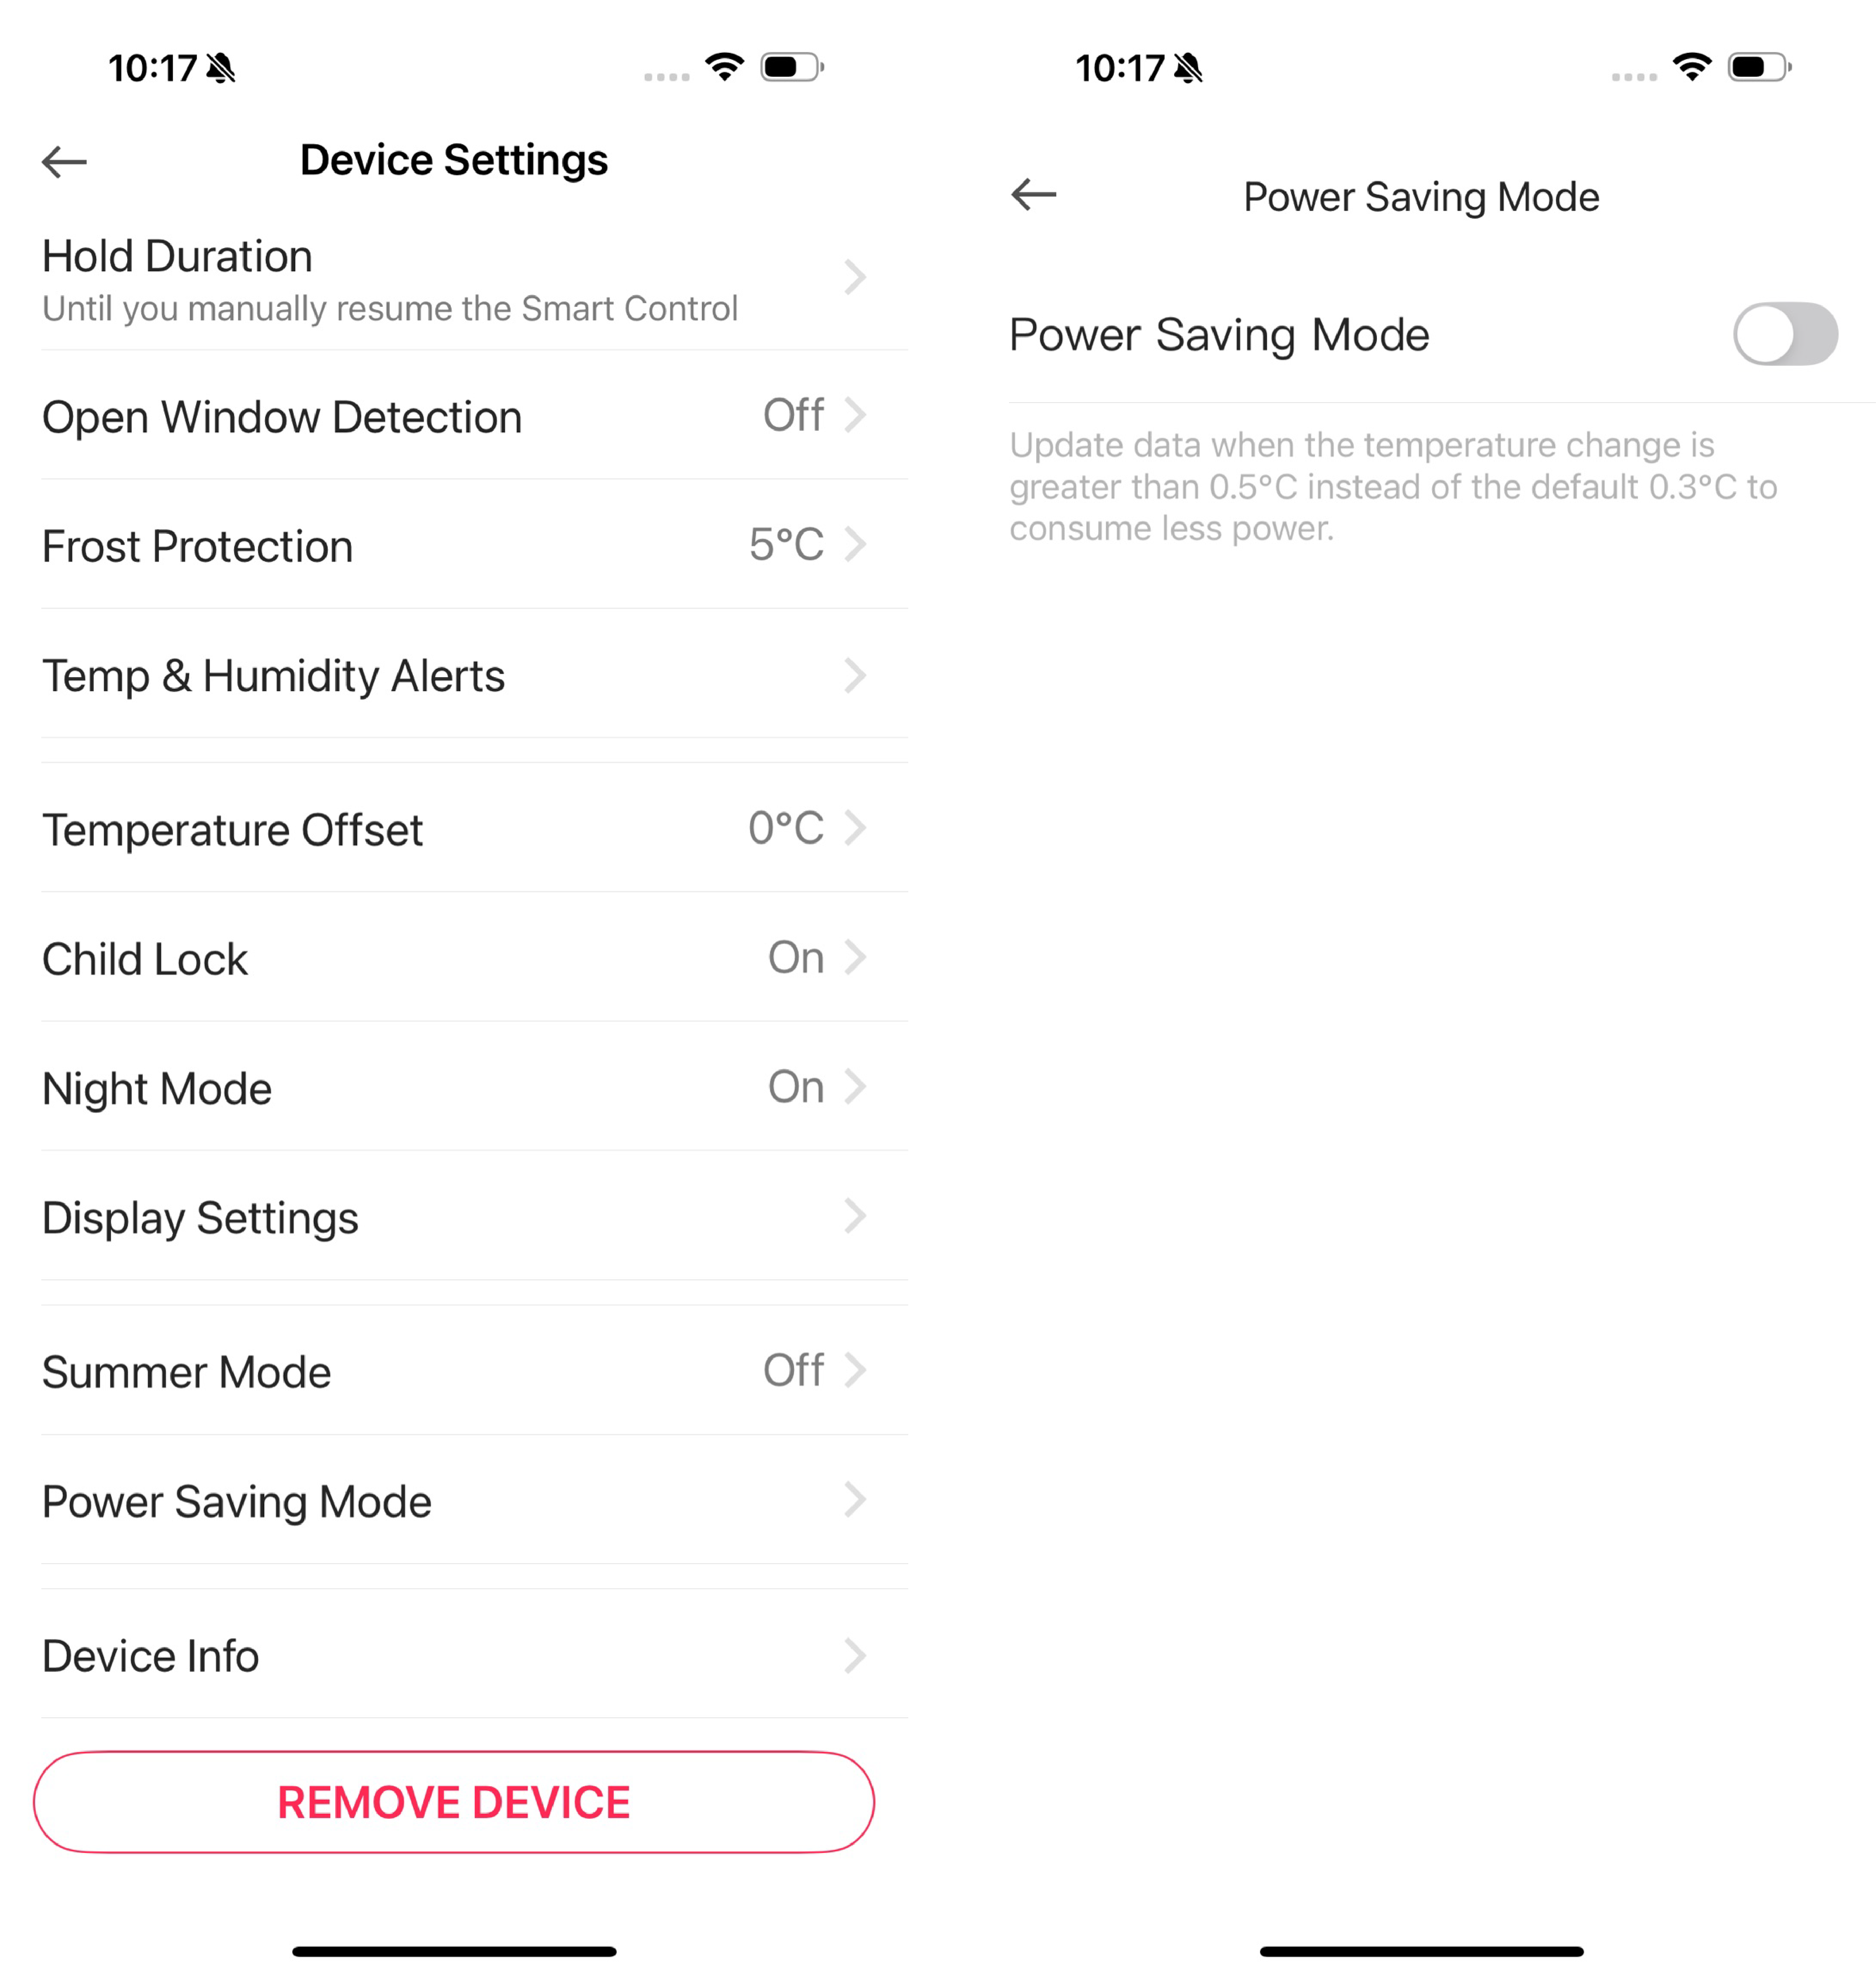
11. Power-Saving Mode
Update temperature readings when the change is greater than 0.5℃ to save power.
Support
For technical support, the setup videos, FAQs, warranty and more, please visit https://www.tp-link.com/support/

Authentication
CE Mark Warning

OPERATING FREQUENCY (the maximum transmitted power)
863~865MHz / 863.35MHz / 25mW (e.r.p)
863~865MHz / 864.35MHz / 25mW (e.r.p)
868~868.6MHz / 868.35MHz / 25mW (e.r.p)
EU Declaration of Conformity
TP-Link hereby declares that Room Thermostat is in compliance with the essential requirements and other relevant provisions of directives 2014/53/EU, 2011/65/EU and (EU)2015/863.
The original EU Declaration of Conformity may be found at https://www.tp-link.com//support/ce/
RF Exposure Information
This device meets the EU requirements (2014/53/EU Article 3.1a) on the limitation of exposure of the general public to electromagnetic fields by way of health protection.
The device complies with RF specifications when the device used at 20 cm from your body.
UKCA Mark

UK Declaration of Conformity
TP-Link hereby declares that Room Thermostat is in compliance with the essential requirements and other relevant provisions of the Radio Equipment Regulations 2017.
The original UK Declaration of Conformity may be found at https://www.tp-link.com/support/ukca/.

Продукт сертифицировано згідно с правилами системи УкрСЕПРО на відповідність вимогам нормативних>Продукт сертифіковано згідно с правилами системи УкрСЕПРО на відповідність вимогам нормативних документів та вимогам, що передбачені чинними законодавчими актами України.

Safety Information
Safety Information
Keep the device away from water, fire, humidity or hot environments.
Do not attempt to disassemble, repair, or modify the device. If you need service, please contact us.
Do not use the device where wireless devices are not allowed.
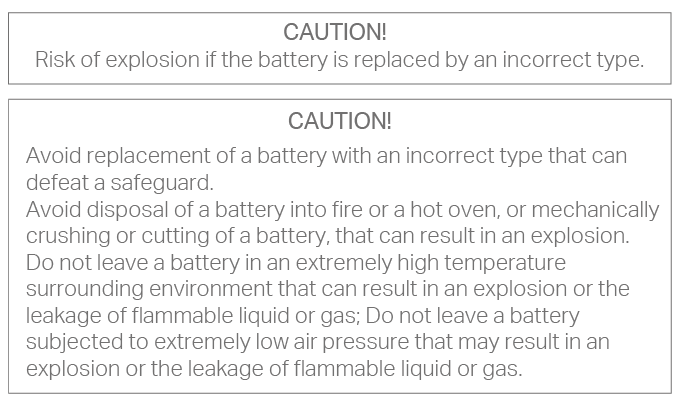
Do not ingest battery, Chemical Burn Hazard
Operating Temperature: 0℃ (32℉) - 50℃ (122℉)
Please keep it away from harsh environments with high temperatures or high humidity.
Do not immerse the vent hole into any liquid.
This device is designed to facilitate a healthy lifestyle, but should not be used as a measuring tool.
Please read and follow the above safety information when operating the device. We cannot guarantee that no accidents or damage will occur due to improper use of the device. Please use this product with care and operate at your own risk.
This product uses radios and other components that emit electromagnetic fields. Electromagnetic fields and magnets may interfere with pacemakers and other implanted medical devices. Always keep the product and its power adapter more than 15 cm (6 inches) away from any pacemakers or other implanted medical devices. If you suspect your product is interfering with your pacemaker or any other implanted medical device, turn off your product and consult your physician for information specific to your medical device.
Explanation of the symbols on the product label
Note: The product label is on the bottom of the product and its power supply. Symbols may vary from products.
| Symbol 符號解釋 |
Explanation 解釋 |
|---|---|
 |
Class II equipment Class II 設備 |
 |
Class II equipment with functional earthing 具有功能接地的Class II 設備 |
 |
Alternating current 交流電 |
 |
DC voltage 直流電壓 |
 |
Polarity of output terminals 輸出端子極性 |
 |
Indoor use only 僅限室內使用 |
 |
Dangerous voltage 危險電壓 |
 |
Caution, risk of electric shock 注意,有觸電危險 |
 |
Energy efficiency Marking 能源效率標示 |
 |
Protective earth 保護地線 |
 |
Earth 地線 |
 |
Frame or chassis 機架接地 |
 |
Functional earthing 功能地線 |
 |
Caution, hot surface 警告,表面高溫 |
 |
Caution 警告 |
 |
Operator’s manual 操作手冊 |
 |
Stand-by 待機 |
 |
“ON”/”OFF” (push-push) 「開」/「關」 ( 按壓式) |
 |
Fuse 保險絲 |
 |
Fuse is used in neutral N 保險絲用於中性線N |
 |
RECYCLING This product bears the selective sorting symbol for Waste electrical and electronic equipment (WEEE). This means that this product must be handled pursuant to European directive 2012/19/EU in order to be recycled or dismantled to minimize its impact on the environment. User has the choice to give his product to a competent recycling organization or to the retailer when he buys a new electrical or electronic equipment. 回收利用 本產品標示有「廢棄電氣電子設備(WEEE)」的分類回收標誌。這表示本產品必須依據歐盟指令 2012/19/EU 進行妥善回收或拆 解,以減少對環境的影響。 使用者可選擇將本產品交給合格的回收機構,或在購買新電器或電子設備時,交回給零售商進行回收處理。 |
 |
Caution, avoid listening at high volume levels for long periods 注意,避免長時間以高音量收聽 |
 |
Disconnection, all power plugs 斷開所有電源插頭 |
| m | Switch of mini-gap construction 微間隙結構的開關 |
| µ | Switch of micro-gap construction (for US version) Switch of micro-gap / micro-disconnection construction (for other versions except US) 微小間隙結構開關(適用於美國版) 微小間隙 / 微小斷開結構開關(適用於美國以外的其他版本) |
| ε | Switch without contact gap (Semiconductor switching device) 無接點間隙開關(半導體開關裝置) |