Setup Guide
Tapo C225 Pan/Tilt AI Home Security Wi-Fi Camera
Welcome to the setup guide.
To ensure equal access for all users, we offer this accessible setup guide. This guide is designed to meet accessibility needs, enabling a successful setup. It will introduce the appearance of your camera, including its ports, buttons and labels, and then guide you through the setup process.
Step 1. Know about your camera
In this section, we will describe the camera's appearance, including its ports, buttons, and labels.
1. You can find your camera and power adapter in the package.
Power Adapter: The power adapter is usually a rectangular or square block with a cord on one end that plugs into the power port to power it on.
2. Next, place your camera on a horizontal surface, such as on a shelf or desktop.
To ensure the camera is placed upward correctly, you should position it with the camera lens facing forward.
3. After positioning your camera correctly, we will introduce the ports, buttons and labels on your device in a certain order.
System LED: It is right above the lens. It shows your camera status. You can check the camera status on the app.
Lens: For capturing things within its view.
Microphone: For capturing your voice. It is right below the lens.
Privacy Mode Button: It is located at the bottom when facing the front of the cameras. Press the button to turn Privacy Mode on and off. When Privacy Mode is on, the camera lens is hidden.
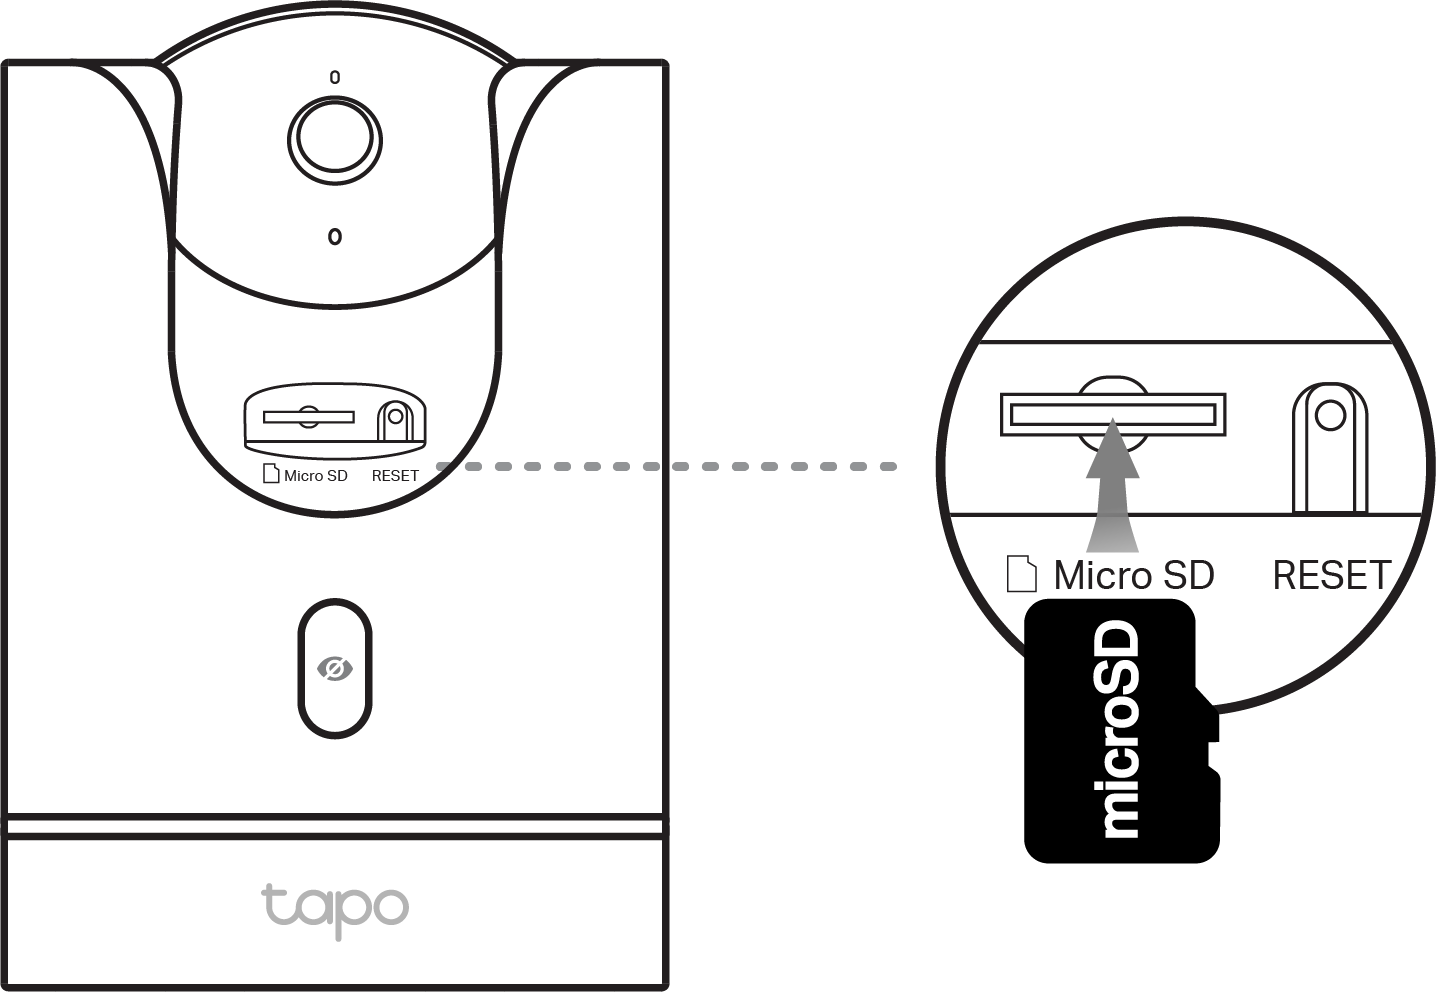
Tilt the camera lens up to find the microSD card slot on the left and the RESET button on the right.
microSD card slot: While facing the front of the camera, insert a microSD card with the notch on the right side.
RESET: While the camera is on, press and hold the RESET button for at least 5 seconds to reset the camera.
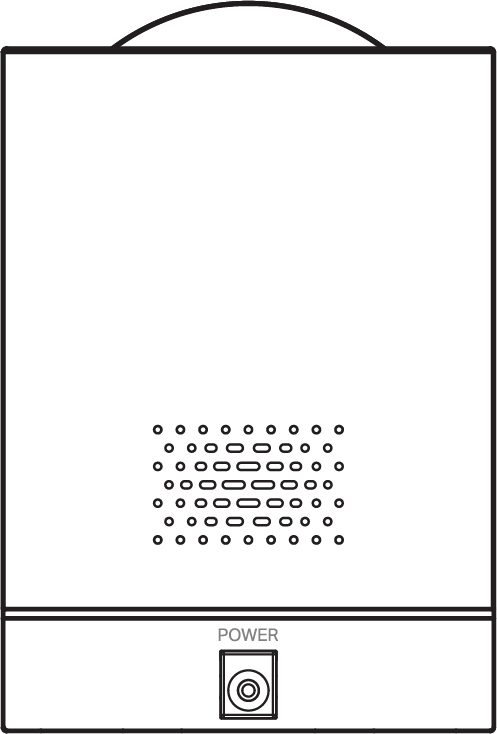
Turn to the back side of your camera. You can find the DC Power Connector down below.
Product label: The product label is on the bottom of the camera through laser engraving.
1.0-package-New_20250408115608o.png)
Step 2. Set Up
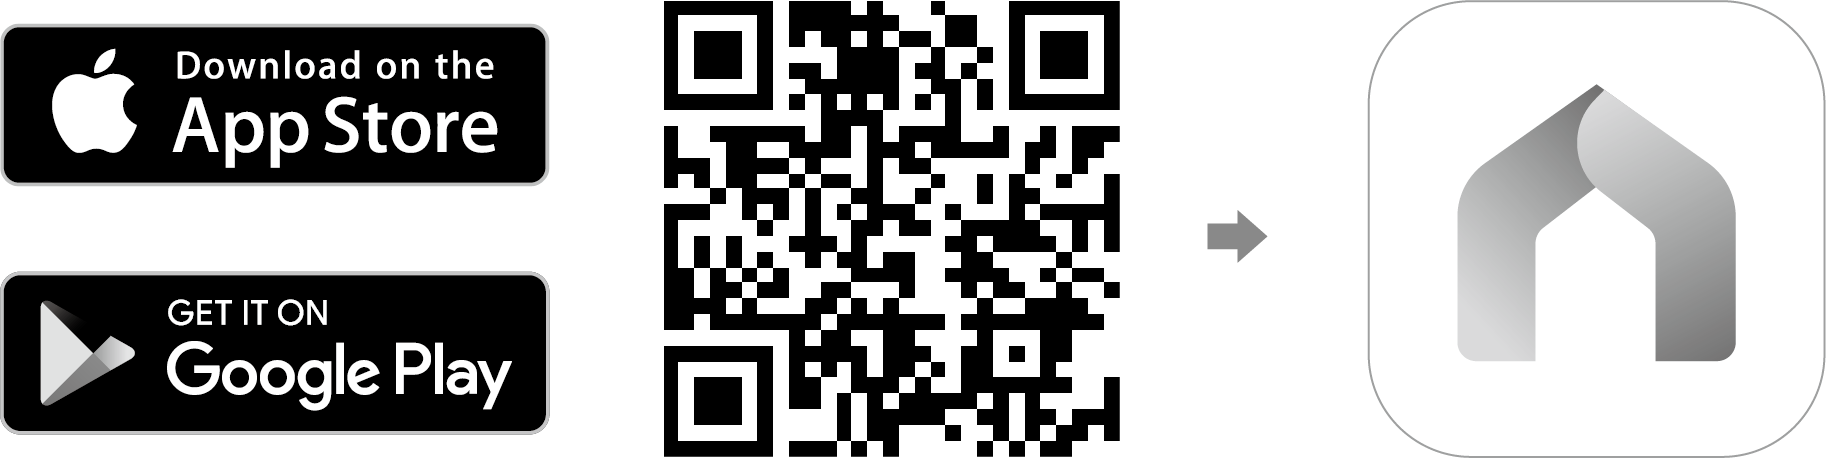
1. Get the Tapo app from the App Store or Google Play, then log in.
2. Plug in the power adapter. Wait 30 seconds for the camera to start up. You can hear a clicking sound.
3. Tap the + button in the app and select your camera model. Follow app instructions to complete setup.
If you need help, please visit https://www.tapo.com/support/ for technical support, the user guide, FAQs, warranty & more.
For details on Tapo app accessibility, please check Accessibility Support.
English: Safety Information
Do not attempt to disassemble, repair, or modify the device. If you need service, please contact us.
Do not use damaged charger or USB cable to charge the device.
Do not use any other chargers than those recommended.
Do not use the device where wireless devices are not allowed.
Adapter shall be installed near the equipment and shall be easily accessible.
Keep the device away from water, fire, humidity or hot environments.
Please read and follow the above safety information when operating the device. We cannot guarantee that no accidents or damage will occur due to improper use of the device. Please use this product with care and operate at your own risk.