Table of Contents
Kasa Smart Light Bulb Installation and User Guide
About This Guide
This guide provides a brief introduction to smart bulbs and the Kasa Smart app, as well as regulatory information.
Features available in the smart bulb may vary by model and software version. Smart bulb availability may also vary by region. All images, steps, and descriptions in this guide are only examples and may not reflect your actual smart bulb experience.
Conventions
In this guide, the following convention is used:
| Convention | Description |
|---|---|
| Underline | Hyperlinks are in blue and underlined. You can click to redirect to a website. |
More Info
• Specific product information can be found on the product page at https://www.tp-link.com.
• A Technical Community is provided for you to discuss our products at https://community.tp-link.com.
• Our Technical Support contact information can be found at the Help center of the Kasa Smart app and the Contact Technical Support page at https://www.tp-link.com/support.
• Videos about how to configure the smart bulb features can be found on the Setup Videos page at https://www.tp-link.com/support/setup-video/#smart-bulbs.
Introduction
The Smart Bulb is part of the Kasa smart home family of products, including plugs, switches, cameras and more. You can adjust brightness, track energy consumption, set schedules and timers and set an alarm that wakes you naturally by simulating the sunrise. Group lights together to control your smart bulbs more easily and create your own scenes.
Turn your home into a true smart home with Kasa Smart. You can also control multiple smart home devices with the Kasa Smart app or use your voice for added convenience. With Kasa, your home is never more than a few taps away.
- No Hub Required – The smart bulb screws in just like an ordinary bulb. Simply download the Kasa Smart app, connect to Wi-Fi and enjoy. No need for a hub or extra equipment.
- Scheduling - Set your smart bulb to turn on or off while you are home or away.
- Energy Saving – Reduce power usage without compromising on light quality.
- Voice Control – Use simple voice commands with Alexa and Google Assistant.
- Remote Control – Set up the smart bulb easily and control from anywhere with the free Kasa Smart app.
Set Up Your Smart Bulb
Follow the steps below to get started with your smart bulb.
Step 1. Download App
Go to Google Play or the App Store or scan the QR code below to download and install the Kasa Smart app.
![]()
Step 2. Log In
Open the app and use your TP-Link ID to log in. If you don't have a TP-Link ID, tap Create Account and the app will guide you through the rest.
Step 3. Add Your Device
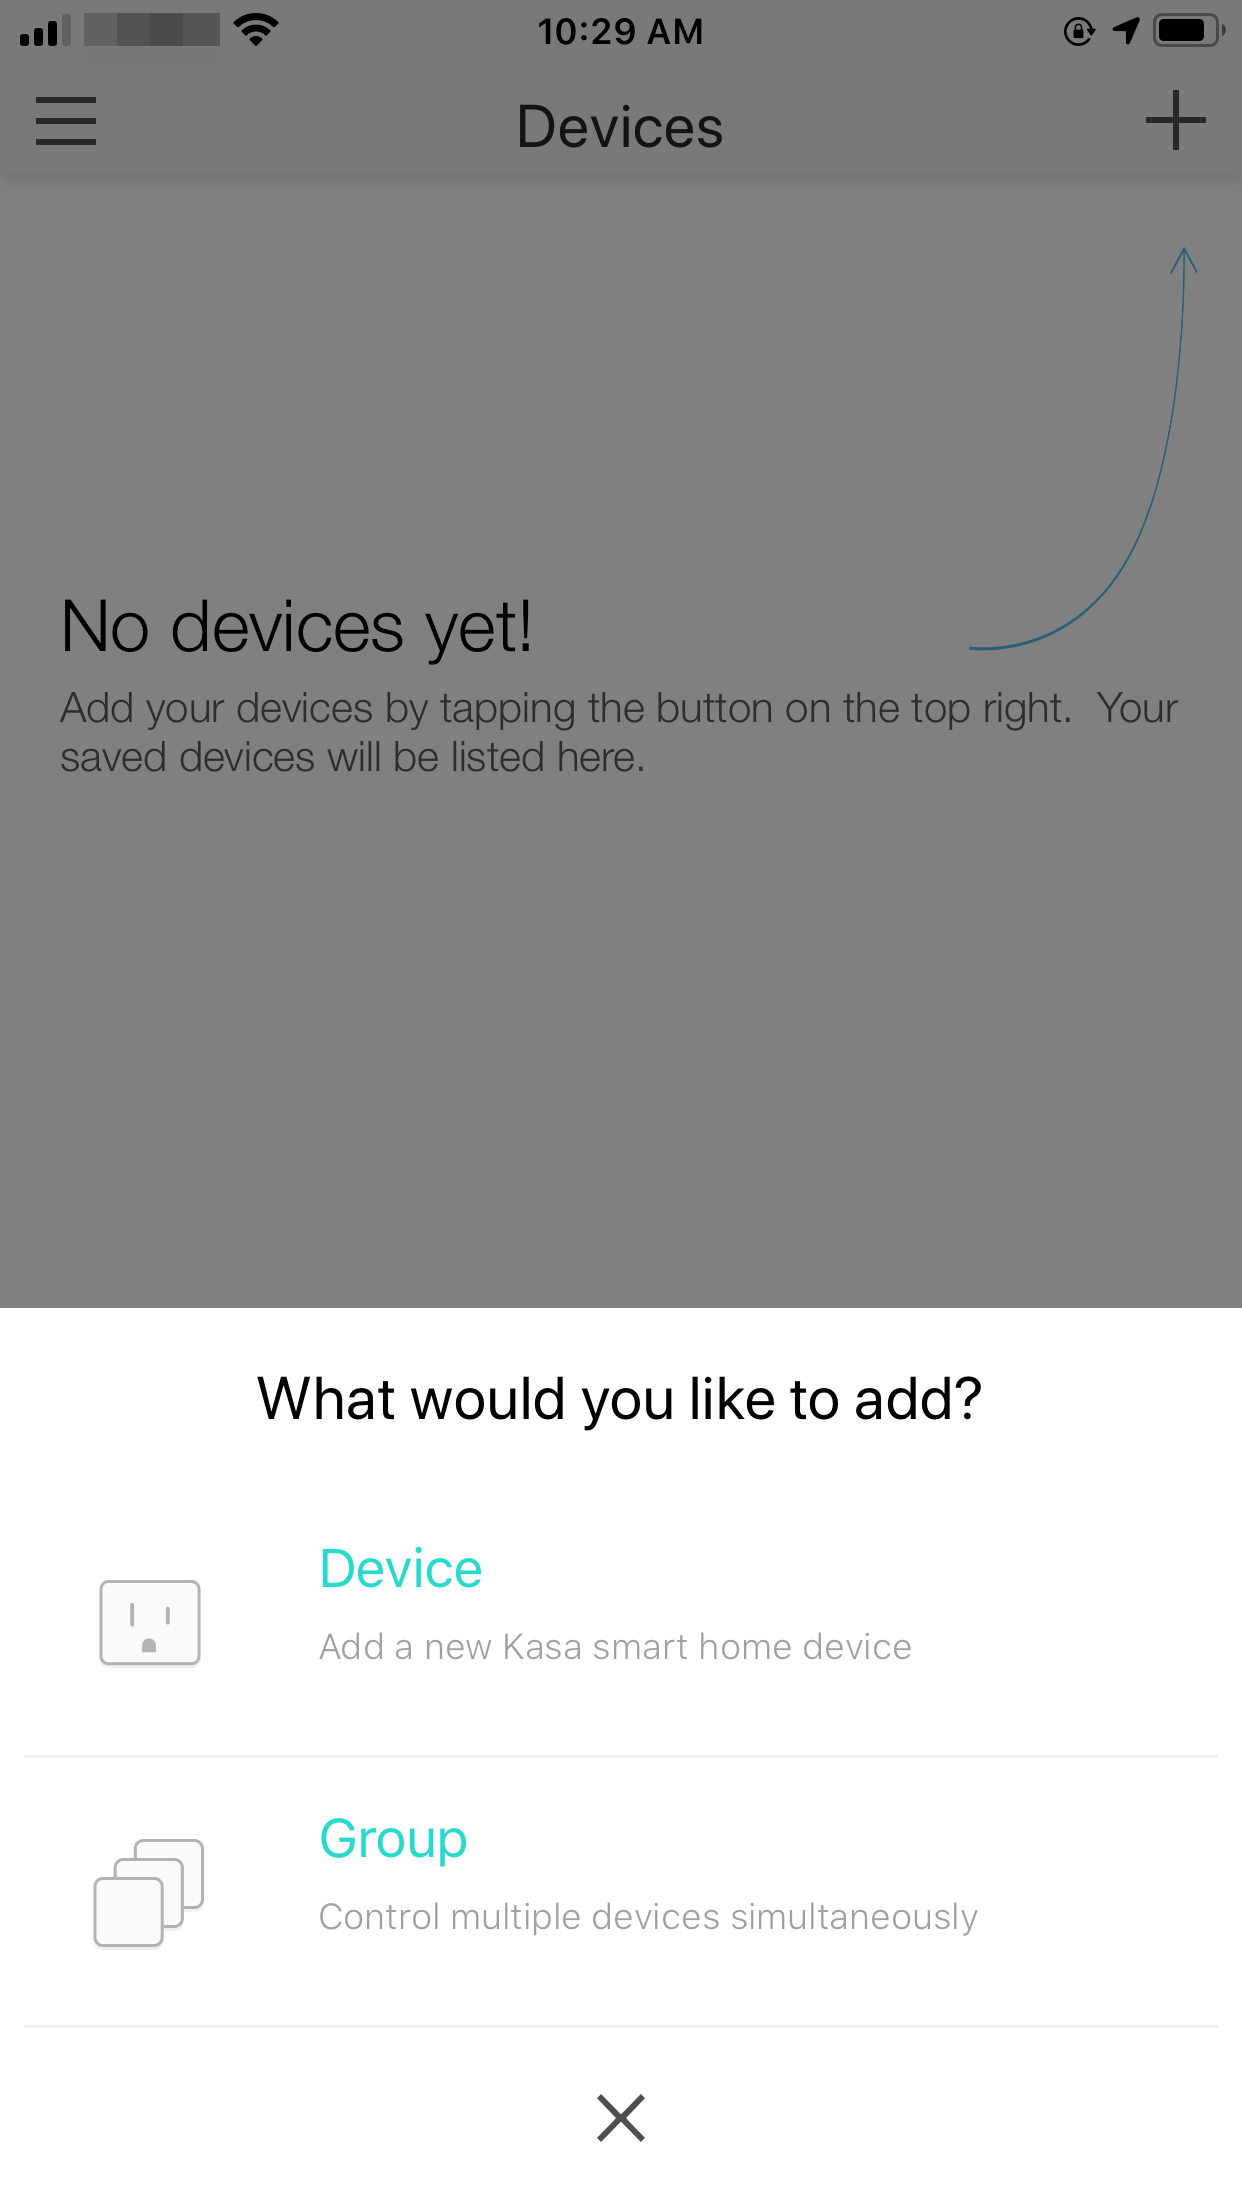
Tap the + button in the app and select Device to add your new Kasa smart bulb. Follow app instructions to complete the installation and setup.
Set Up Using Amazon Frustration-Free Setup
What is Amazon Frustration-Free Setup?
Amazon Frustration-Free Setup can help connect and set up your Kasa smart bulb in fewer steps, without having to remember and re-enter your Wi-Fi password on each device.
To use this feature, confirm the following:
-
The new Kasa smart bulb supports Amazon FFS. (*Only the KL125 and KL135 support Amazon FFS.)
-
You have an Amazon FFS enabled Alexa device or router.
-
You have saved your Wi-Fi information to Amazon by using Alexa echo.
-
Your Kasa smart bulb and router are on the same network as your Alexa echo.
LED Indications during Amazon Frustration-Free Setup
| LED | Status |
|---|---|
| Solid white | Ready for setup or working properly |
| Blinking red, green and blue once in sequence and then remain solid white | FFS setup in progress |
| Blinking white three times | FFS setup failed and you can set up the bulb from app manually |
How to use Amazon Frustration-Free Setup with Kasa bulbs
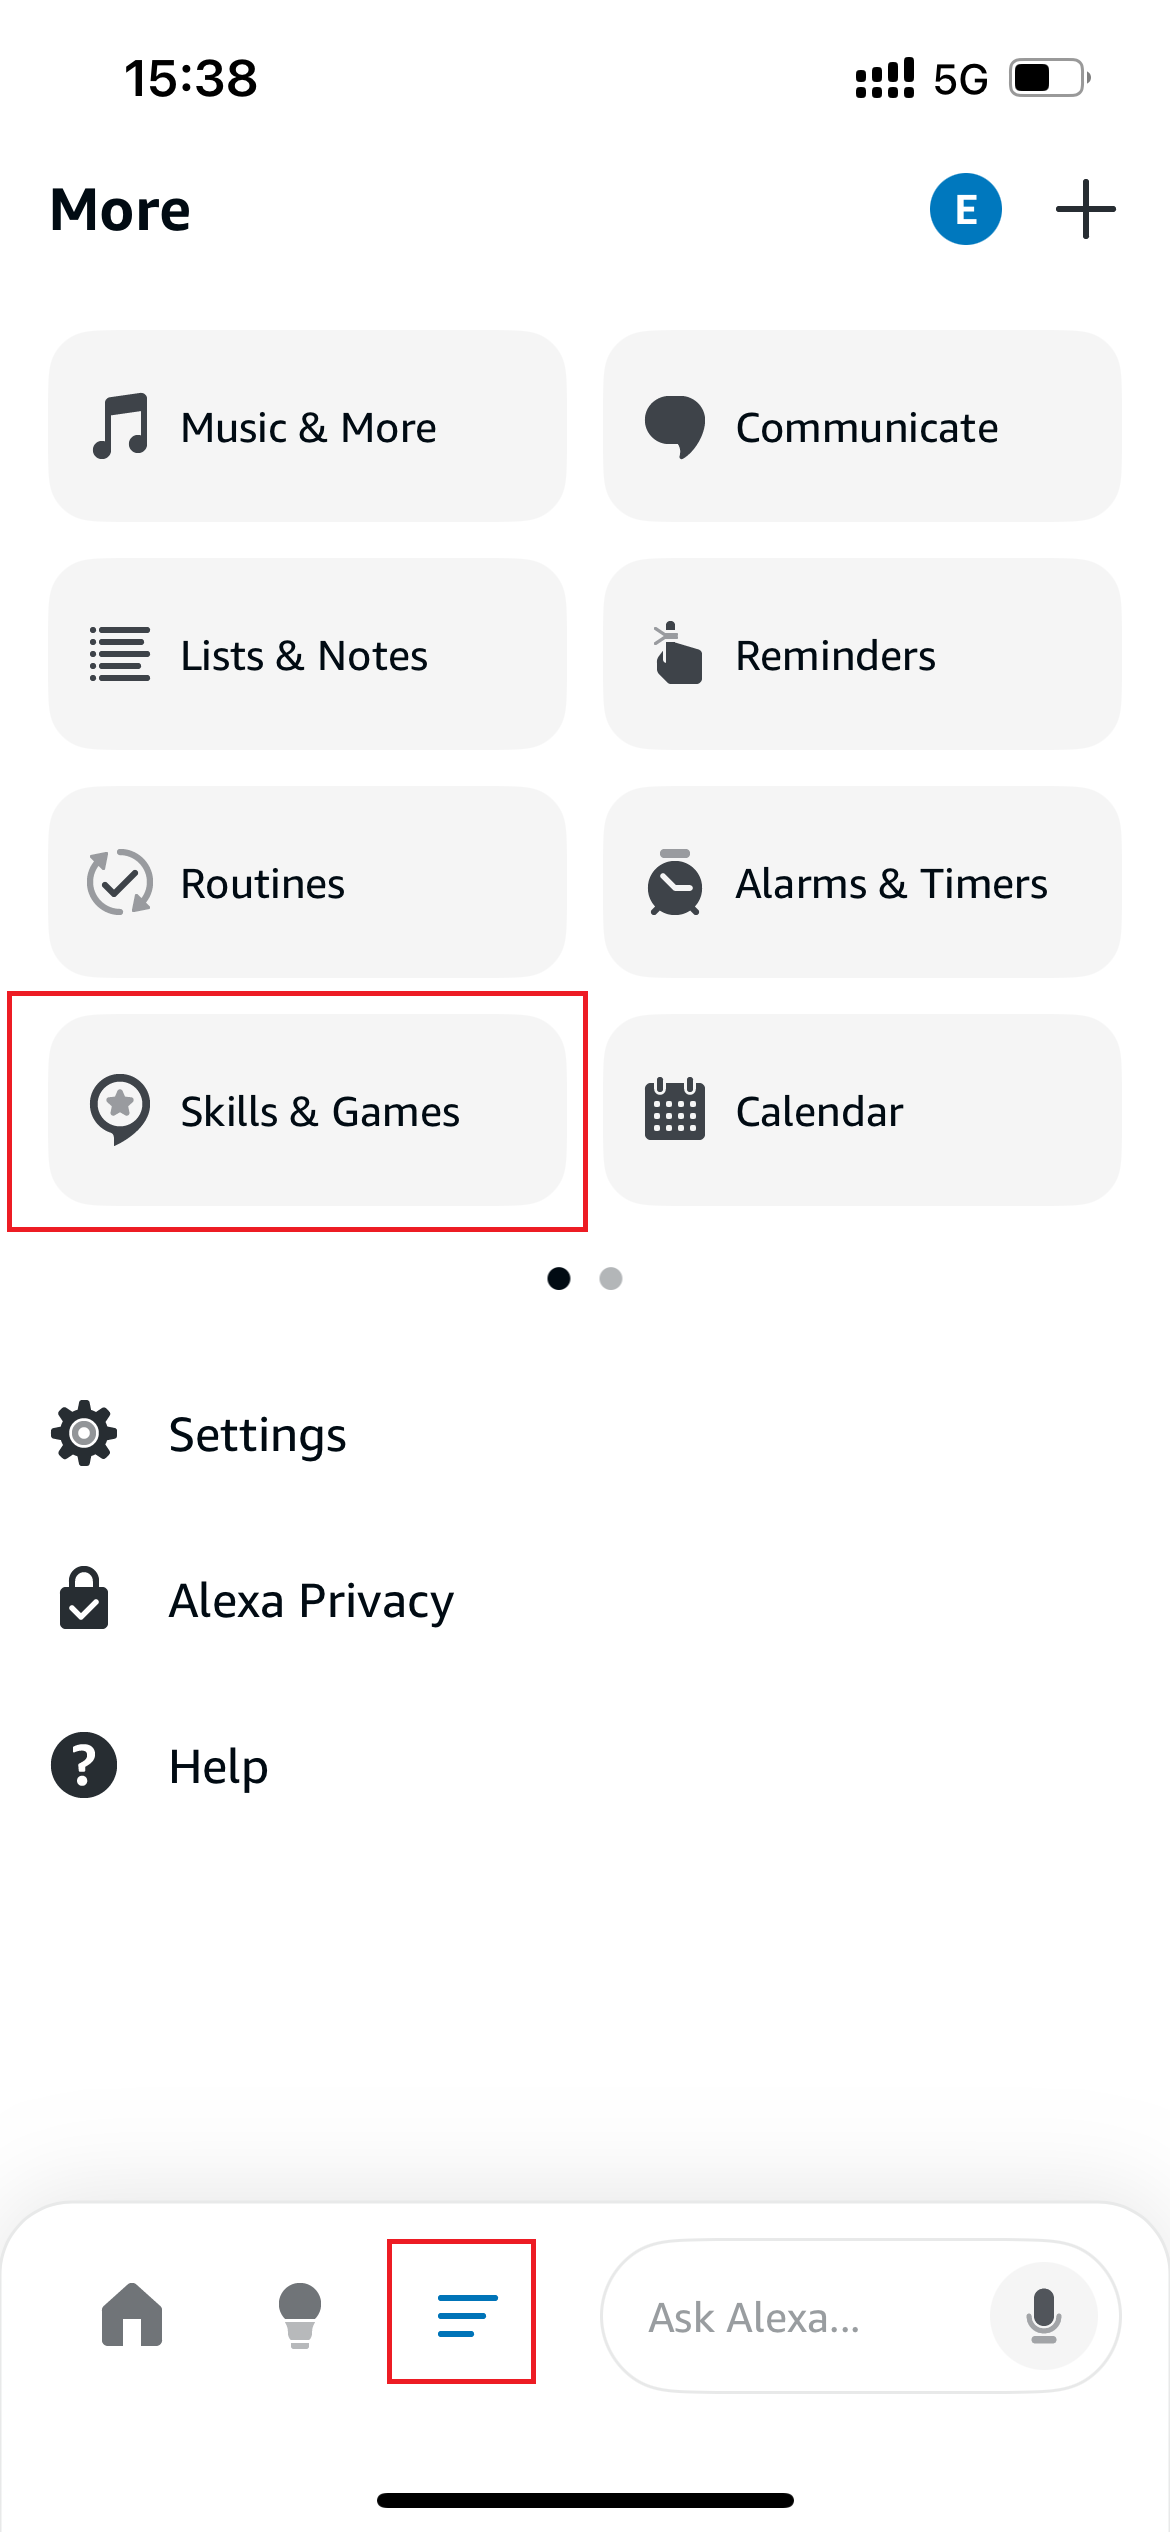
1. Open the Amazon Alexa app. Then tap More and select Skills & Games.
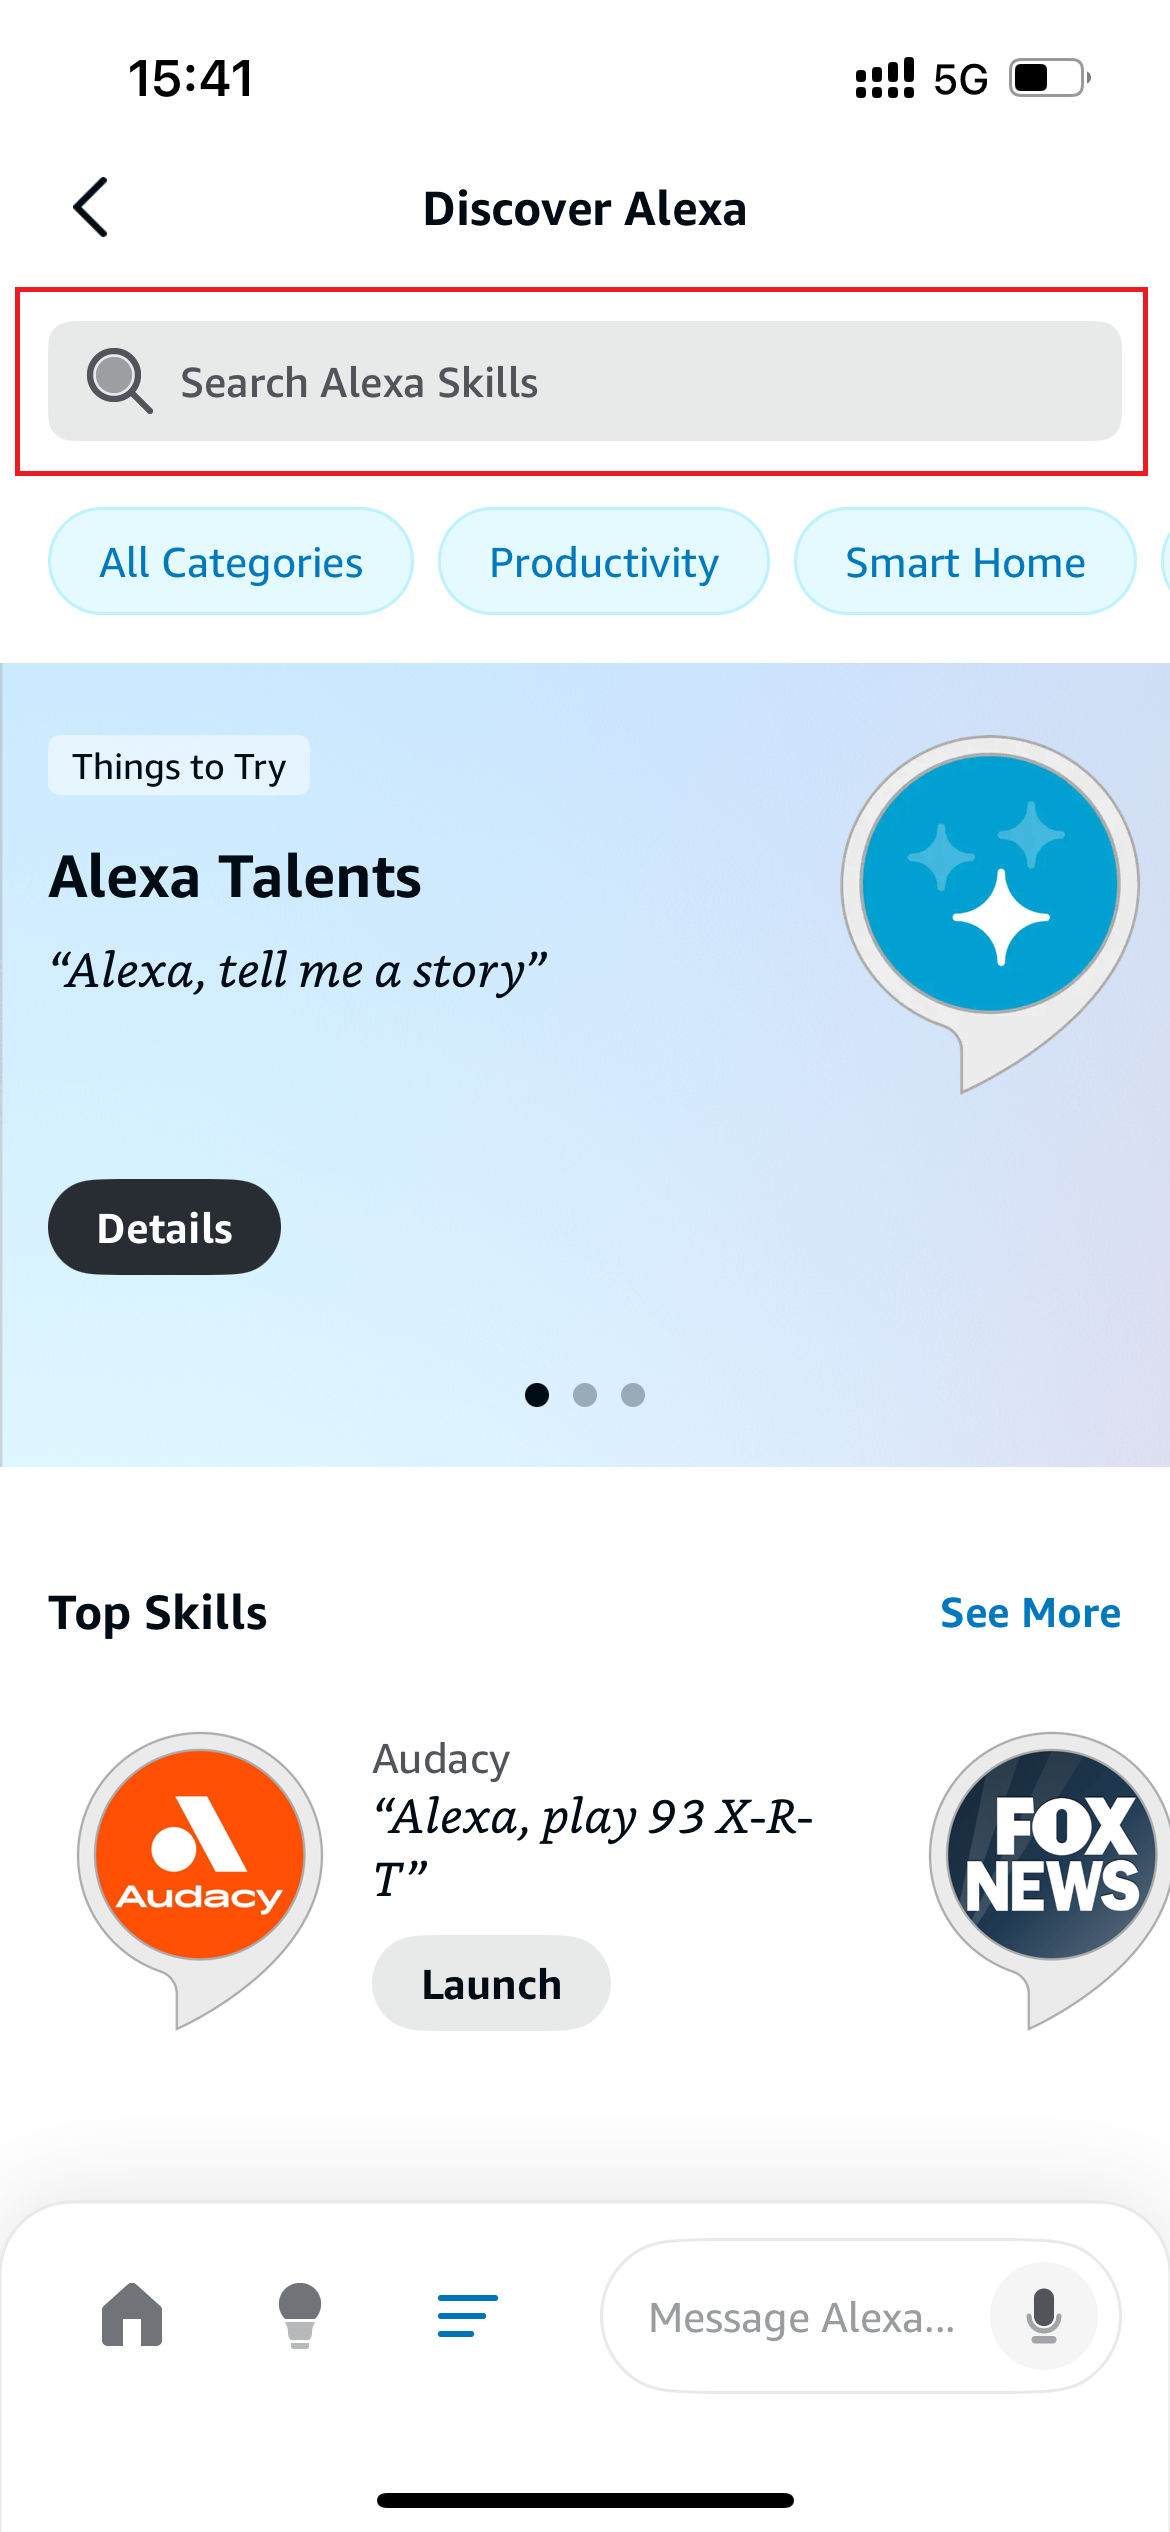
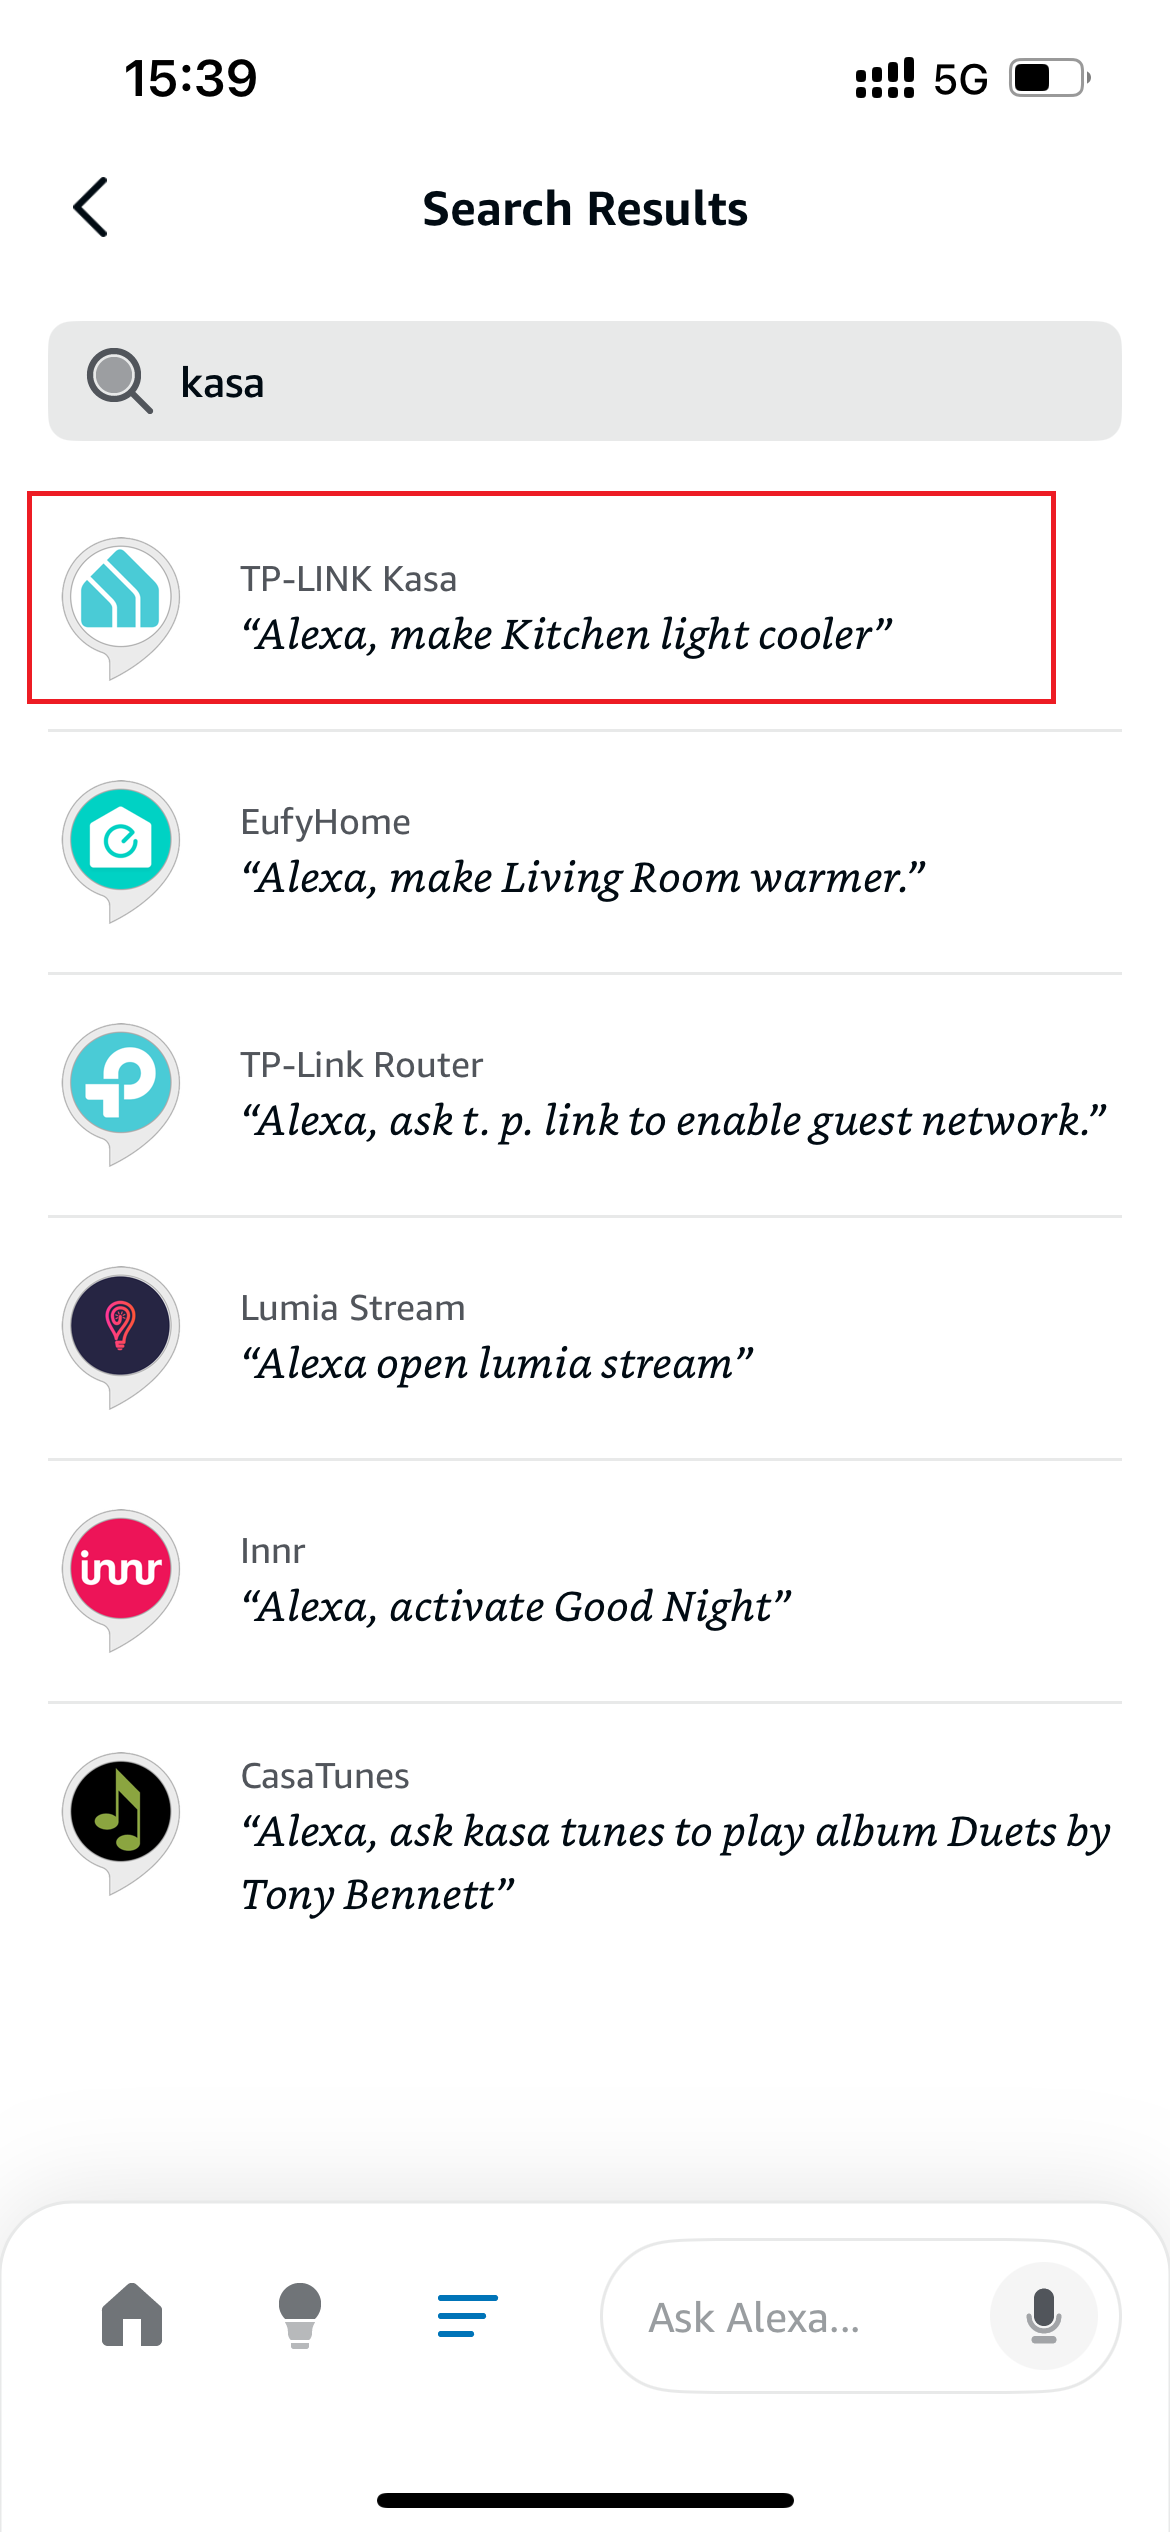
2. Enter Kasa in the search bar and choose TP-LINK Kasa.
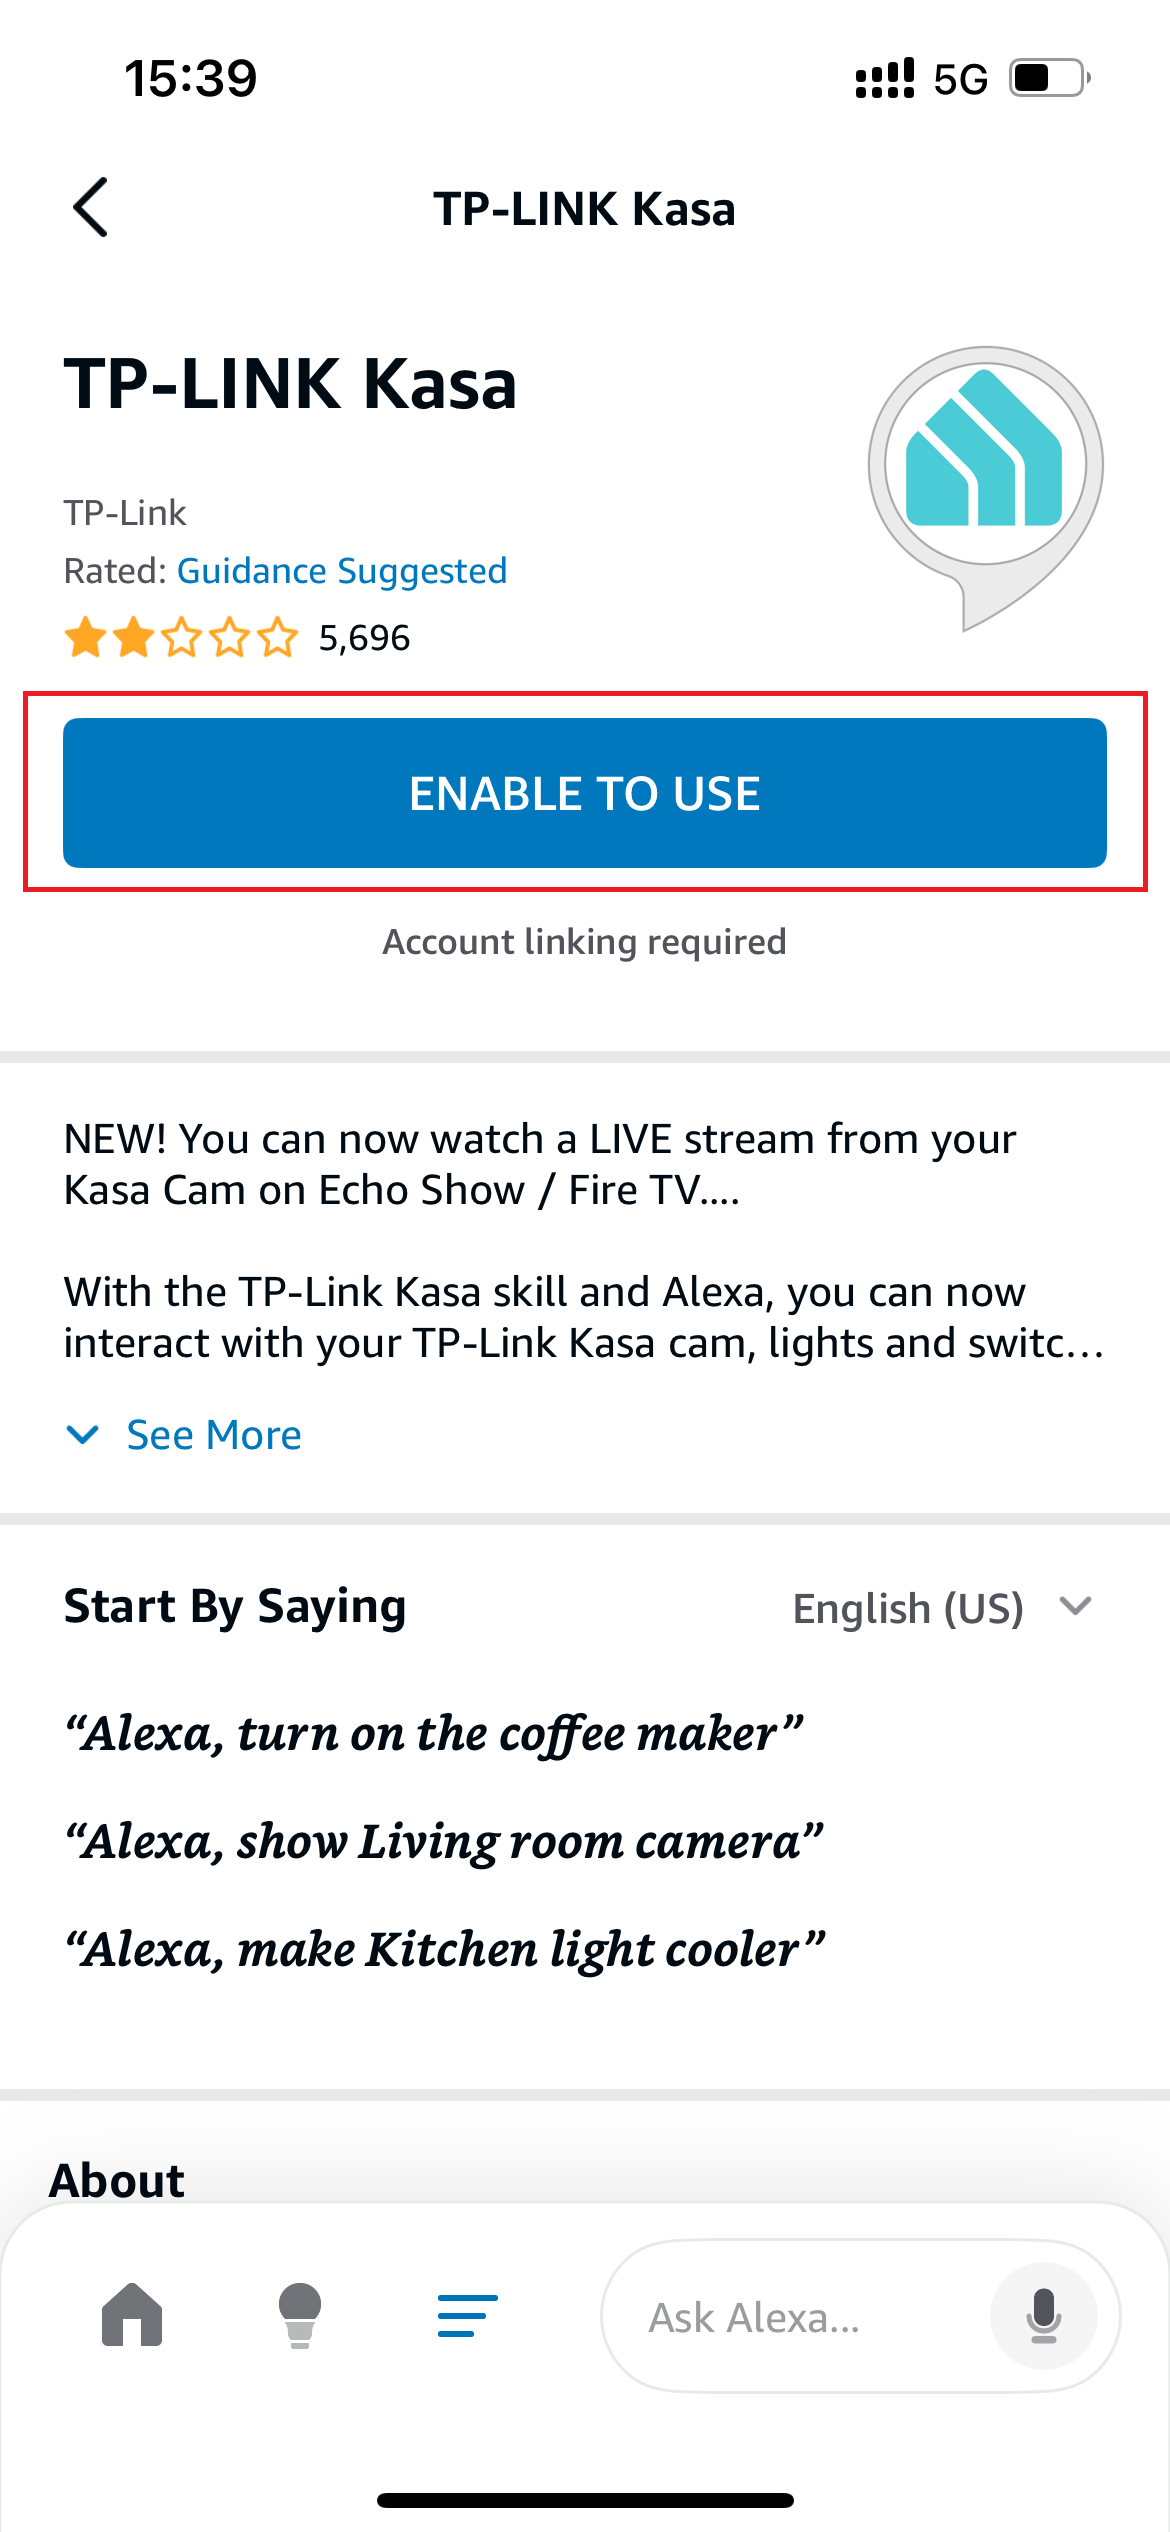
3. Tap the ENABLE TO USE button.
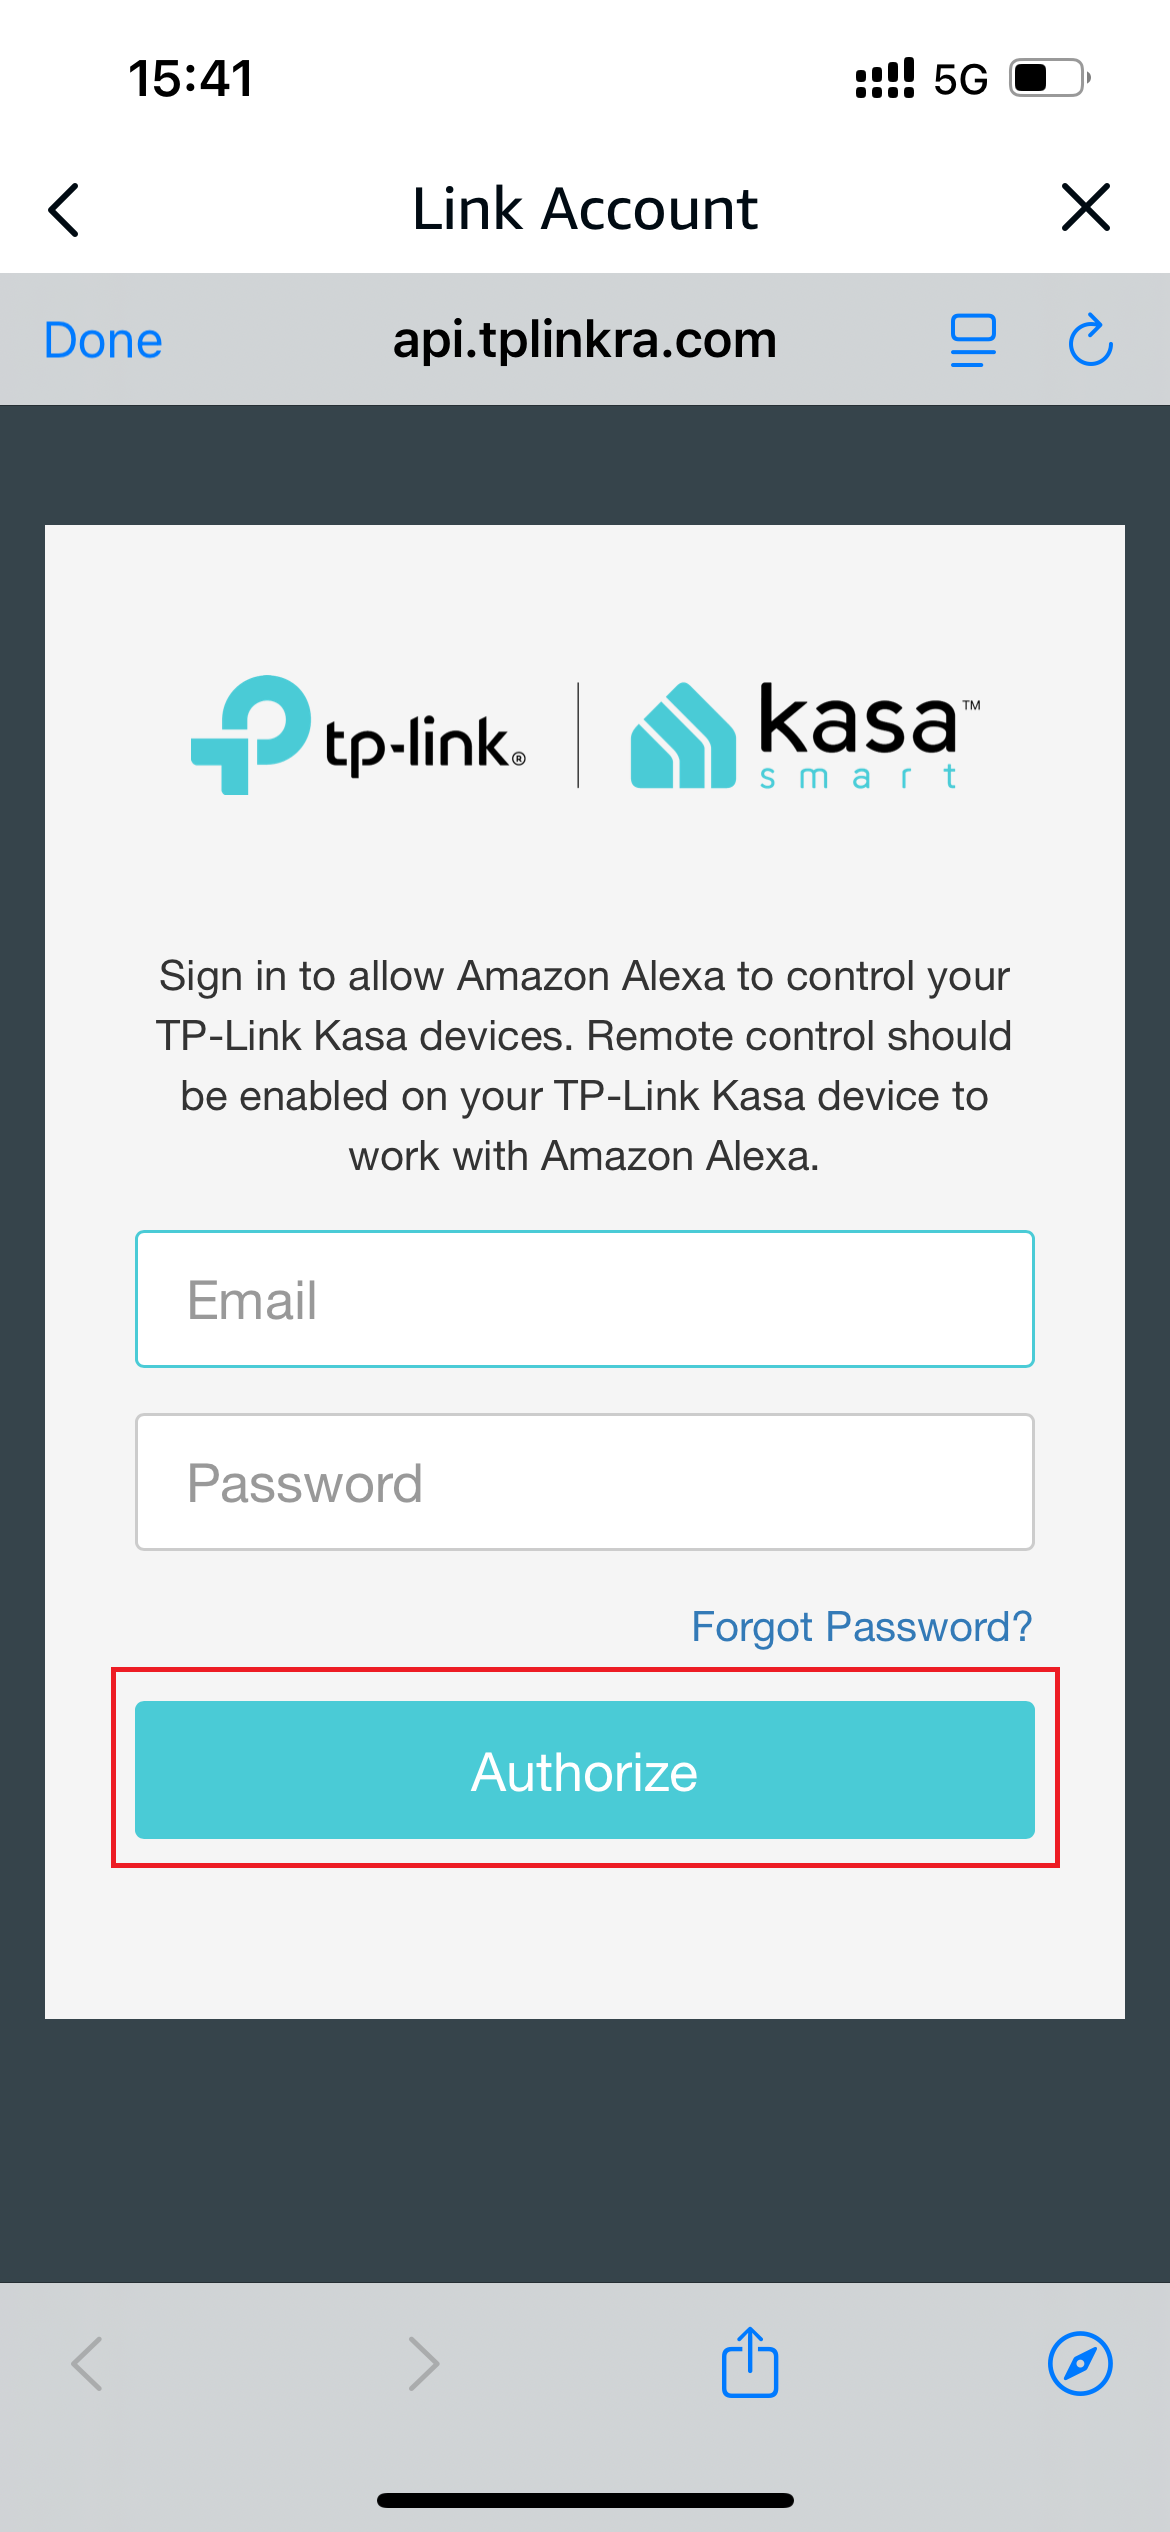
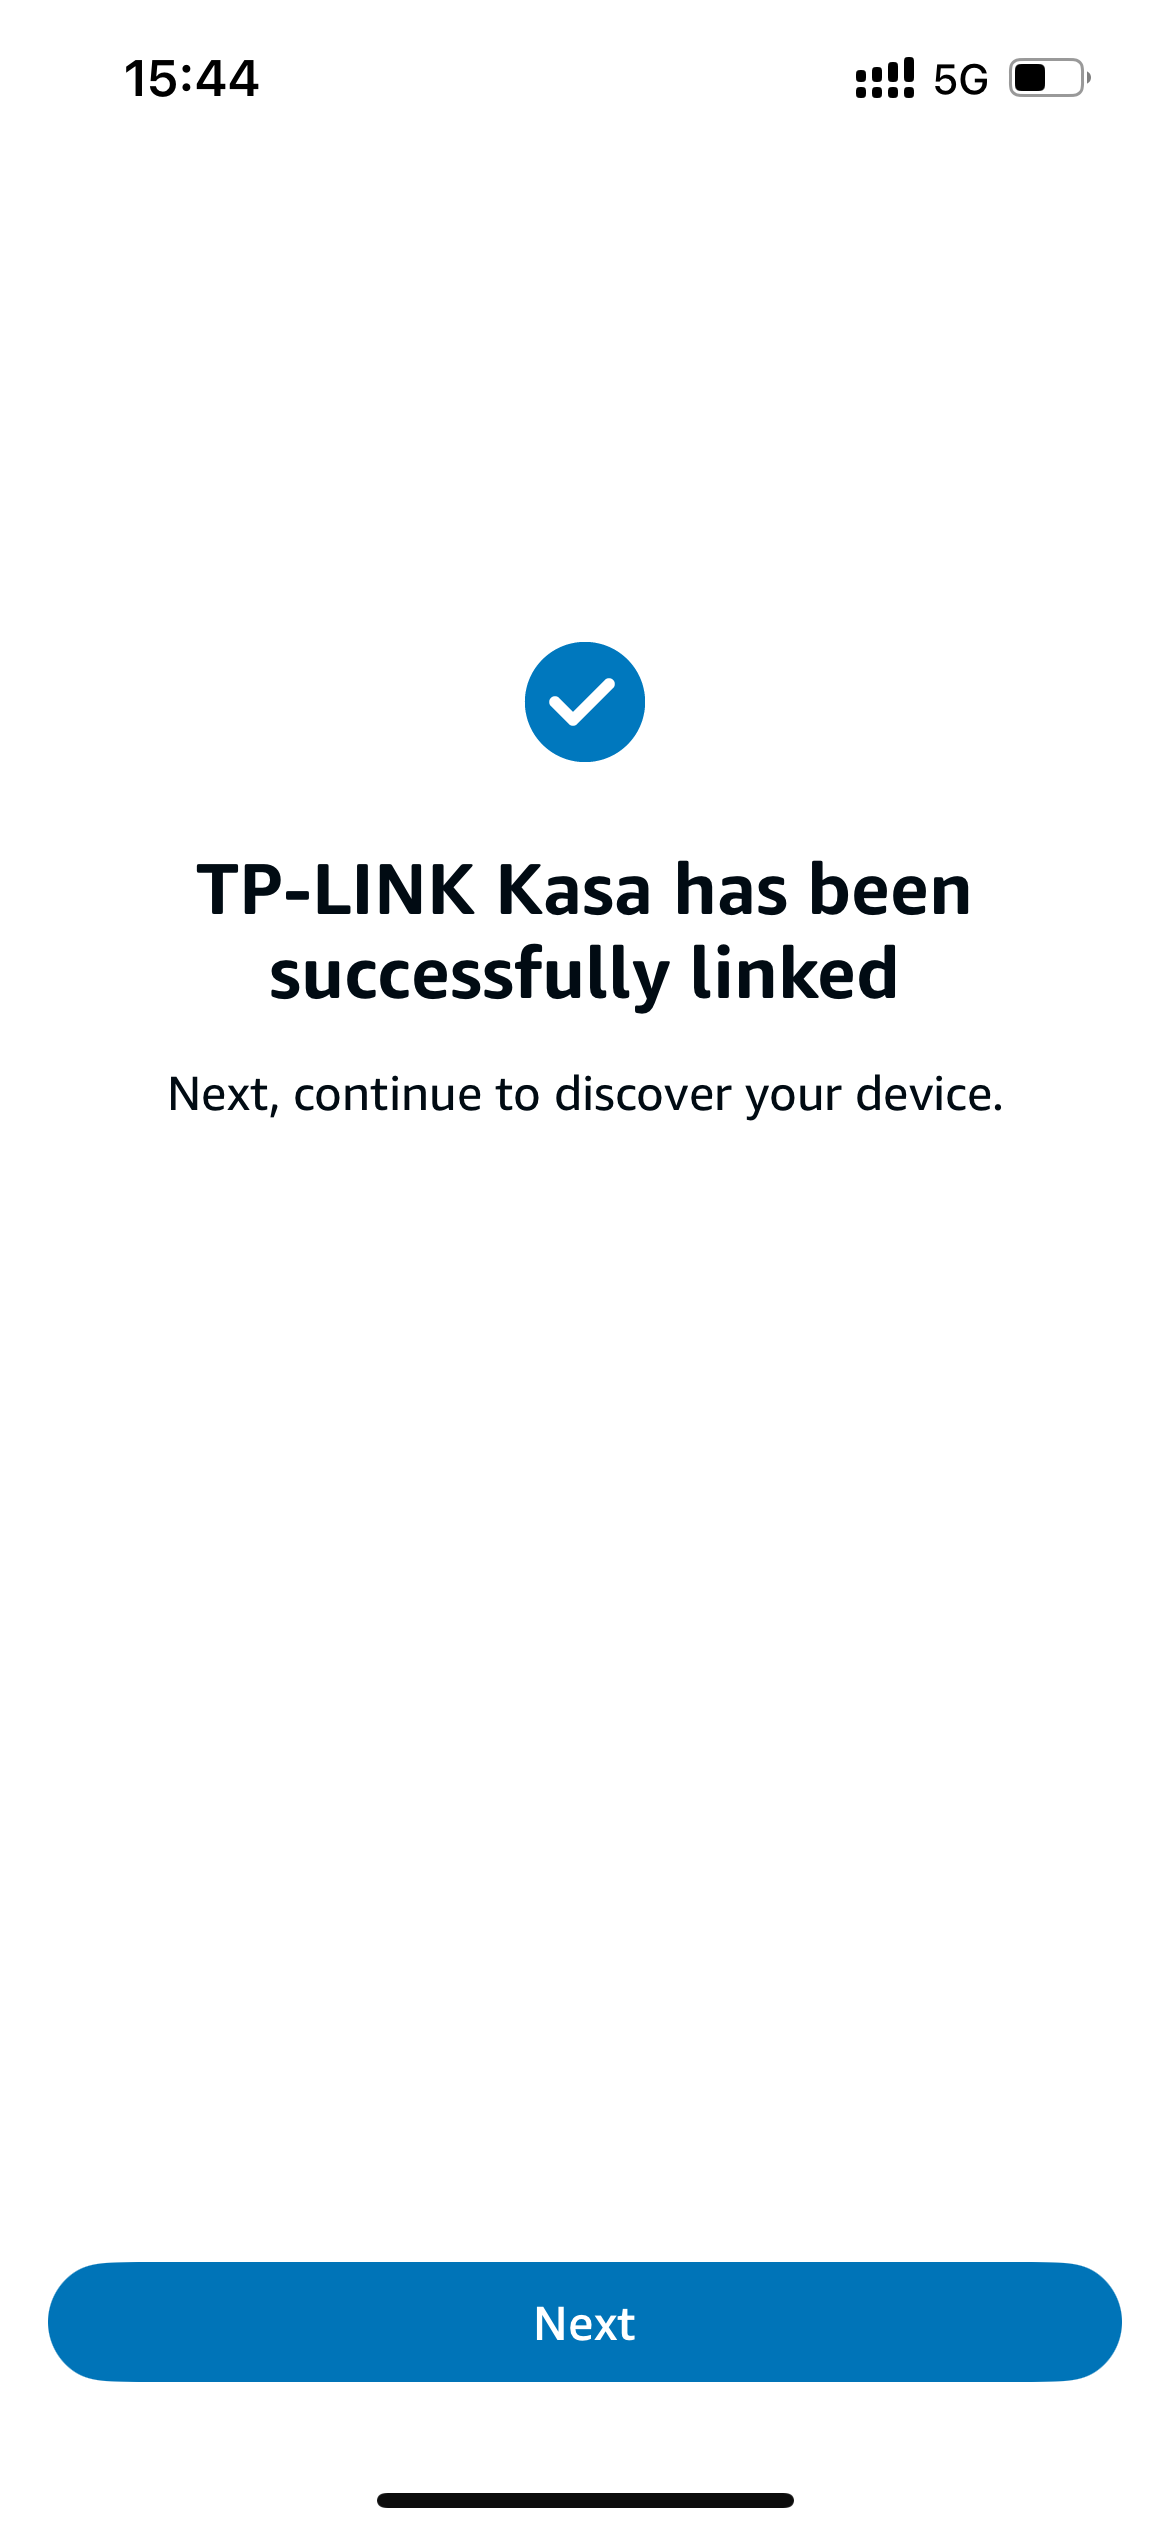
4. Log in with your TP-Link ID that has bound to your Kasa device, and tap Authorize. After authorized successfully, the message Kasa has been successfully linked will come up.
5. Power up your Kasa smart bulb and the setup will complete automatically in two minutes.
For setting up more Kasa smart bulbs, just plug and play!
Done!
If this new smart bulb displays on the Home page in the Kasa Smart app, it indicates this bulb has been successfully associated with your Amazon account and joined your Wi-Fi network automatically.
If this new smart bulb does not display on the Home page in the Kasa Smart app, try setting it up manually via the Kasa Smart app by following the steps in the previous chapter.
Reset Your Smart Bulb
Follow the steps below to reset your smart bulb.
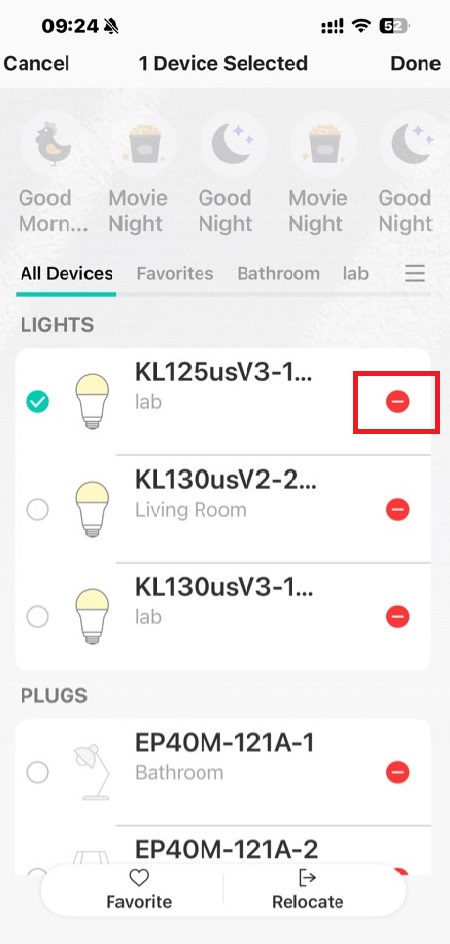
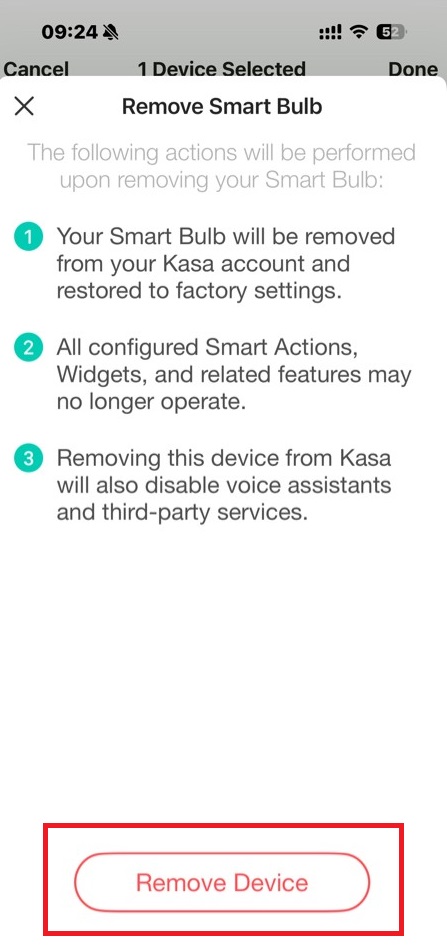
Method 1
On the Devices page in the Kasa app, long press the bulb card and then tap the - button to remove it.
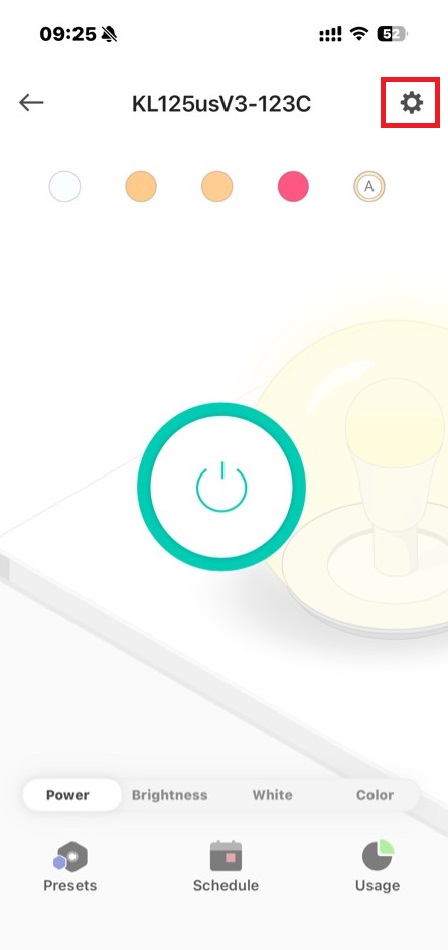
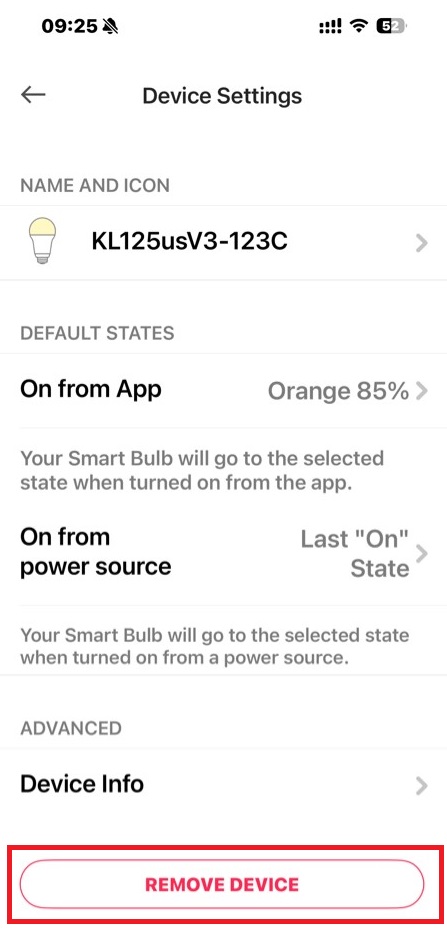
Method 2
In the Kasa app, tap the bulb card to enter the device status page and tap ![]() > Remove Device to reset the bulb.
> Remove Device to reset the bulb.
Third-Party Services
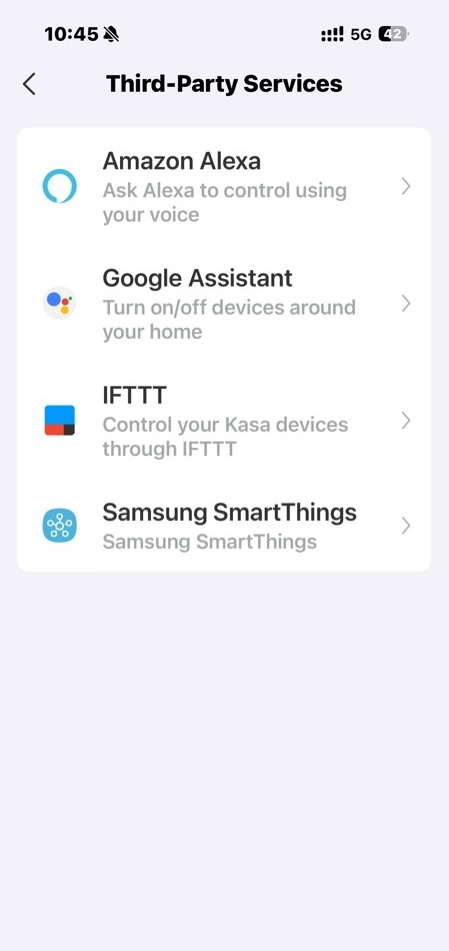
Use the Kasa app to pair your smart bulb with Amazon Alexa, Google Home Assistant, SmartThings, and other third-party services to enjoy a full hands-free experience. Kasa helps manage the rest of your smart home too, working with Nest to trigger changes when you arrive home or leave for the day.
Step 1
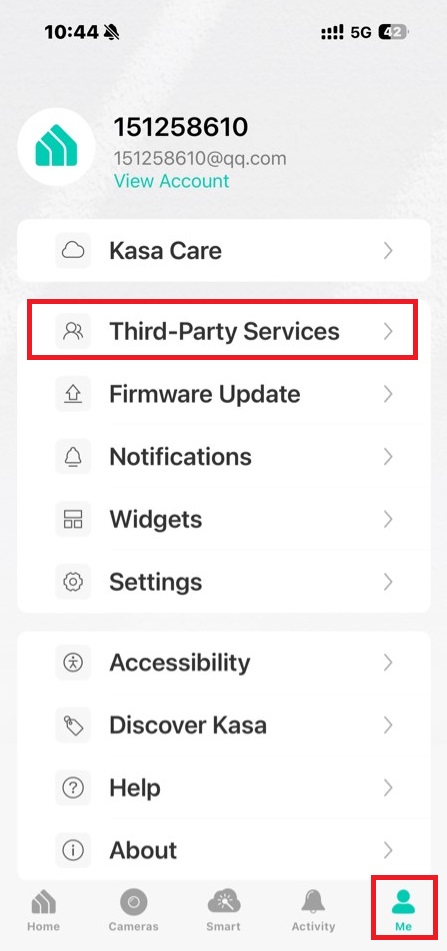
Go to the Me page in the Kasa app and tap Third-Party Services.
Step 2
Select one as you like and follow the app instructions to complete the settings.
Authentication
FCC compliance information statement

Product Name: Kasa Smart Wi-Fi Light Bulb, Dimmable / Kasa Smart Wi-Fi Light Bulb, Multicolor / Kasa Smart Wi-Fi Light Bulb, Multicolor
Model Number: KL110 / KL125 / KL135
Responsible Party:
TP-Link Systems Inc.
Address: 10 Mauchly, Irvine, CA 92618
Website: http://www.tp-link.com/us/
Tel: +1 626 333 0234
Fax: +1 909 527 6804
E-mail: sales.usa@tp-link.com
This equipment has been tested and found to comply with the limits for a Class B digital device, pursuant to part 15 of the FCC Rules. These limits are designed to provide reasonable protection against harmful interference in a residential installation. This equipment generates, uses and can radiate radio frequency energy and, if not installed and used in accordance with the instructions, may cause harmful interference to radio communications. However, there is no guarantee that interference will not occur in a particular installation. If this equipment does cause harmful interference to radio or television reception, which can be determined by turning the equipment off and on, the user is encouraged to try to correct the interference by one or more of the following measures:
• Reorient or relocate the receiving antenna.
• Increase the separation between the equipment and receiver.
• Connect the equipment into an outlet on a circuit different from that to which the receiver is connected.
• Consult the dealer or an experienced radio/ TV technician for help.
This device complies with part 15 of the FCC Rules. Operation is subject to the following two conditions:
1) This device may not cause harmful interference.
2) This device must accept any interference received, including interference that may cause undesired operation.
Any changes or modifications not expressly approved by the party responsible for compliance could void the user’s authority to operate the equipment.
Note: The manufacturer is not responsible for any radio or TV interference caused by unauthorized modifications to this equipment. Such modifications could void the user's authority to operate the equipment.
FCC RF Radiation Exposure Statement
This equipment complies with FCC RF radiation exposure limits set forth for an uncontrolled environment. This device and its antenna must not be co-located or operating in conjunction with any other antenna or transmitter.
“To comply with FCC RF exposure compliance requirements, this grant is applicable to only Mobile Configurations. The antennas used for this transmitter must be installed to provide a separation distance of at least 20 cm from all persons and must not be co-located or operating in conjunction with any other antenna or transmitter.”
We, TP-Link Systems Inc., has determined that the equipment shown as above has been shown to comply with the applicable technical standards, FCC part 15. There is no unauthorized change is made in the equipment and the equipment is properly maintained and operated.
Canadian Compliance Statement
This device contains licence-exempt transmitter(s)/receiver(s) that comply with Innovation, Science and Economic Development Canada's licenceexempt RSS(s). Operation is subject to the following two conditions:
1) This device may not cause interference.
2) This device must accept any interference, including interference that may cause undesired operation of the device.
L'émetteur/récepteur exempt de licence contenu dans le présent appareil est conforme aux CNR d'Innovation, Sciences et Développement économique Canada applicables aux appareils radio exempts de licence. L'exploitation est autorisée aux deux conditions suivantes:
1) L'appareil ne doit pas produire de brouillage;
2) L'appareil doit accepter tout brouillage radioélectrique subi, même si le brouillage est susceptible d'en compromettre le fonctionnement.
Radiation Exposure Statement:
This equipment complies with IC radiation exposure limits set forth for an uncontrolled environment. This equipment should be installed and operated with minimum distance 20cm between the radiator & your body.
Déclaration d'exposition aux radiations:
Cet équipement est conforme aux limites d'exposition aux rayonnements IC établies pour un environnement non contrôlé. Cet équipement doit être installé et utilisé avec un minimum de 20 cm de distance entre la source de rayonnement et votre corps.
Industry Canada Statement
CAN ICES-003(B)/NMB-003(B)
CAN ICES-005(B)/NMB-005(B)
Safety Information
- Operating Temperature: -15℃~40℃(5℉~104℉)
- Keep the device away from water, fire, humidity or hot environments.
- NOT FOR EMERGENCY LIGHTING.
- Do not attempt to disassemble, repair, or modify the device. If you need service, please contact us.
- Do not use the device where wireless devices are not allowed.
- Only use the control provided with or specified by these instructions to control this device.
- Do not install the Smart Bulb with wet hands or when standing on wet or damp surfaces.
- NOT for use in totally enclosed or recessed luminaires. Suitable for damp locations.
- The increased weight may reduce the mechanical stability of certain luminaires and lampholders and may impair contact making and lamp retention.
- RISK OF ELECTRIC SHOCK OR BURNS. Switch OFF the light switch controlling the bulb and WAIT for the bulb to cool down before attempting to change it.
- Compatible with regular light switches. Not suitable for use with standard in-wall dimmers. Not compatible with photosensors, motion sensors, or timers. Dimmable via the app only.
- Only use the control provided with or specified by these instructions to control this lamp. This lamp will not operate properly when connected to a standard (incandescent) dimmer or dimming control.
Please read and follow the above safety information when operating the device. We cannot guarantee that no accidents or damage will occur due to improper use of the device. Please use this product with care and operate at your own risk.
Explanation of the symbols on the product label
Note: Symbols may vary from products.
| Symbol 符號解釋 |
Explanation 解釋 |
|---|---|
 |
Class II equipment Class II 設備 |
 |
Class II equipment with functional earthing 具有功能接地的Class II 設備 |
 |
Alternating current 交流電 |
 |
DC voltage 直流電壓 |
 |
Polarity of output terminals 輸出端子極性 |
 |
Indoor use only 僅限室內使用 |
 |
Dangerous voltage 危險電壓 |
 |
Caution, risk of electric shock 注意,有觸電危險 |
 |
Energy efficiency Marking 能源效率標示 |
 |
Protective earth 保護地線 |
 |
Earth 地線 |
 |
Frame or chassis 機架接地 |
 |
Functional earthing 功能地線 |
 |
Caution, hot surface 警告,表面高溫 |
 |
Caution 警告 |
 |
Operator’s manual 操作手冊 |
 |
Stand-by 待機 |
 |
“ON”/”OFF” (push-push) 「開」/「關」 ( 按壓式) |
 |
Fuse 保險絲 |
 |
Fuse is used in neutral N 保險絲用於中性線N |
 |
RECYCLING This product bears the selective sorting symbol for Waste electrical and electronic equipment (WEEE). This means that this product must be handled pursuant to European directive 2012/19/EU in order to be recycled or dismantled to minimize its impact on the environment. User has the choice to give his product to a competent recycling organization or to the retailer when he buys a new electrical or electronic equipment. 回收利用 本產品標示有「廢棄電氣電子設備(WEEE)」的分類回收標誌。這表示本產品必須依據歐盟指令 2012/19/EU 進行妥善回收或拆 解,以減少對環境的影響。 使用者可選擇將本產品交給合格的回收機構,或在購買新電器或電子設備時,交回給零售商進行回收處理。 |
 |
Caution, avoid listening at high volume levels for long periods 注意,避免長時間以高音量收聽 |
 |
Disconnection, all power plugs 斷開所有電源插頭 |
| m | Switch of mini-gap construction 微間隙結構的開關 |
| µ | Switch of micro-gap construction (for US version) Switch of micro-gap / micro-disconnection construction (for other versions except US) 微小間隙結構開關(適用於美國版) 微小間隙 / 微小斷開結構開關(適用於美國以外的其他版本) |
| ε | Switch without contact gap (Semiconductor switching device) 無接點間隙開關(半導體開關裝置) |