How to configure Wireless MAC address filter on modem router (self-developed UI)
Step 1: Open the web browser and type the IP address of the device in the address bar (default is 192.168.1.1). Press Enter.
Step 2: Type the username and password in the login page, the default username and password both are admin, Then click "OK" to log into the device.
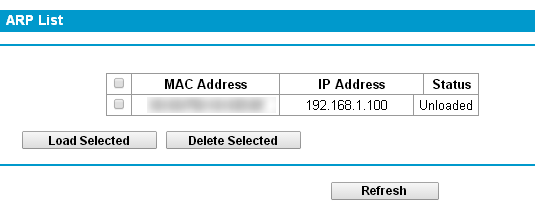
Step 3: Prepare the MAC Address(also called Physical Address) of the wireless devices that you want to allow/deny wireless access .You can find the MAC Addresses of all the connected clients under IP&MAC Binding > ARP List
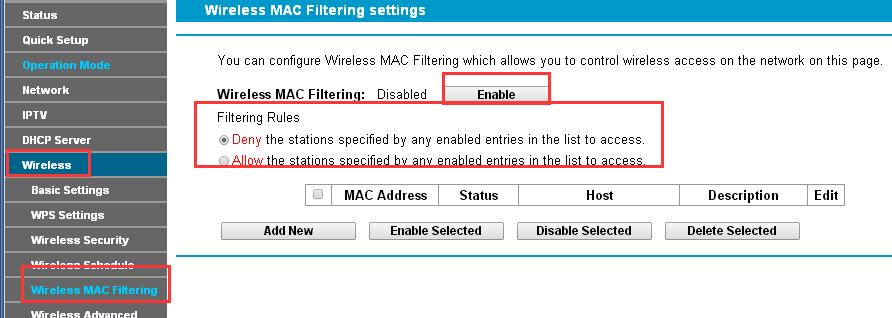
Step 4: Go to Wireless > Wireless MAC Filtering > click "Enable" to active this function;Select the filtering rules according to your demand.
If you have a dual band modem,please configure the Wireless MAC filter separately on either or both bands(Wireless2.4GHz/Wireless 5GHz).
Select "Deny the stations specified by any enabled entries in the list to access" means the listed MAC Addresses will NOT be able to access the internet wirelessly; Select "Allow the stations specified by any enabled entries in the list to access" means only the listed MAC Addresses will be able to use the wireless internet.
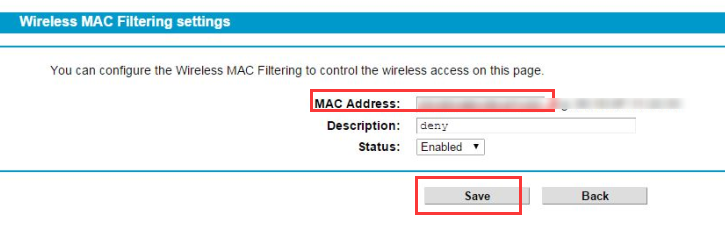
Step 5: Click "Add New" and input the "MAC Address" of your device,create any name for "Description",then press "Save".
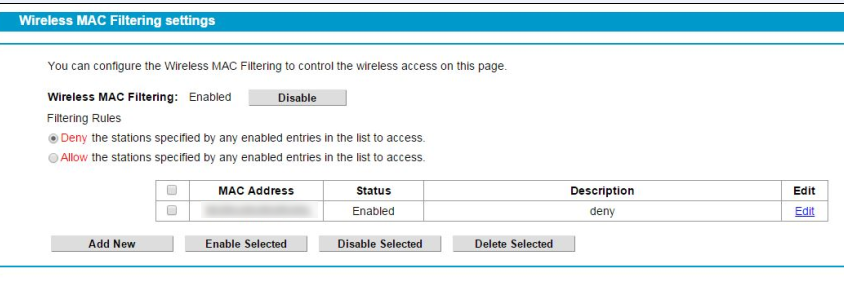
Step 6: You can add rules one by one in this way.
Get to know more details of each function and configuration please go to Download Center to download the manual of your product.
¿Es útil este artículo?
Tus comentarios nos ayudan a mejorar esta web.
