Advanced Setup (IPTV) of TD-W8960N For TM UniFi
This Article Applies to:
Note:
- Before doing all these settings, please hard reset the device to factory first. If you don’t know how to make it, you can click here to see the guide.
- Please check your hardware version. TD-W8960N v4 doesn't support TM UniFi. FAQ_46
Step 1 Connect your computer to the device´s port 2 or 3. Open the web browser and type in router’s IP address, and press the Enter button. (The default is 192.168.1.1.) The Username and Password are both "admin".

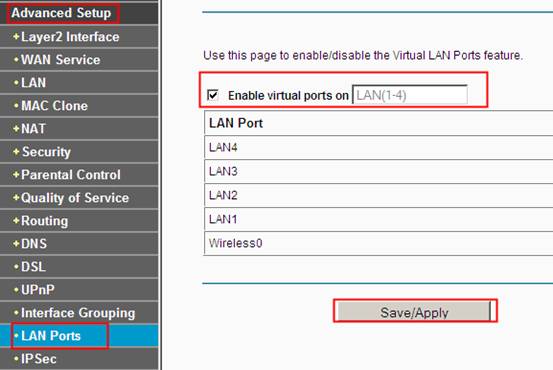
Step 2 Go to Advanced Setup->LAN Ports, enable the virtual port, hit Save/Apply.
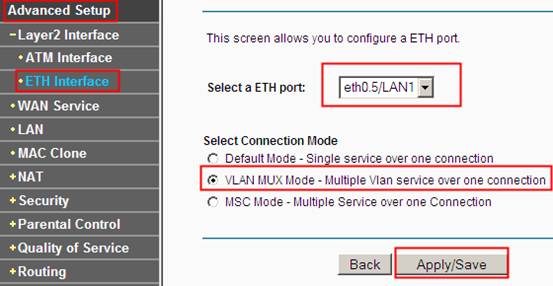
Step 3 Go to Advanced Setup->Layer2 Interface->ETH Interface, select the follow option and hit Save/Apply.
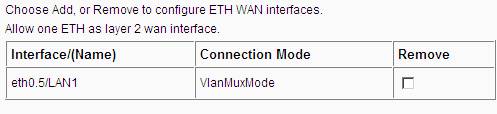
Confirm the settings again.
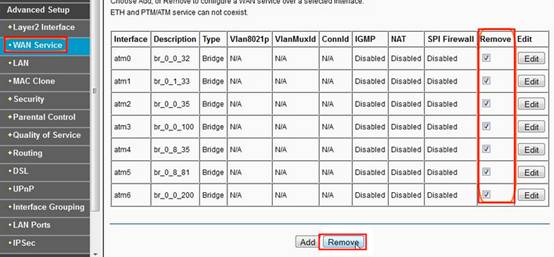
Step 4 Go to Advanced Setup->WAN Service, select all current interfaces, hit Remove to delete all.
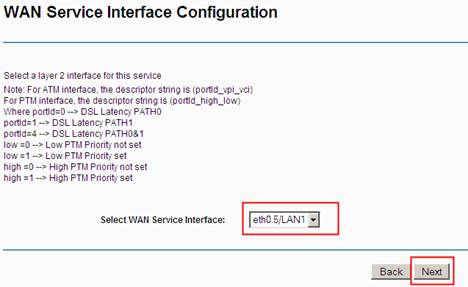
Step 5 Hit Add to create IPTV interface. (Vlan.600) Select the Newly created WAN interface eth0.5/LAN1, hit Next to continue.
Step 6 Select & enter the following values for vlan.600 for IPTV, hit Next to continue.
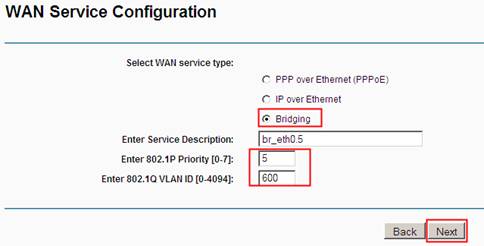
Then hit Apply/Save to finish this process.
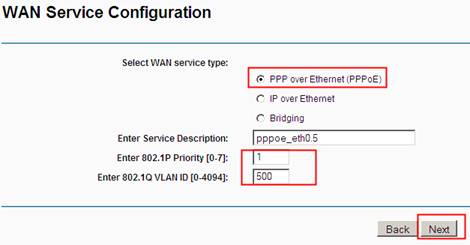
Step 7 Go to Advanced Setup->WAN Service, hit Add again to create the vlan.500 for Internet PPPoE. Select the same WAN interface, hit Next.
Step 8 Select & enter the following values for Internet PPPoE, hit Next to continue.
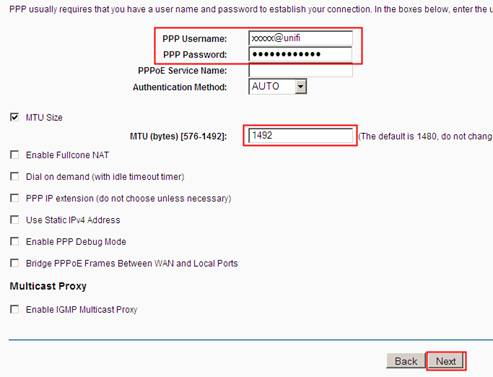
Step 9 Please ensure you enter the correct UniFi user ID & password (It is case sensitive!!) and the MTU value, hit Next to continue.
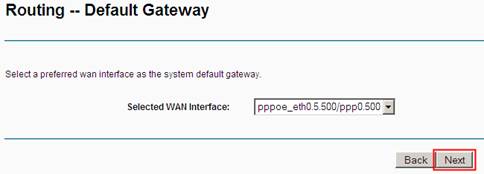
Step 10 Hit Next to continue.
Step 11 Select Use the following Static DNS IP address. You can use the OpenDNS as below or Google:8.8.8.8/8.8.8.4, hit Next to continue.

Then click Apply/Save to finish this process.
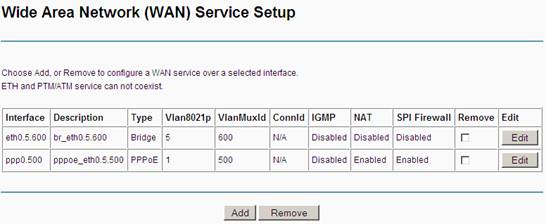
Step 12 Again, ensure the vlans are created in the exact sequences as follows.
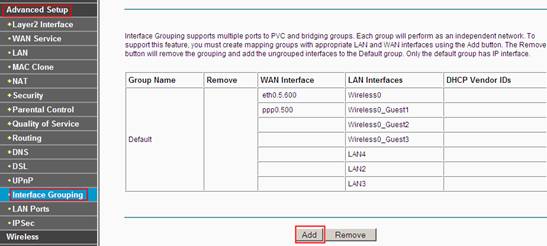
Step 13 Go to Advanced Setup->Interface Grouping, hit Add to create & map the IPTV port.
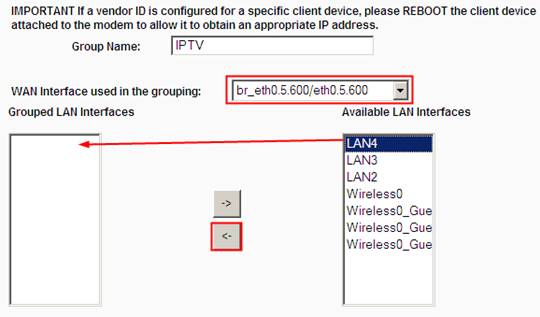
Step 14 Enter the IPTV group name, select the correct vlan.600 interface. Select LAN4 on the right panel and move to left panel. Then hit Save/Apply.
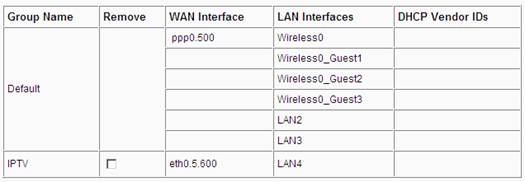
Step 15 Re-confirm the interface grouping result as follows.
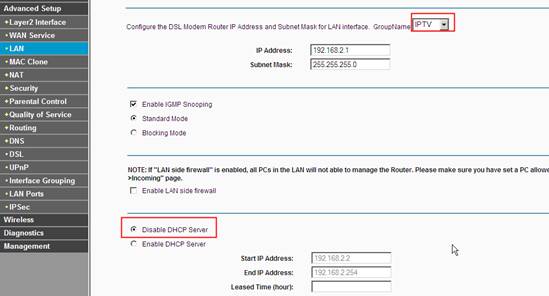
Step 16 Go to Advanced Setup->LAN, select IPTV group name and disable the DHCP, hit Save/Apply.
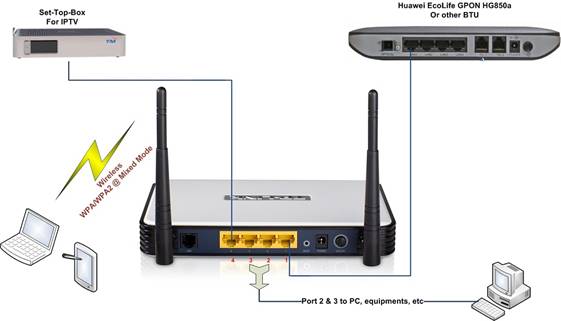
Until now, you can use the IPTV with TD-W8960N. If you have any problem, please contact support@tp-link.com. Below is the possible physical connection.
Is this faq useful?
Your feedback helps improve this site.
TP-Link Community
Still need help? Search for answers, ask questions, and get help from TP-Link experts and other users around the world.