如何將 VIGI 攝影機加入 UniFi Protect
這篇文章適用於:
介紹
VIGI 攝影機支援 ONVIF,現已相容最新版的 UniFi Protect,可將 VIGI 攝影機加入 UniFi Protect,並使用如觀看影像等基本功能。
本文將說明如何將 VIGI 攝影機新增至 UniFi Protect,同時也會針對 UniFi Protect 所出現的 “Invalid credentials. Please check and try again.” 問題進行障礙排除。
設定
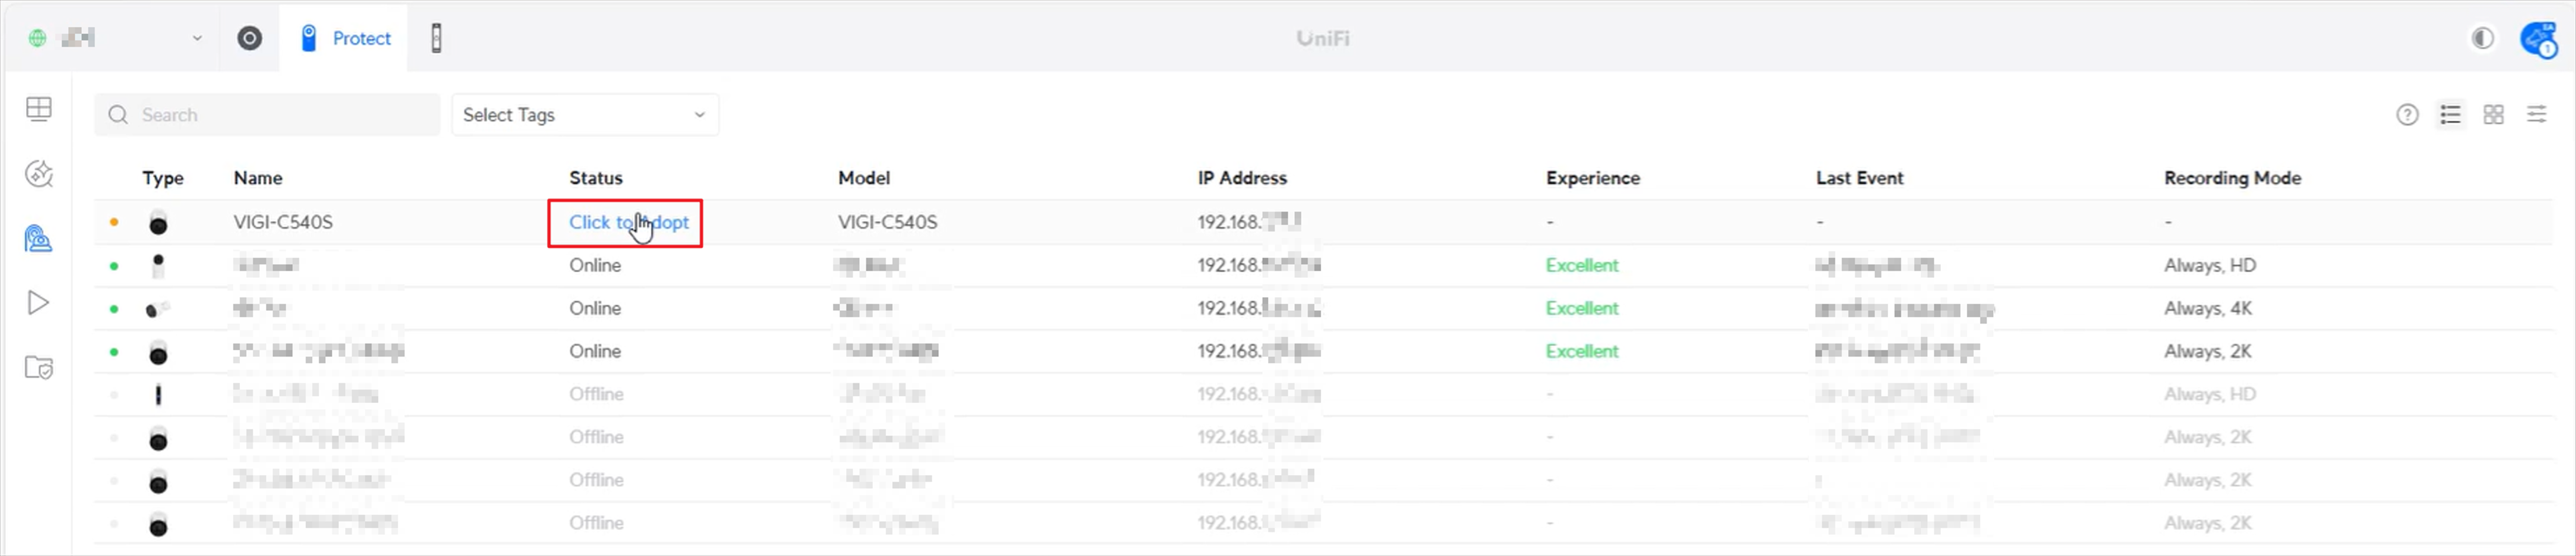
步驟1. 確認 VIGI 攝影機已連線,正確連線狀態會於UniFi Protect 中顯示為 "Click to adopt"。
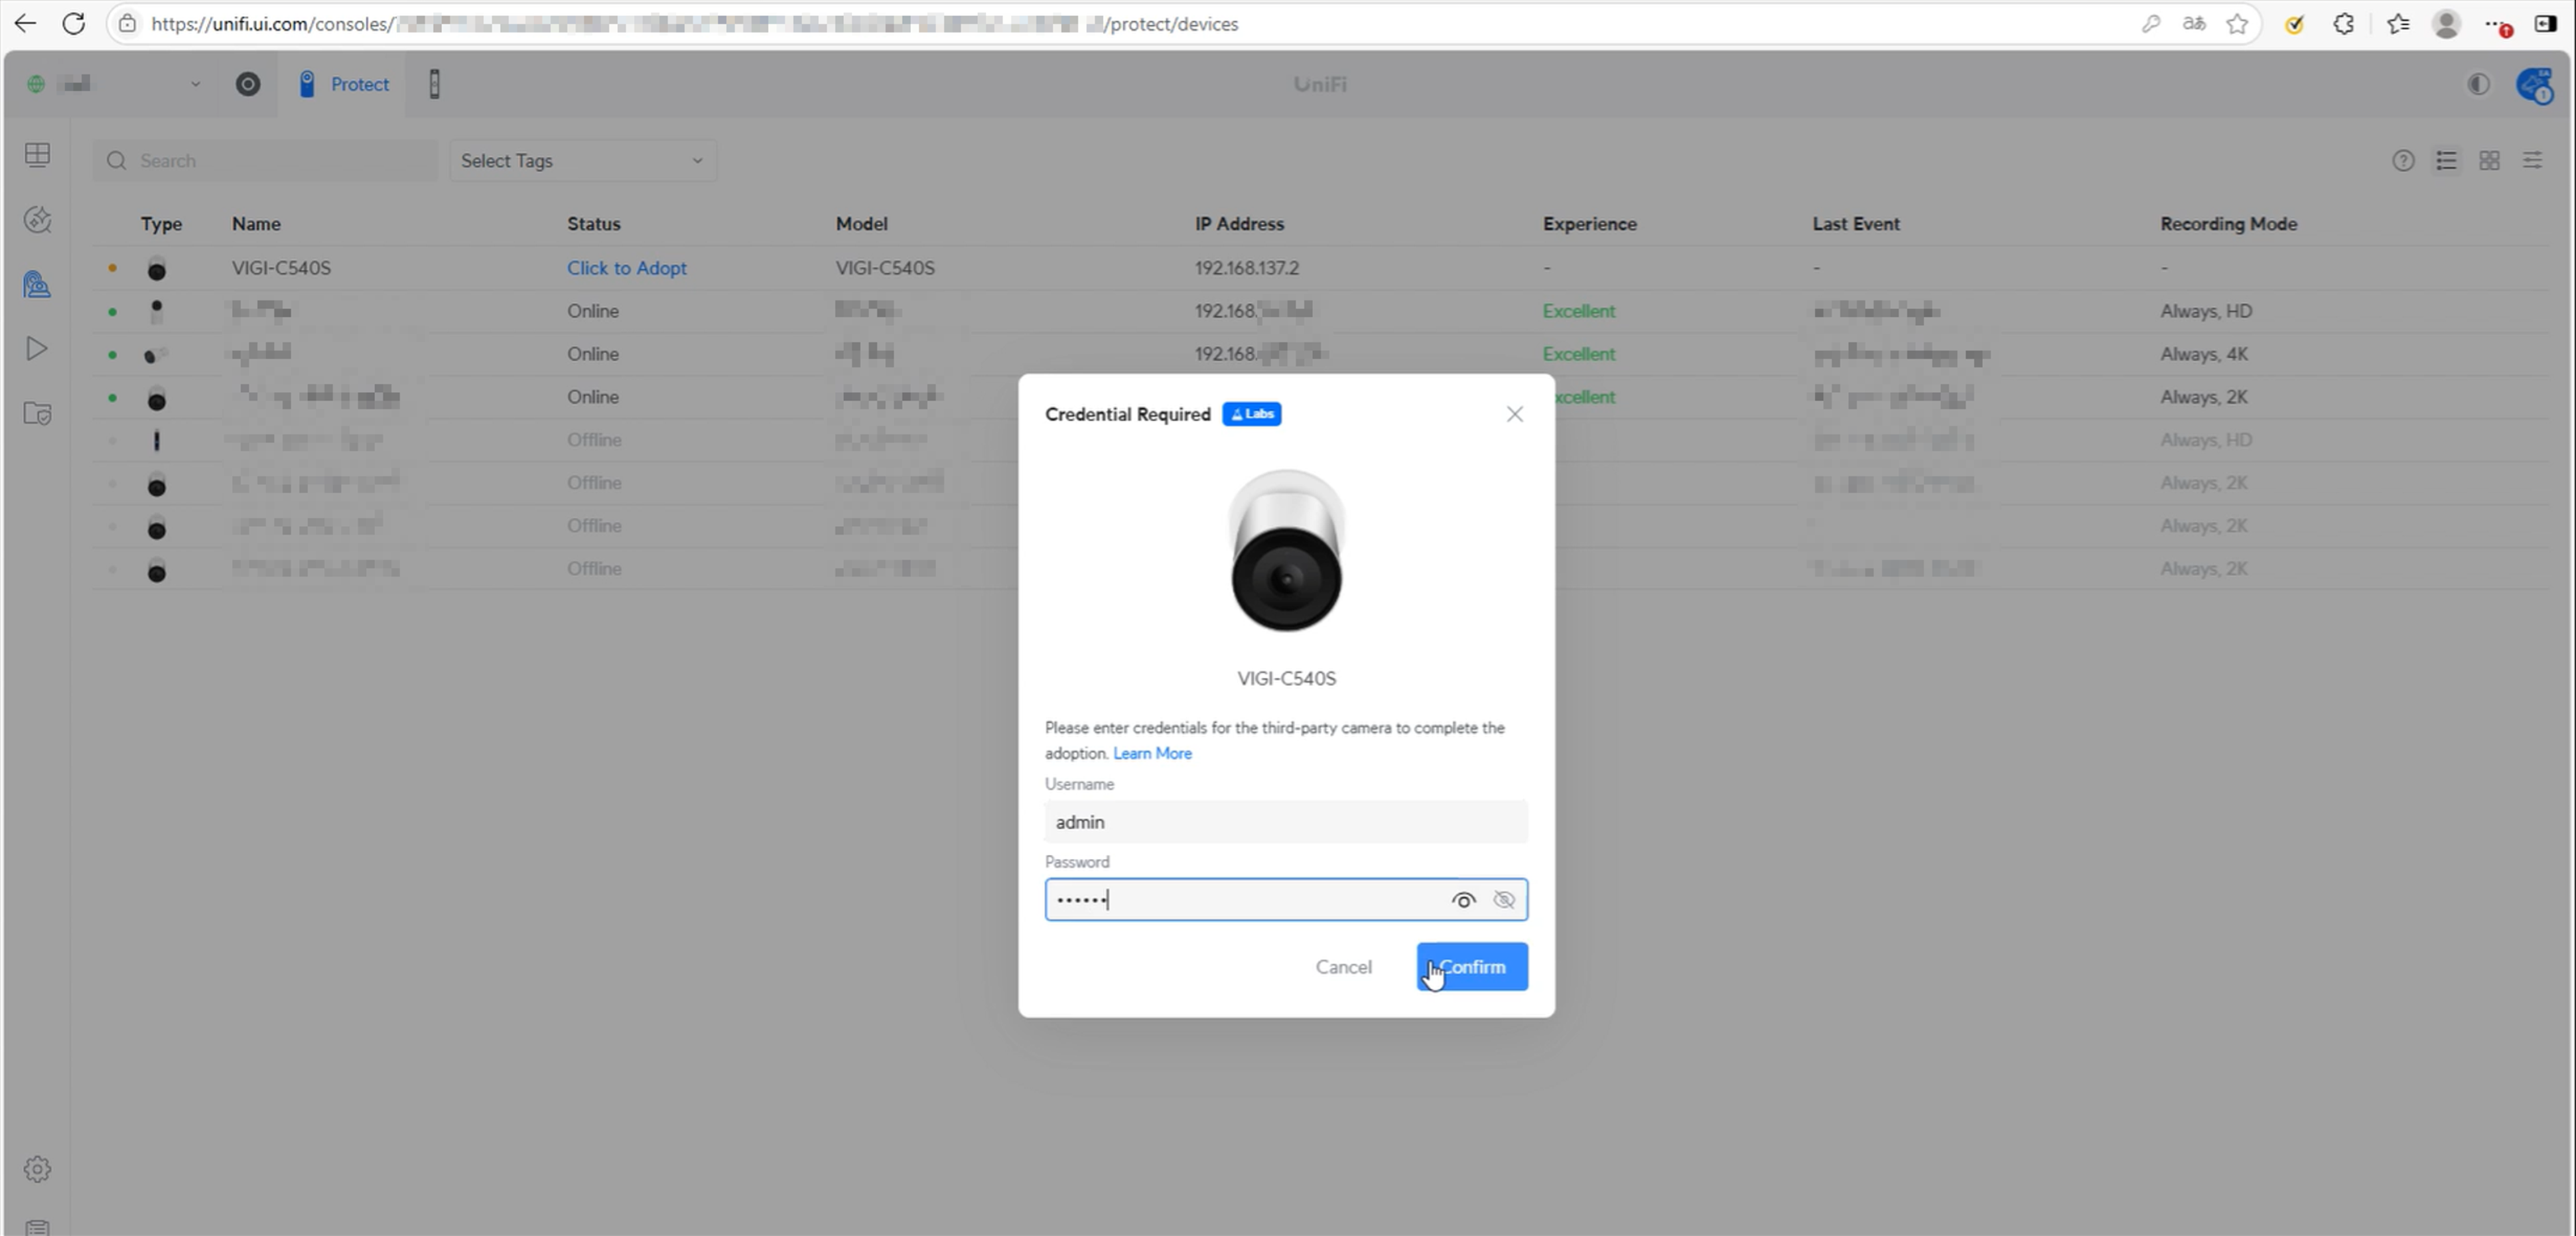
步驟 2.只需點擊您想新增的裝置,並輸入該 VIGI 攝影機的使用者名稱與密碼即可,接著點擊 Confirm。
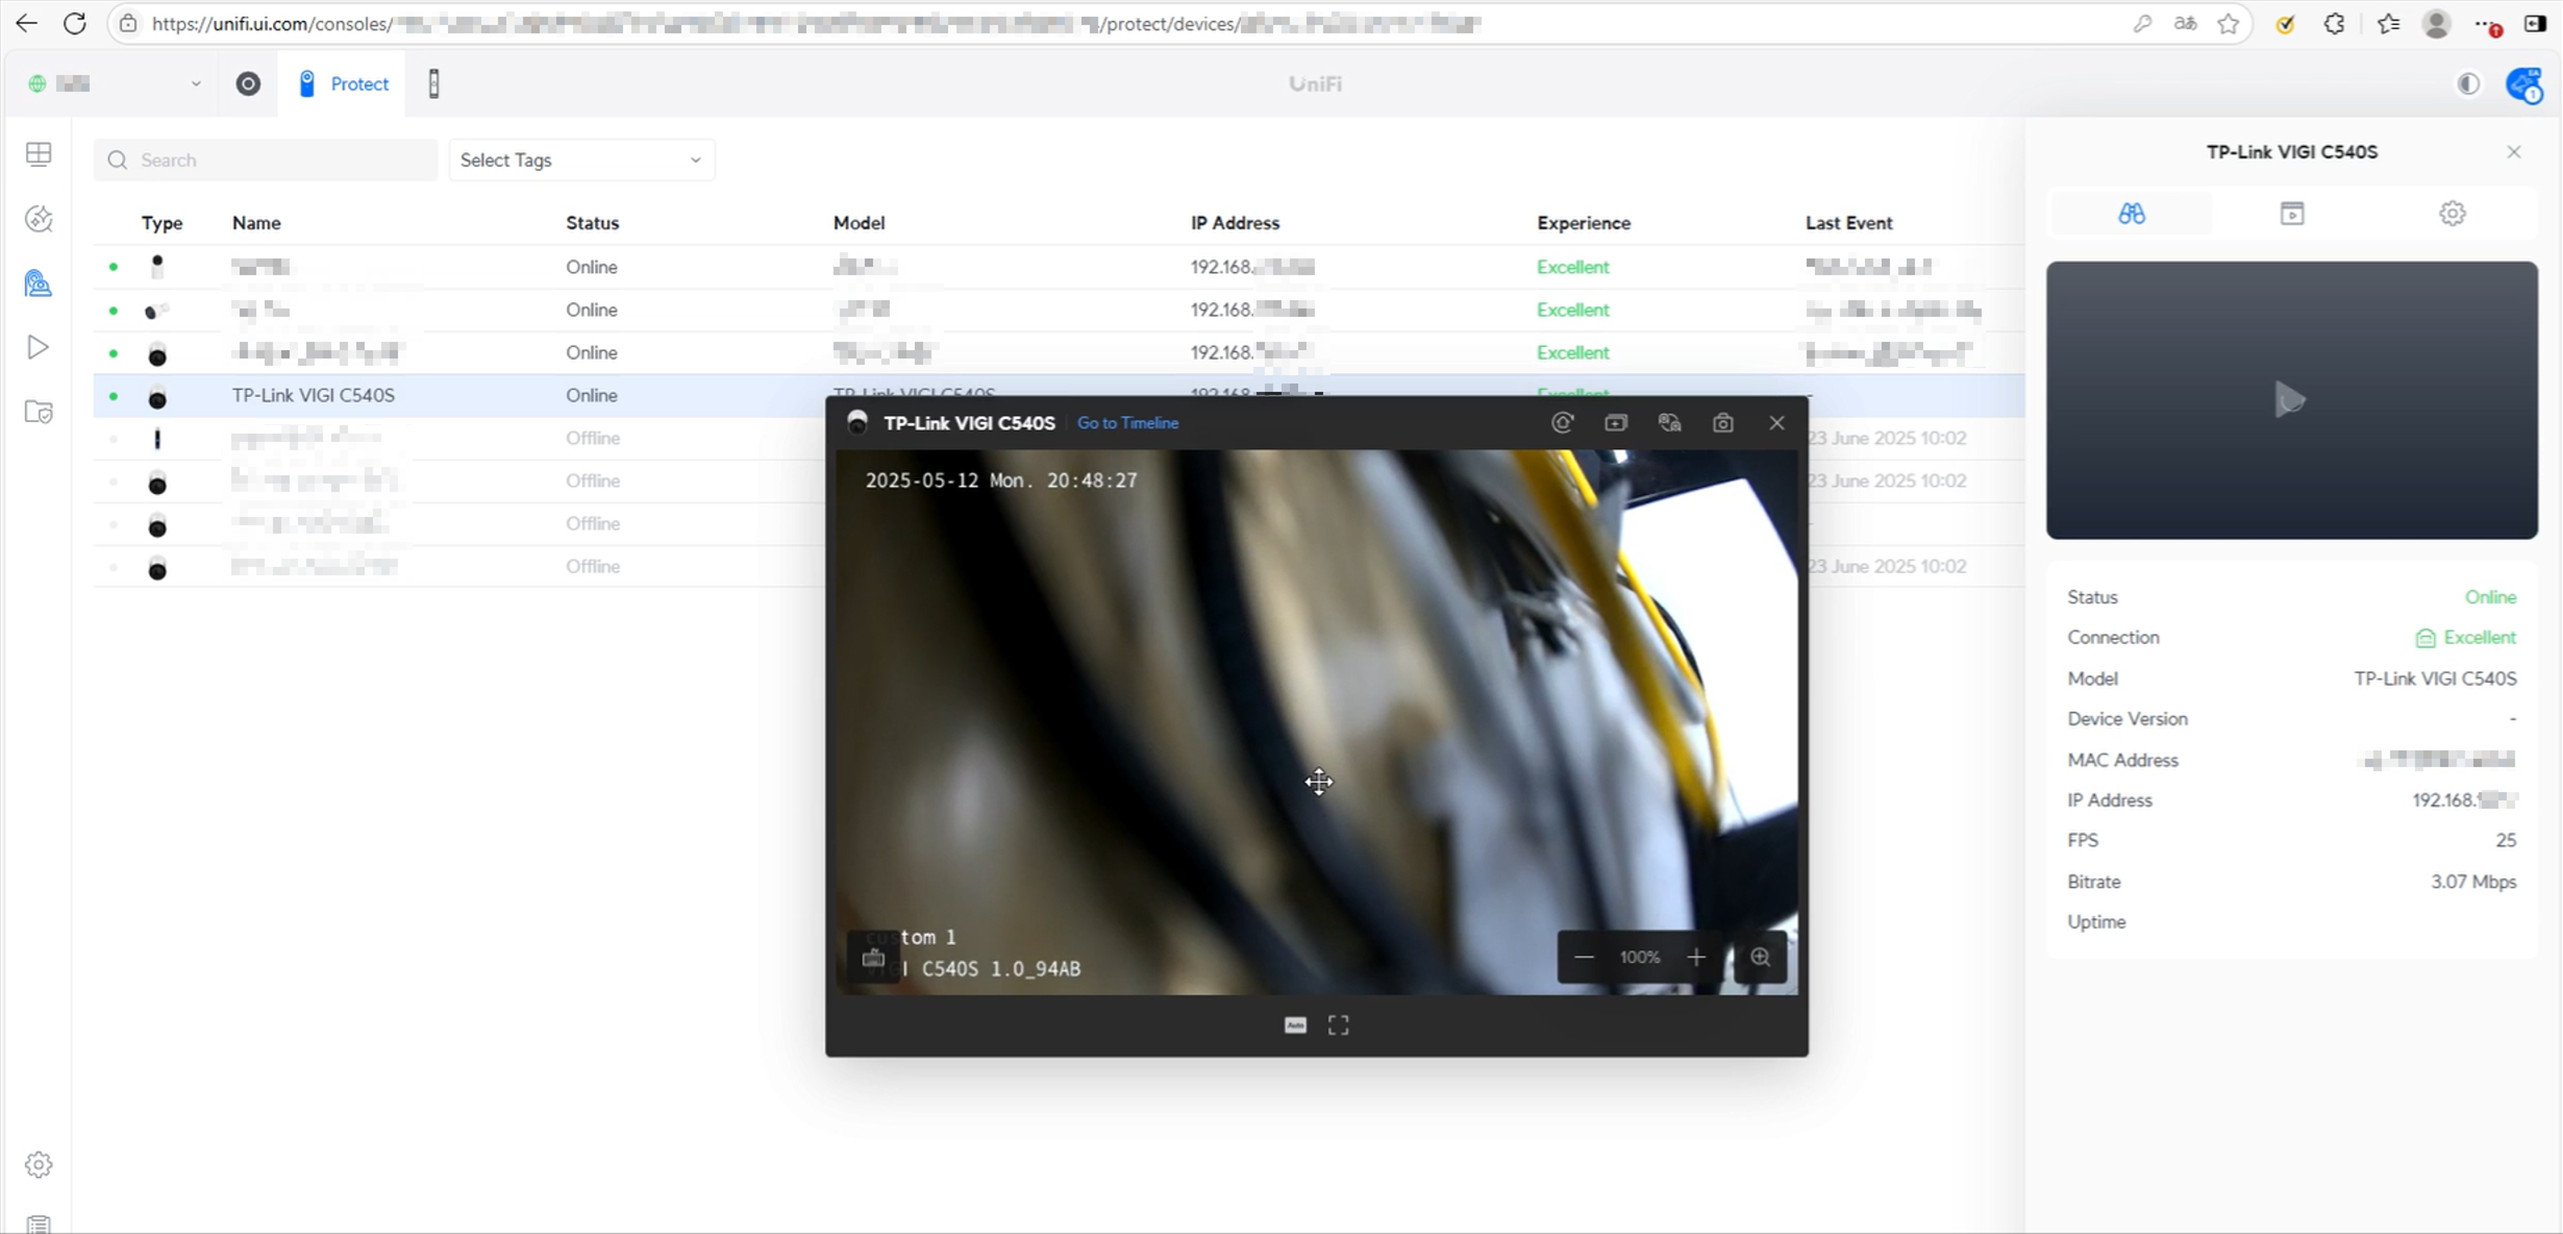
步驟 3. 當攝影機狀態為 Online,即可點擊該攝影機觀看影像。
QA
Q1: 收到錯誤訊息 “Invalid credentials. Please check and try again.”該如何處理?
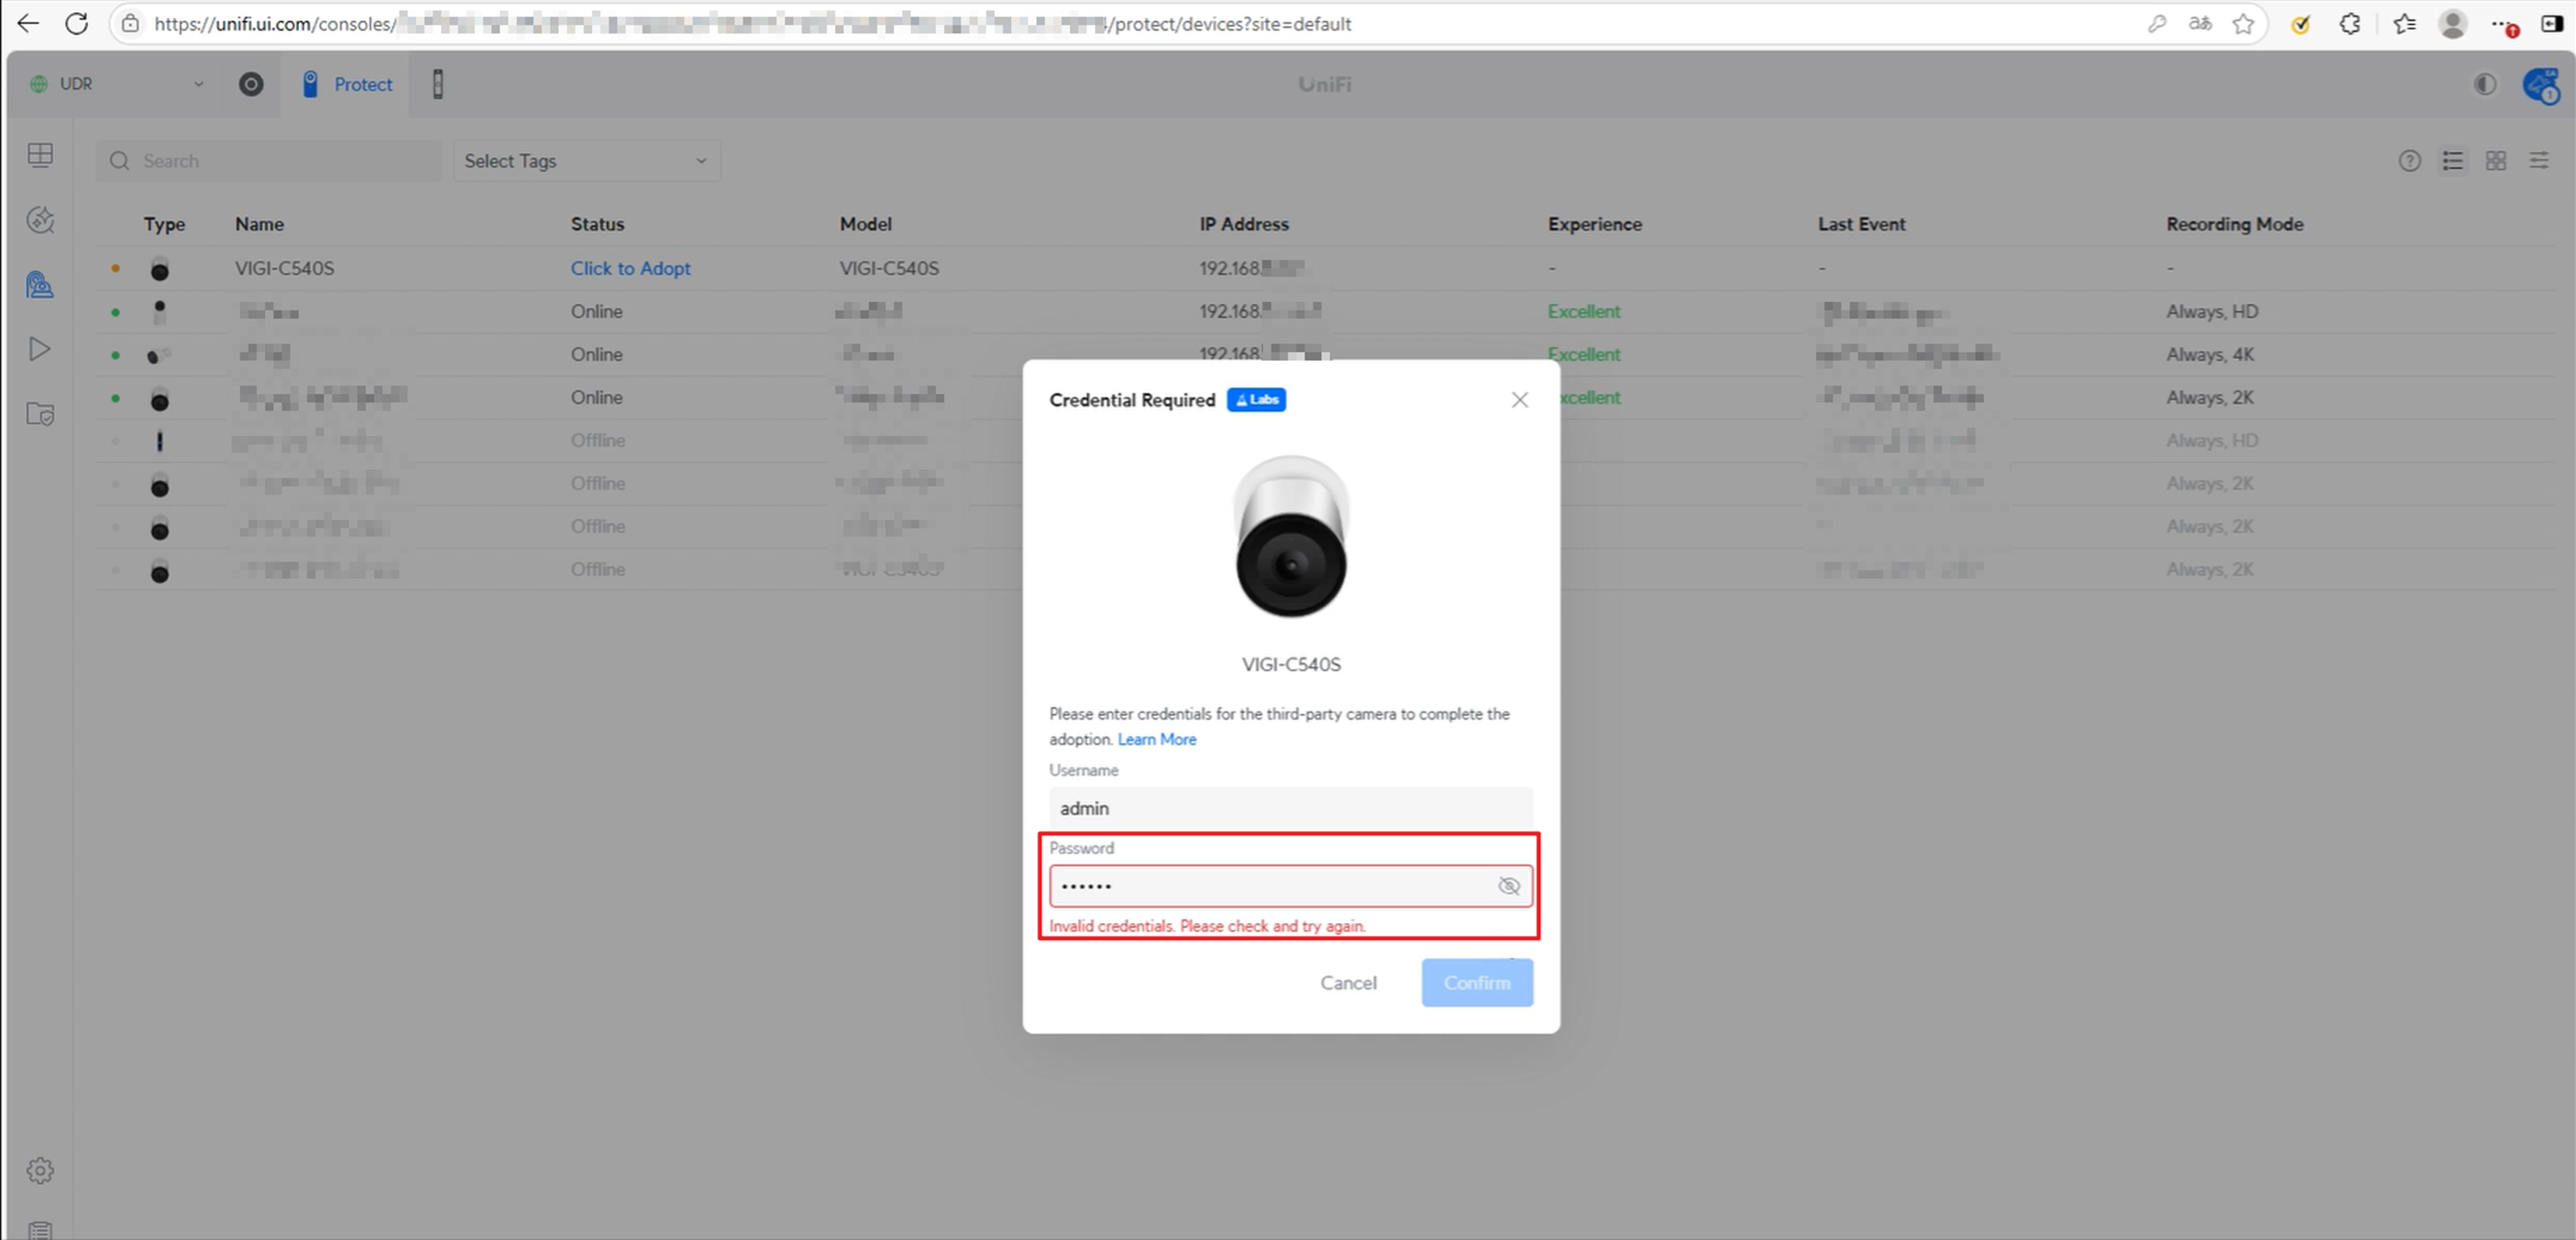
A1:
請重新啟動攝影機並重新整理 UniFi 網頁介面,接著立即使用正確的使用者名稱與密碼嘗試新增 IPC。
請避免輸入錯誤密碼或讓介面閒置過久,因為這可能會導致 UniFi 使用錯誤的憑證進行驗證,並有可能鎖住 IP。
這篇faq是否有用?
您的反饋將幫助我們改善網站