How to Change Wireless Settings using the tpPLC Utility (Blue UI via PC)
If you haven't download tpPLC Utility please refer to How to prepare for using the tpPLC Utility on Windows(Blue UI)?
Step 1: Connect to your Adapter via Ethernet or Wireless
Step 2: Launch the tpPLC Utility

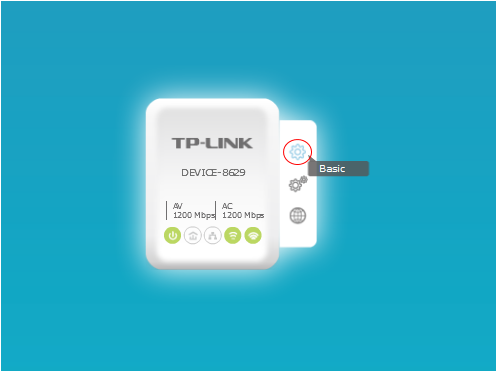
Step 3: move the cursor to the “right” edge of the adapter image to open the side menu. Then, click on Basic.

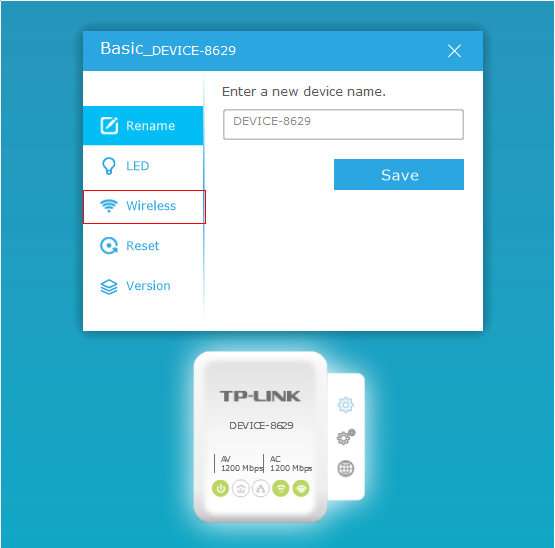
Step 4: Click on Wireless

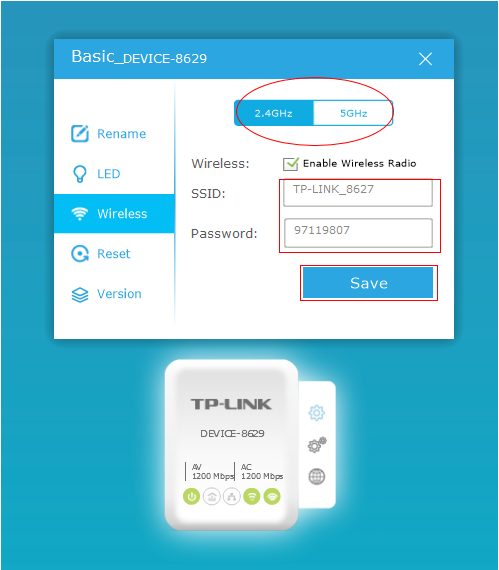
Step 5: Choose you’re “Band”, change the wireless name and password and click “Save”. Repeat step for 2nd Band if applicable.

IMPORTANT: If wireless section does not appear on the utility, please make sure your product is conneted to is wireless device, and please reconnect the product to your computer and open the utility again.
Is this faq useful?
Your feedback helps improve this site.
TP-Link Community
Still need help? Search for answers, ask questions, and get help from TP-Link experts and other users around the world.

2.0-R1-package_1551163834829i.jpg)