How do I configure the wireless settings on the Powerline Extender if there is no WPS button on my router?
This Article Applies to:
.jpg)
TP-Link wireless powerline adapters have build-in web manage page, we can login the management page to configure its wireless security.
Part 1: Access the Web management page
For Windows OS only
Step 1:
Connect your windows computer to the wireless powerline adapter’s Ethernet port or wireless. Run the CD came with Powerline adapter, select your model and click the Management Utility.
.jpg)
Step 2:
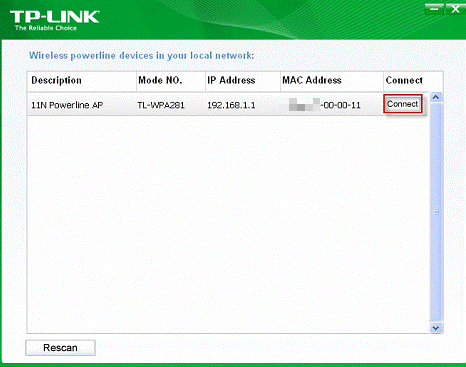
The Utility will scan the whole network and show you all wireless powerline adapter. Please find the adapter to be configured and click Connect to log in the Web-based management utility.

Note : I f another TL-WPA281 is displayed on the screen above and you cannot decide which model is the one you are configuring, please refer to the MAC address under MAC Address column. The device’s MAC address can be found on the label at the bottom of the device.
Step 3:
Enter admin for the Username and Password (both in lower case). Then click OK or press Enter.
.jpg)
For Mac OS only
Download the wireless powerline utility to your product model from the support page at http://www.tp-link.com, then go to Support section, Download Center.
For All Operating Systems without using the CD
Step 1:
Please only plug the wireless adapter to the power socket and connect you computer to the adapter.
Step 2:
Manually configure a static IP address for your connection, wired or wireless. The IP address should be 192.168.1.x(1<x<255).
If you don't know how to configure the IP address, please refer to the FAQ below.
Step 3:
Open the web browser and type http://192.168.1.1 in the address bar, press the Enter button. Please type admin/admin (username and password) in the coming pop out window.
Part 2: Configure the wireless security
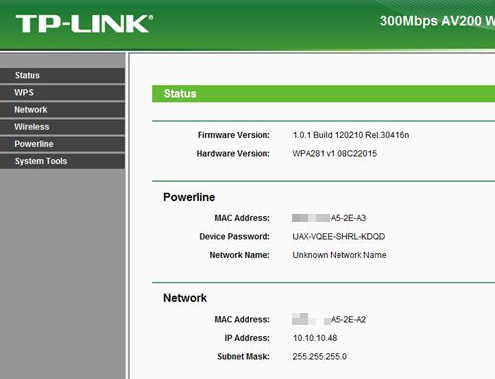
After a successful login, you can configure and manage the device. There are six main menus on the leftmost column of the Web-based management page: Status, WPS, Network, Wireless, Powerline and System Tools.
Submenus will be available after clicking one of the main menus. On the right of the Web-based management page lays the detailed explanations and instructions for the corresponding page.

Step 1:
Select Wireless->Wireless Settings on the left side menu to open the wireless settings page.
.jpg)
You can configure a new network name (SSID) for WPA281’s wireless network. It could be the same as your existing wireless network name as well. You don’t need to change other settings in normal case. At last, please click the Save button.
Step 2:
Select Wireless-> Wireless Security on the left side menu to open the wireless security page. Here, WPA-PSK/WPA2-PSK is recommended. PSK Password is the key of your wireless network, You can make up one by yourself and it could be the same password as your existing wireless network's password as well. Please remember it. At last, please click the Save button.
.jpg)
Step 3:
Select Systems Tools ->Reboot on the left side menu.Click Reboot button to make all the settings take effect.
.jpg)
Until now, you have finished all the settings successfully.
Get to know more details of each function and configuration please go to Download Center to download the manual of your product.
Is this faq useful?
Your feedback helps improve this site.
TP-Link Community
Still need help? Search for answers, ask questions, and get help from TP-Link experts and other users around the world.

2.0-R1-package_1551163834829i.jpg)
2.0_1508142049083d.jpg)